Set Notice Online, Travel and Transact
Cardholder sets a travel notice through mobile banking app or online banking, travels to reported destination, and confidently makes a purchase transaction.
Wherever your cardholders go in the world, Visa wants payment transactions to be as convenient, secure, and smart as possible. Visa’s Travel Notification Service provides a digital solution for cardholders to report travel itineraries prior to or during travel. After a cardholder reports travel plans online or through a mobile banking app, Visa will store the cardholder’s travel details for future matching. When the cardholder transacts in the planned location and time frame, Visa provides a travel tag in real-time within the authorization message. Issuers can use this information to have more confidence in authorization decisions, helping reduce the likelihood of false declines for cardholders.
Available for use by
Regional Availability
Global except Europe
 play_circle_outline
Give your customers greater convenience when they travel
Travel Notification Service (TNS) can be integrated within a mobile banking app or online banking portal to allow cardholders to self-report their travel plans. Cardholders can report an unlimited number of countries in their travel itinerary. TNS incorporates the cardholders’ reported travel itinerary in the authorization message to help issuers approve transactions with more confidence.
Refer to Visa Travel Notification Service Docs for more details.
International Travel Scenario
Samantha lives in San Francisco, and will be traveling to New Zealand and Australia soon for vacation. Samantha wants to notify her issuer of her travel plans to help ensure she is not falsely declined when making purchase transactions abroad. She logs into her issuer’s mobile banking app and navigates to the travel notice section. Samantha selects the cards she plans to use on her trip, inputs the dates and destinations of her travel, and submits the itinerary details to her issuer. Samantha’s issuer shares the travel details with Visa so the travel itinerary can be stored for reference while she is in New Zealand and Australia.
Samantha lands in New Zealand on the first day of her trip and uses one of her Visa cards to make a purchase. Visa receives the authorization request from the merchant, matches the location of the merchant to one of the destinations on her stored itinerary, and sends the issuer a confirmation match in the authorization message in real-time. Her issuer sees that this purchase is outside of Samantha’s typical location, but uses this travel information in real-time to have more confidence authorizing the purchase.
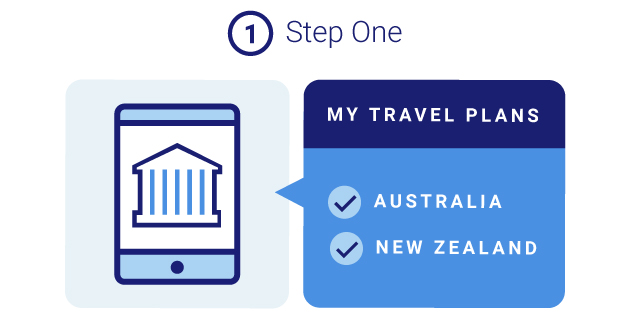
Input travel plans into mobile banking app
Samantha adds her travel plans in her mobile banking app.

Travel and make purchase
Samantha travels to Australia and New Zealand and makes a purchase.
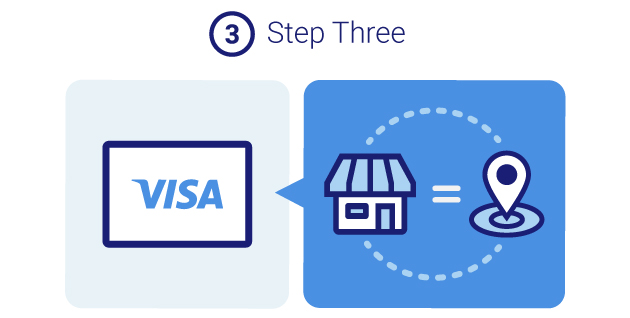
Visa matches the merchant location
Visa matches the merchant location with Samantha’s reported travel plans and sends the match flag in the authorization message.

Issuer confidently approves the transaction
Samantha's issuer receives the purchase authorization request and is able to more confidently approve the transaction.
Key Benefits
Fewer False Declines
Confirmation that cardholders are transacting at their reported travel destinations helps you authorize transactions more confidently and keep your traveling cardholders happy.
Reduce Cost
TNS can help reduce the need for cardholders to contact your call center by incorporating the travel reporting functionality within the app or website directly.
APIs Used
Visa Travel Notification API
Visa Travel Notification Service includes one API with two resources. The first resource allows you to add, update, and delete travel itineraries. The second resource allows you to retrieve details of travel itineraries you previously submitted to Visa. The following sections provide descriptions of the Add, Update, Delete, and Retrieve operations.