Access Keys
To test in the sandbox using basic authentication, sign in to the Control Center and create access keys. You will use these keys to call the Visa Pay API. Follow these steps:
1. In the Control Center, set up Access Keys in the Users & permissions drop-down menu.
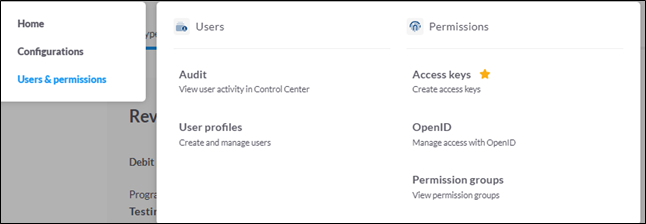
2. Click Create Key in the top-right corner to make a new key.
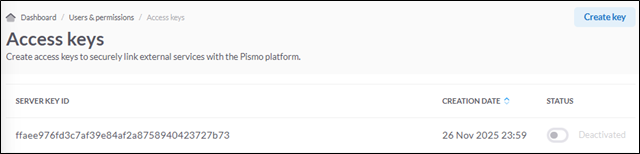
After you create and safely store your Server Key and Server Secret, use them to request an Access Token. You will need this token to call the Visa Pay API.
This API generates the Bearer Token that you will use in all API requests to PISMO.
| Field | Value |
|---|---|
| API URL | https://api.bra01.sandbox.visapay.visa.com/passport/v2/s2s/access-token |
| Requestor | Wallet |
| Receiver | Visa Pay |
1- To create a new account, server_key and server_secret are required.
2- Pass these 2 parameters in the request body for the API.
3- In the API response, the field token returned indicates the Bearer Token for Authorization.
Request Sample:
{
  "server_key": "XXXXXXXXXXXXXd32c5j5j6",
  "server_secret": "XXXXXXXXB9jgjgh"
}
Response Sample:
{
  "server_key": "XXXXXXXX32cXXX494",
  "tenant": "XXXXXXXXX-c76ddXXX8b",
  "program_ids": [],
  "roles": [
    "account-server",
    "onboarding-server"
  ],
  "token": "eyJhbGciOiJIUzUxMiIsImtpZCI6ImFlMWU1YzUwNDBlMDE2NWM5ZmQ5ZGQxYzRmMjQyYzAzZjRkNTE1NTQifQ.eyJpc3MiOiJQYXNzcG9ydCIsInN1YiI6IkFVVEgtZGFhY2M0MGUtNGNmOC00YjhjLWIyYzktZDhlMWFmMzFjNWIzIiwiZXhwIjoxNzQzMDg2ODAxLCJpYXQiOjE3NDMwODYyMDEsImFpZCI6IjE5MjA0MDQwNiIsInVpZCI6IlROLWRlZTJhMTE3LWQxYWUtNDc5OS1iYmFhLWM3NmRkYjQwZWE4YjozNGU0NDY2ZmJlYTExNmRjMjVmYzI3MGJlYTlkMzJjOTAzZWNhNDk0IiwiYWNjb3VudC1pZCI6IjE5MjA0MDQwNiIsInRrdmVyIjoiMiIsInRlbmFudF9pZCI6IlROLWRlZTJhMTE3LWQxYWUtNDc5OS1iYmFhLWM3NmRkYjQwZWE4YiIsInRlbmFudCI6IlROLWRlZTJhMTE3LWQxYWUtNDc5OS1iYmFhLWM3NmRkYjQwZWE4YiIsInRva2VuX3R5cGUiOiJjbGllbnRfY3JlZGVudGlhbHMiLCJyb2xlcyI6WyJhY2NvdW50LXNlcnZlciIsIm9uYm9hcmRpbmctc2VydmVyIl19.x8po4C3FI4bifJgsR2KeP7veUR0efnpoqdW-nwJO_W5onEONRbtejfeId8o60lBdNBTsKLoYUr-UkvpKF-nEjQ",
  "refresh": "eyJhbGciOiJIUzUxMiIsImtpZCI6ImFlMWU1YzUwNDBlMDE2NWM5ZmQ5ZGQxYzRmMjQyYzAzZjRkNTE1NTQifQ.eyJpc3MiOiJQYXNzcG9ydCIsInN1YiI6IkFVVEgtZGFhY2M0MGUtNGNmOC00YjhjLWIyYzktZDhlMWFmMzFjNWIzIiwiZXhwIjoxNzQzMDg2ODAxLCJpYXQiOjE3NDMwODYyMDEsImFpZCI6IjE5MjA0MDQwNiIsInVpZCI6IlROLWRlZTJhMTE3LWQxYWUtNDc5OS1iYmFhLWM3NmRkYjQwZWE4YjozNGU0NDY2ZmJlYTExNmRjMjVmYzI3MGJlYTlkMzJjOTAzZWNhNDk0IiwiYWNjb3VudC1pZCI6IjE5MjA0MDQwNiIsInRrdmVyIjoiMiIsInRlbmFudF9pZCI6IlROLWRlZTJhMTE3LWQxYWUtNDc5OS1iYmFhLWM3NmRkYjQwZWE4YiIsInRlbmFudCI6IlROLWRlZTJhMTE3LWQxYWUtNDc5OS1iYmFhLWM3NmRkYjQwZWE4YiIsInRva2VuX3R5cGUiOiJjbGllbnRfY3JlZGVudGlhbHMiLCJyb2xlcyI6WyJhY2NvdW50LXNlcnZlciIsIm9uYm9hcmRpbmctc2VydmVyIl19.x8po4C3FI4bifJgsR2KeP7veUR0efnpoqdW-nwJO_W5onEONRbtejfeId8o60lBdNBTsKLoYUr-UkvpKF-nEjQ"
}
The access token has a set lifetime (usually 10 minutes). There is an exp field in the JWT that shows when it expires in Unix Epoch time. After the access token expires, the Pismo platform will reject more requests.If you make a request using an expired token, the request returns Unauthorized. . Your code should check for this message and request a new access token when it appears.
You must include the Bearer Token in the Header along with the request body before making calls to the Visa Pay API.
| Authentication Method | Bearer Token in Header |
Pismo gives each Visa Pay client their own tenant to help with issuer processing. Each Pismo tenant connects to Visa to process transactions and get settlement reports (if needed) for the Visa Pay client. Pismo manages wallet enrollment, credential lifecycle management, and can serve as a Token Requestor for Visa Pay.
A Pismo tenant will be set up within one of Pismo's multi-tenant instances, based on data location requirements.
Visa Pay clients must verify the transaction authorization payload before processing, as explained in Verifying webhook requests.
Pismo streams only required events to Visa Pay clients by using a default event filter. Clients must use Pismo events to handle error scenarios related to transaction authorization from the wallet, such as timeouts.
Clients who are not integrated with cloud infrastructure may choose to have an SFTP set up for getting reports – please talk with your Visa representative to request.
 Start a Project