Updated to reflect the new onboarding experience available as of September 2025.
Onboarding Dashboard
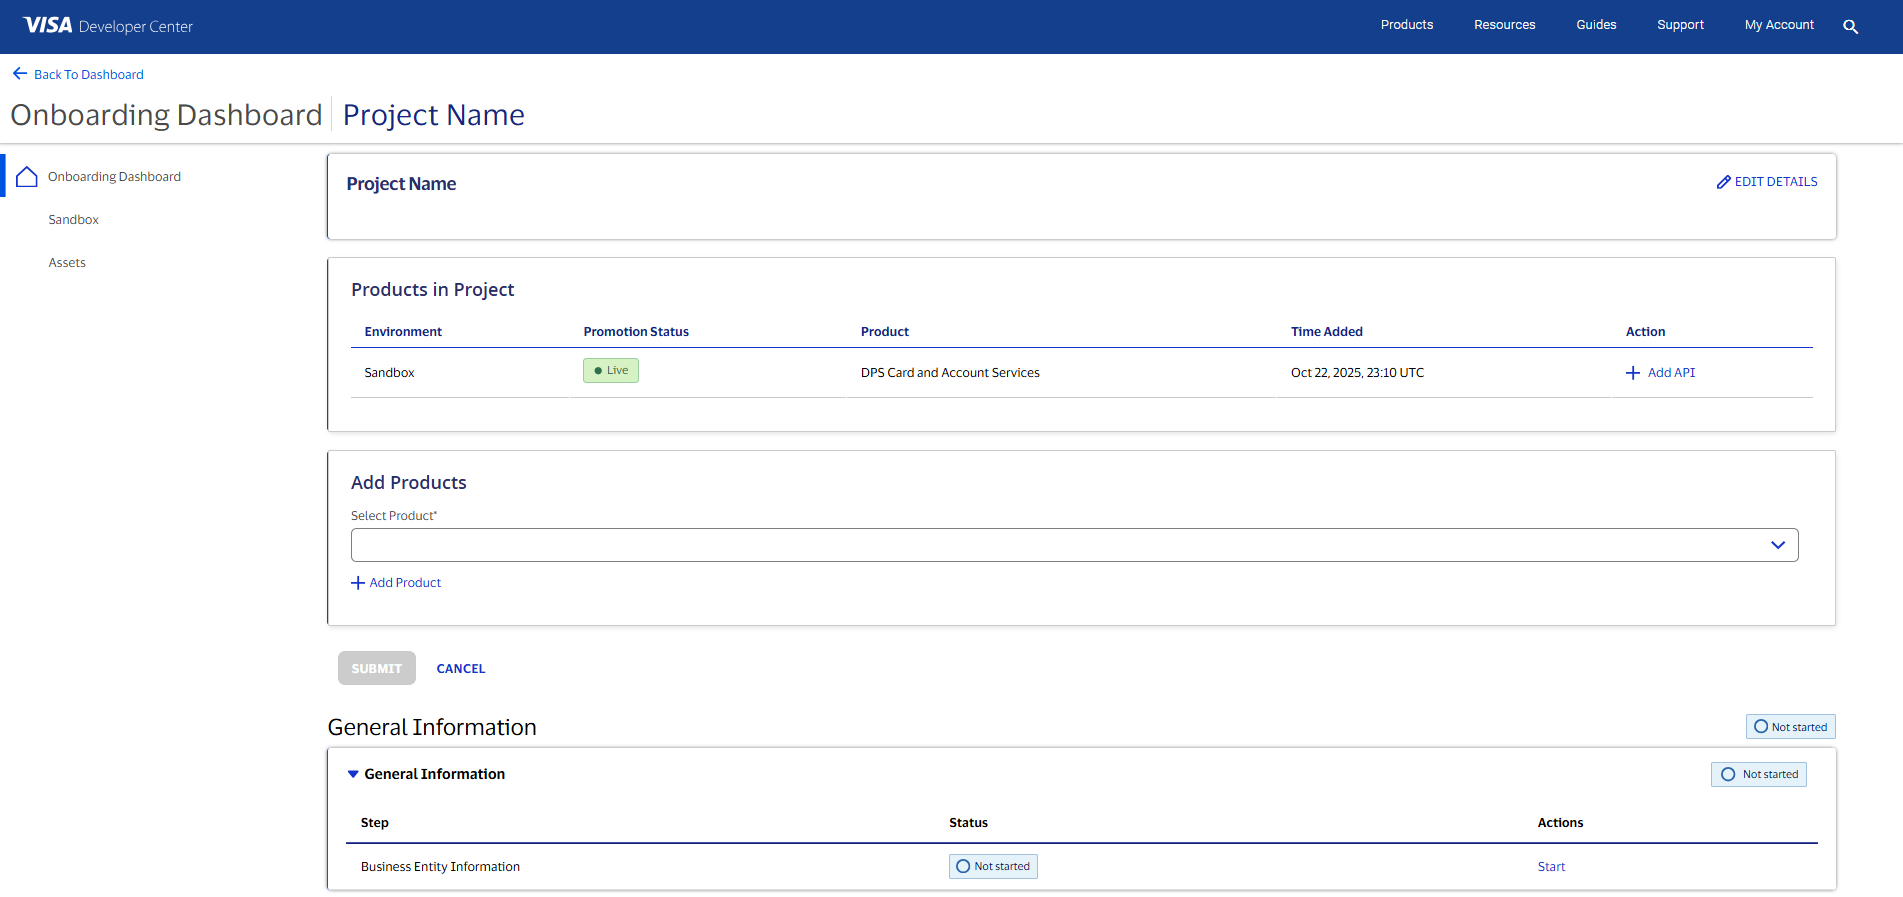
The "Onboarding Dashboard" in your project walks you through the processes required to promote the project to the production environment.
Figure 1. Onboarding Dashboard
Business Entity Information
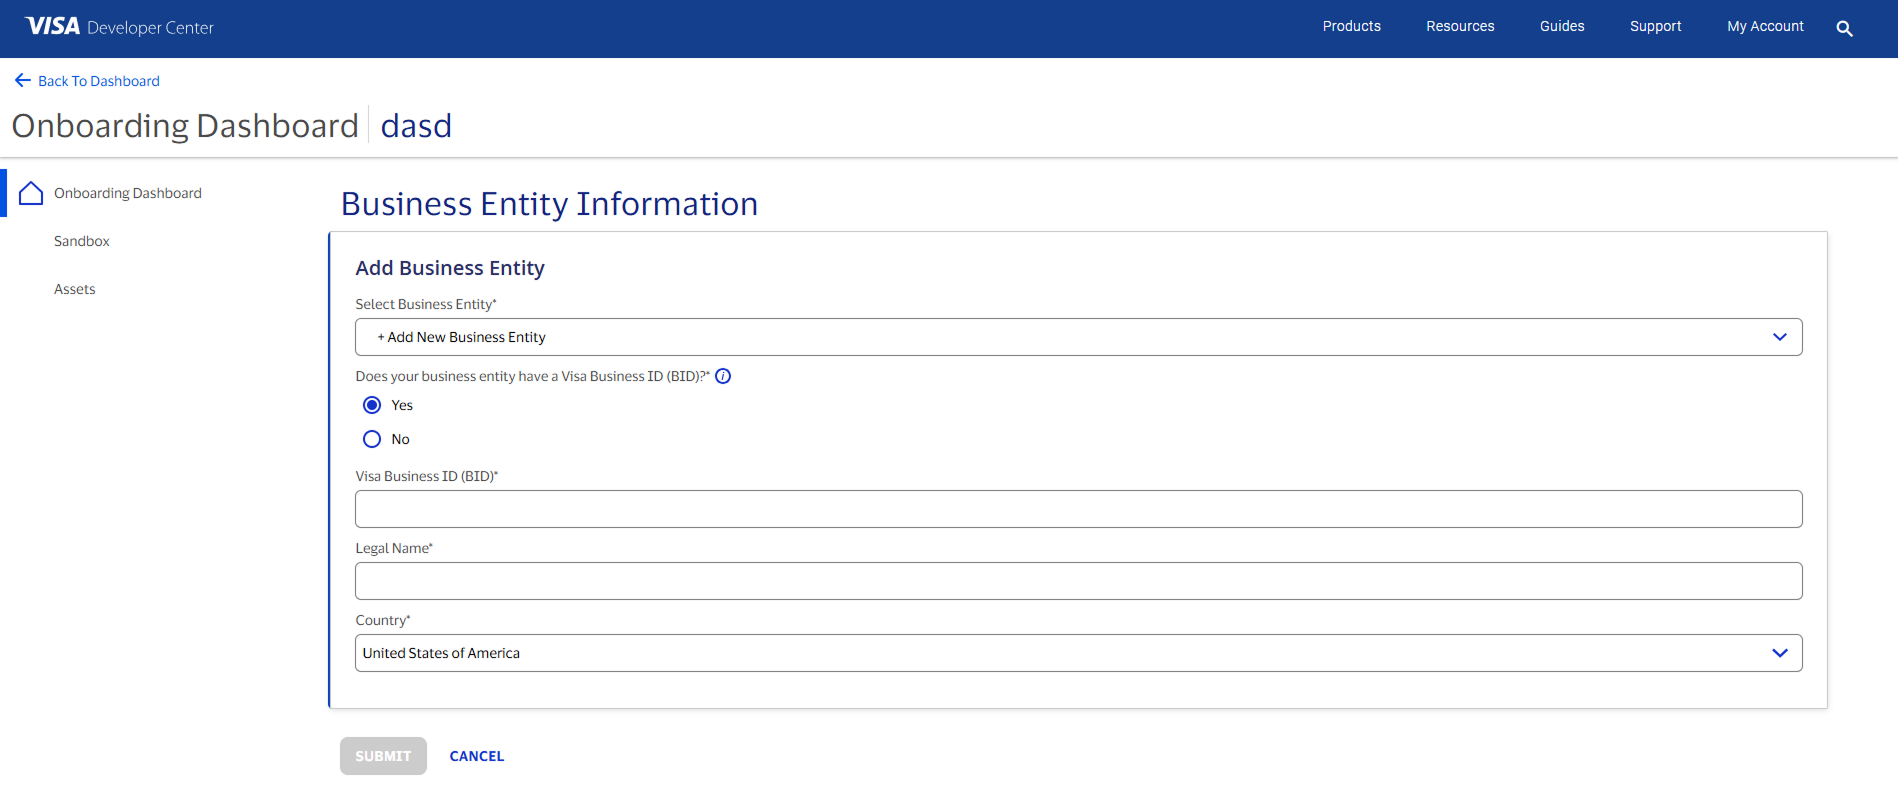
In this form, provide information about the business entity the project is built for.
Figure 2.1 Business Entity Information form on the Onboarding Dashboard

Figure 2.2 Business Entity Information form
Business Entity Contact
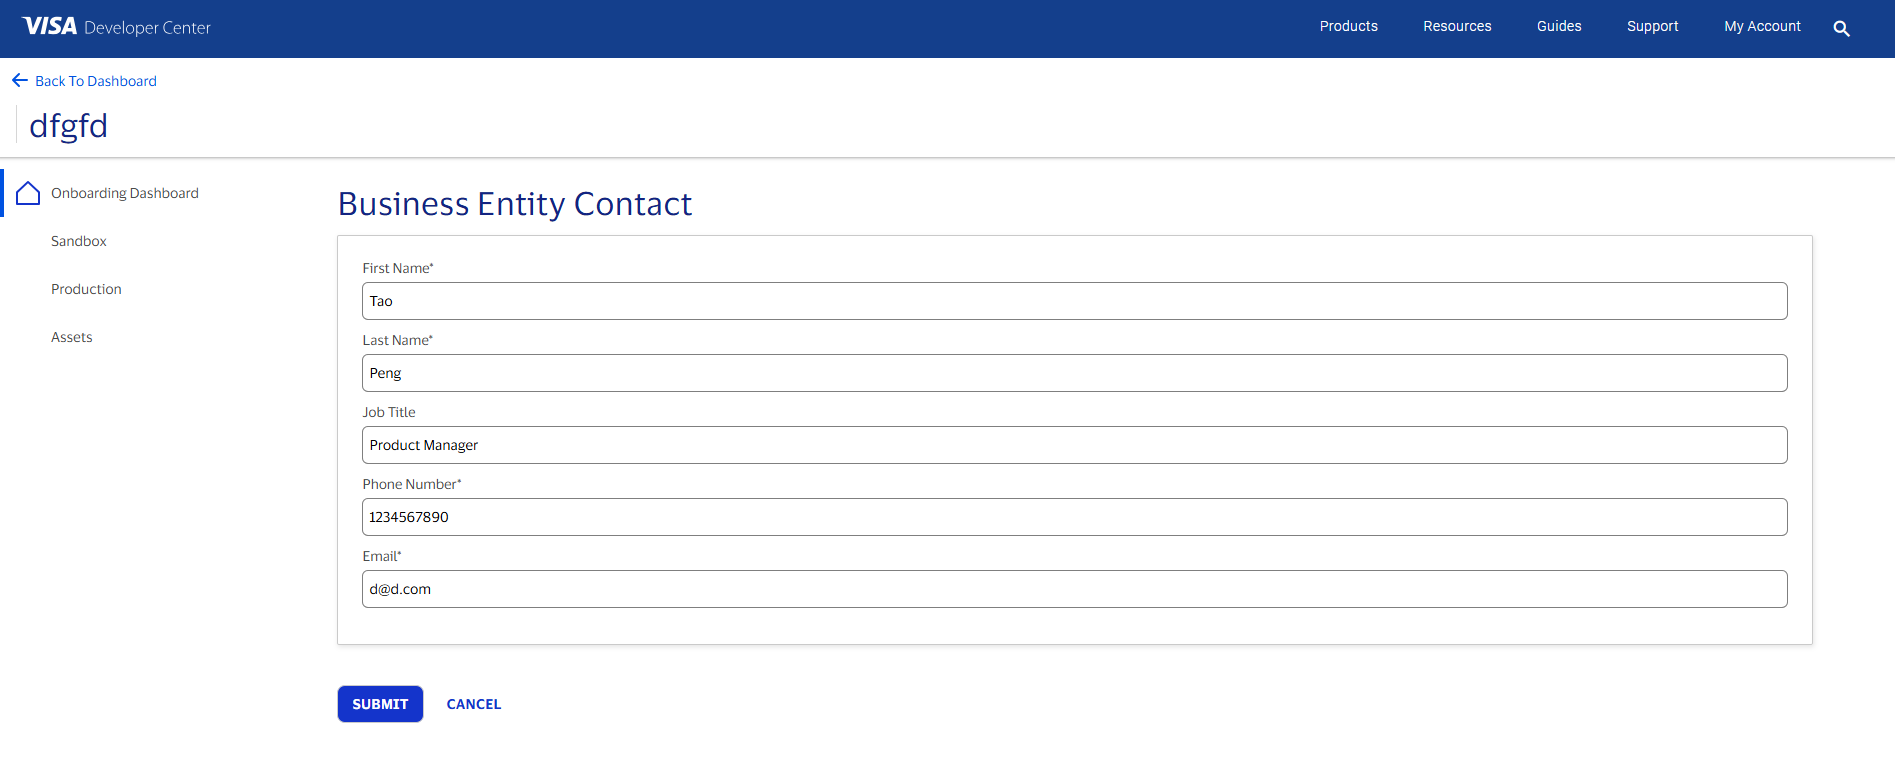
In this form, provide the contact for the business entity the project is built for. The contact will be notified when significant actions are required regarding the business entity or its projects.
Figure 3.1 Business Entity Contact form on the Onboarding Dashboard

Figure 3.2 Business Entity Contact form
Project Information
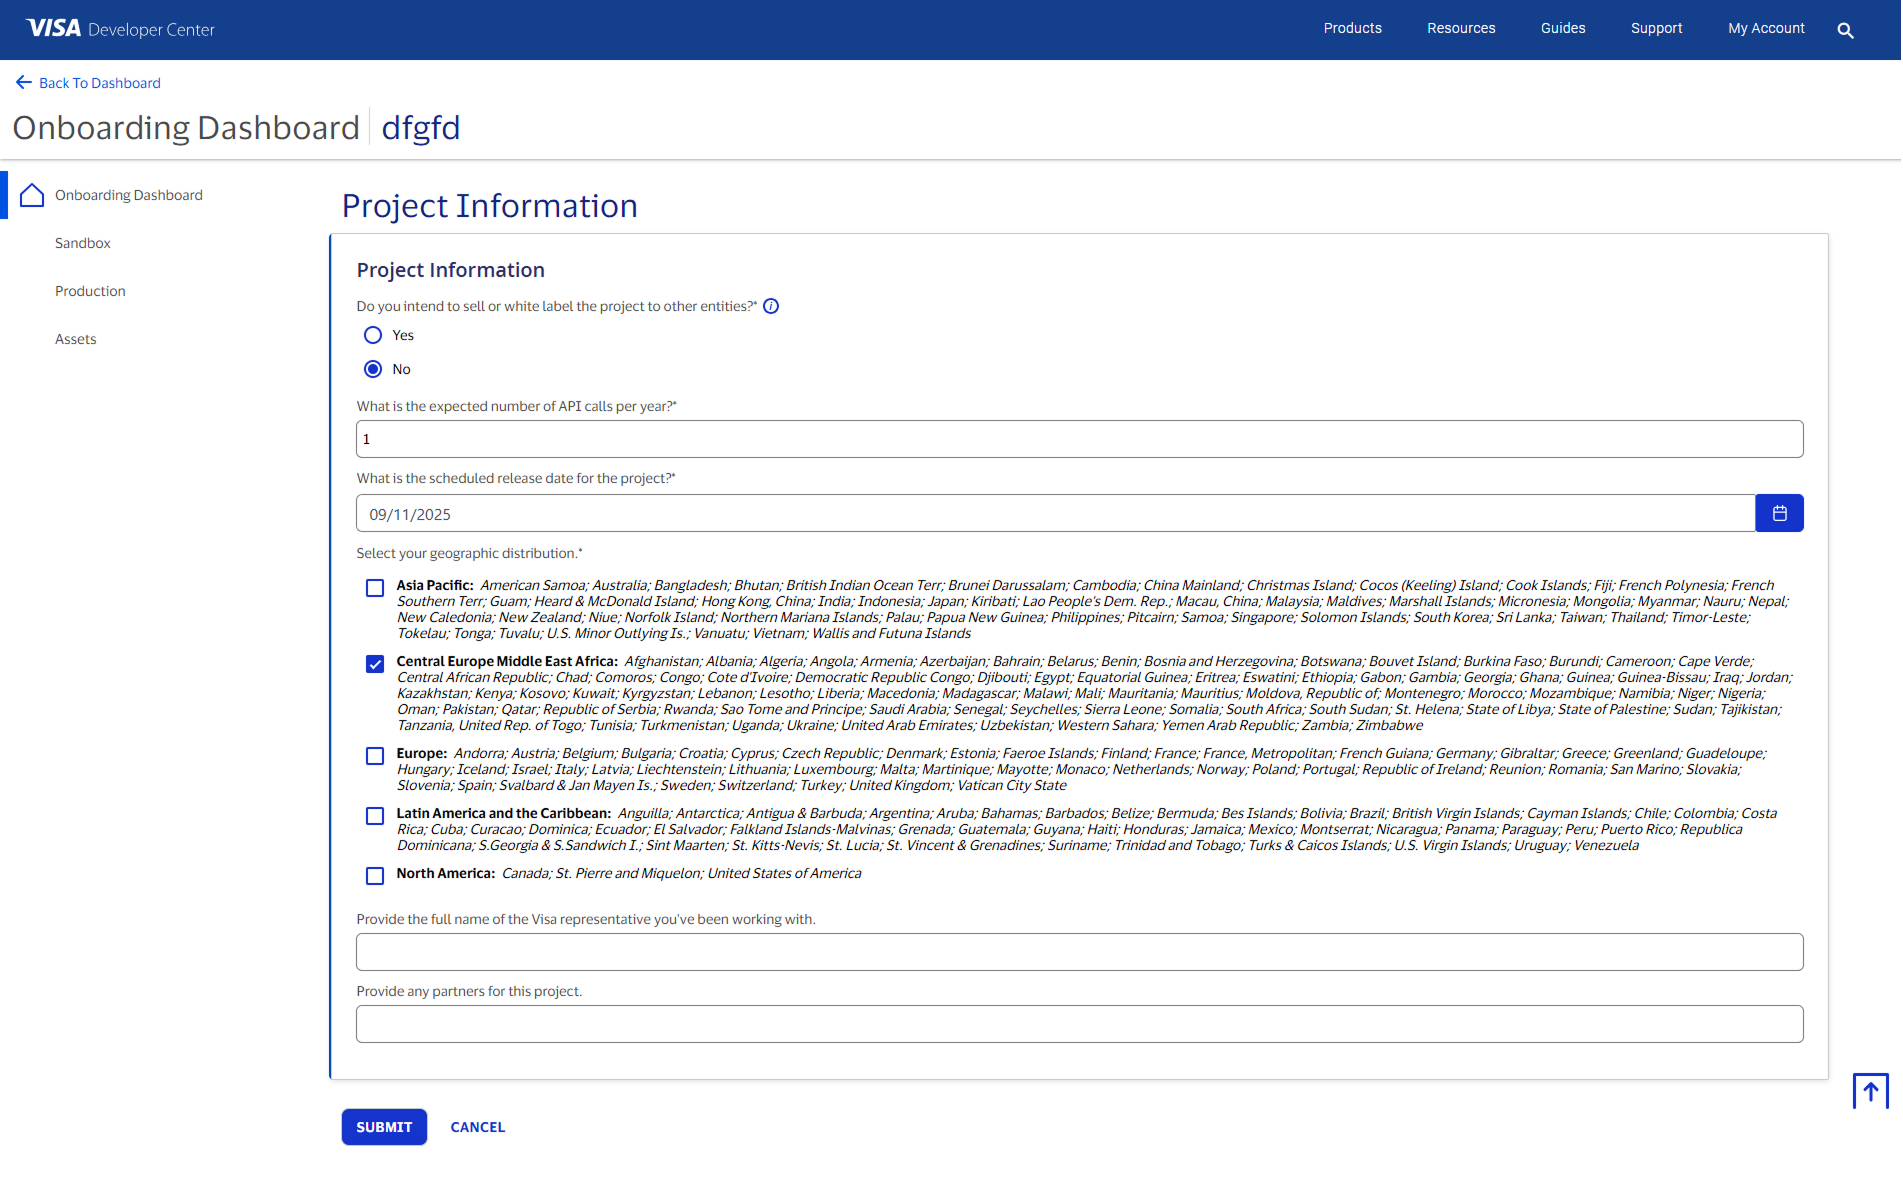
In this form, provide details about how the Visa Developer products will be used. Visa will evaluate whether the products are suitable for your use case based on the provided information.
Figure 4.1 Project Information form on the Onboarding Dashboard

Figure 4.2 Project Information form
Request to Start Next Environment
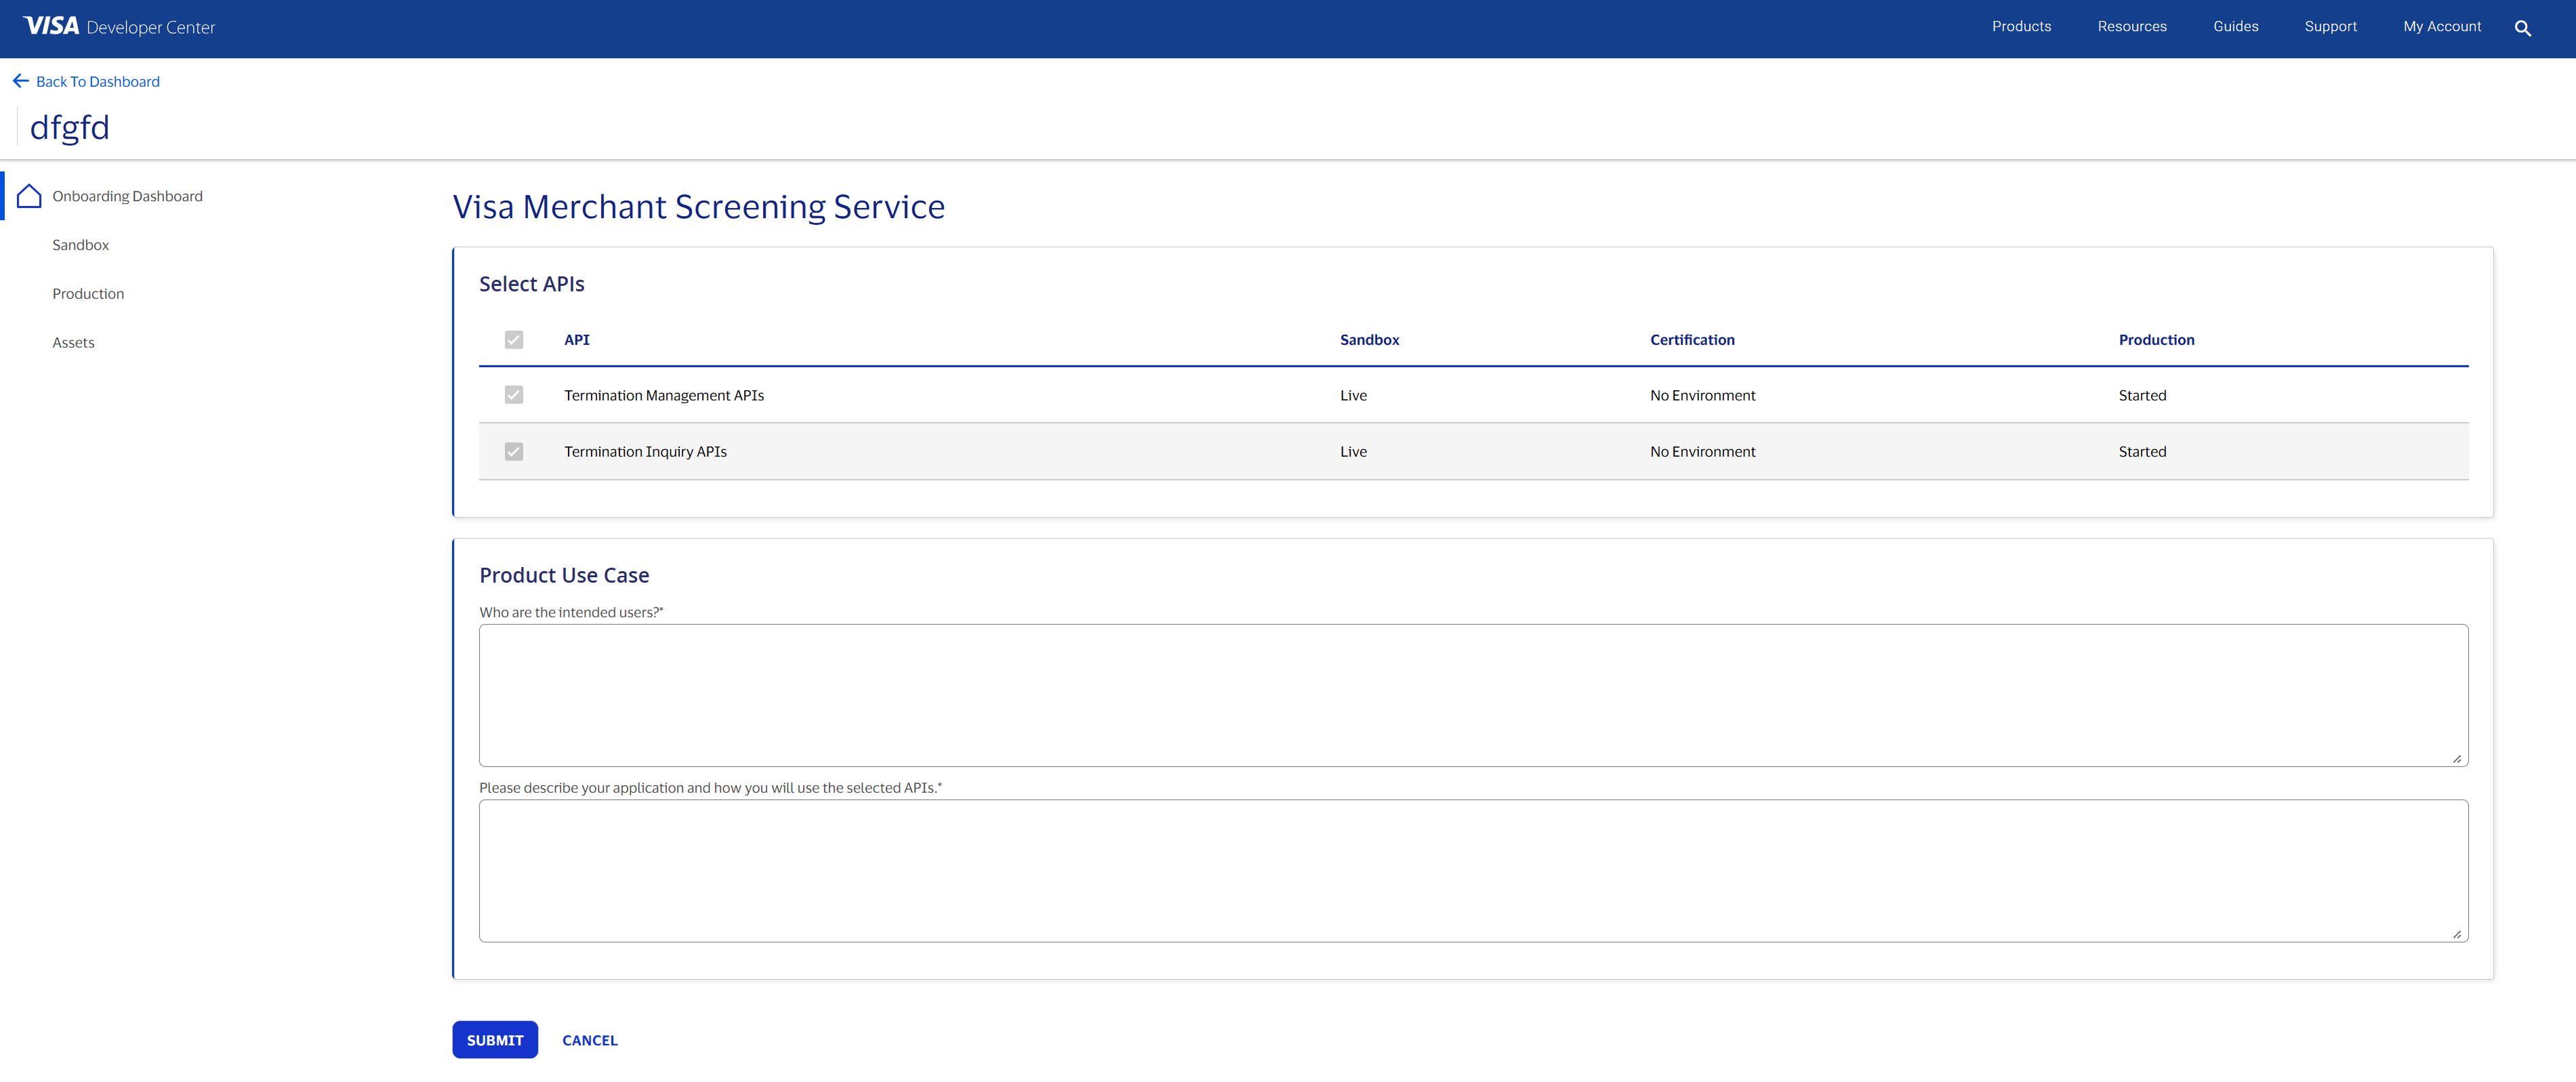
In this form, select which APIs you would like to use in the certification or production environment.
Figure 5.1 Each product added to the sandbox environment has a step in Request to Start the Next Environment track on the Onboarding Dashboard

Figure 5.2 Request to Start the Next Environment form for Visa Merchant Screening Service
API Registration
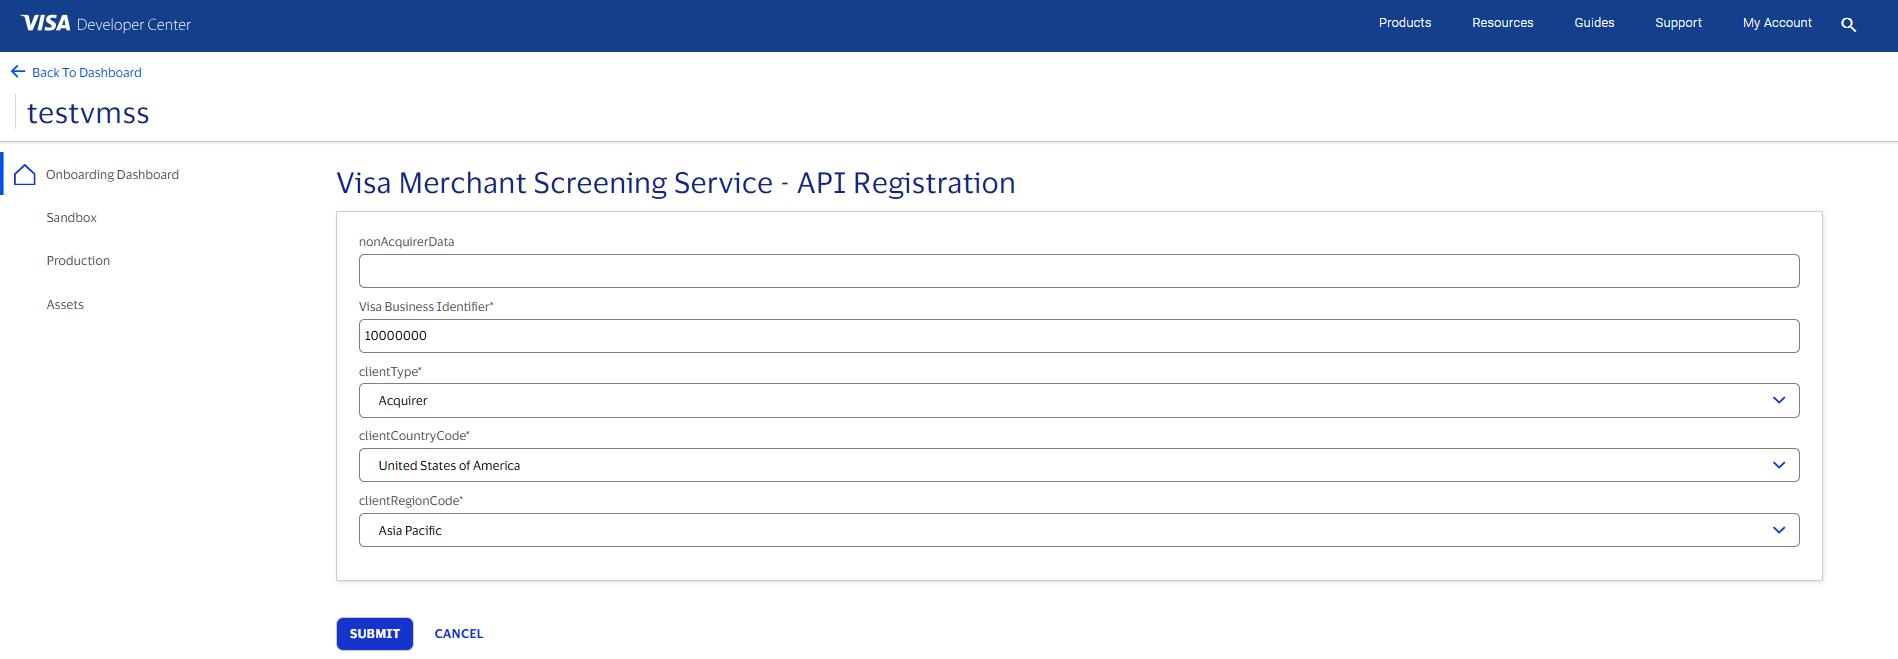
In this form, provide configuration settings for the project. Note that some products do not require any configuration settings.
Figure 6.1 The API Registration track on the Onboarding Dashboard when no products in the environment requires any configuration settings.

Figure 6.2 The API Registration track on the Onboarding Dashboard when at least a product in the environment requires some configuration settings.

Figure 6.3 The API Registration step for Visa Merchant Screening Service
Users
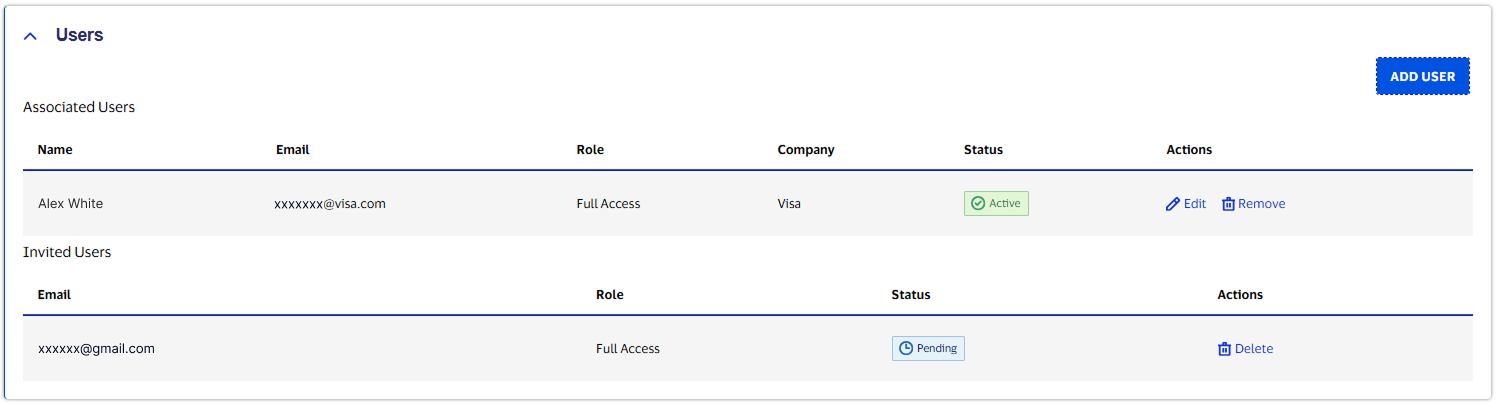
In this step, invite other users to the project for collaboration.
Figure 7.1 Users track on the Onboarding Dashboard

Figure 7.2 Users track
Credentials and Encryption
You may select between X-Pay Token or Two-Way SSL or you may select both. Refer to Two-Way SSL or X-Pay Token documentation for more details.
Regardless of the authentication method chosen, if a selected API requires Message Level Encryption (MLE), the onboarding process will require the submission of a separate CSR. Visit the Encryption Guide for more information.
Certificate Signing Request
The Certificate Signing Request (CSR) file is required to obtain a certificate if you are using a product (API) that uses Two-Way Mutual SSL authentication. A different CSR file is required for the certification and production environments. If an API requires certification prior to going live in the production environment, you will follow this process twice. Once to obtain credentials for certification, and then again to obtain credentials for production. Credentials for certification and production will be provided once a signed relevant contract is in place between you and Visa.
Visit our Developer Quick Start Guide for more information on managing your existing and generating new certificates.
Create a CSR File for Visa Developer Project
In the Sandbox environment, there are two methods for Adding a Certificate Signing Request to a project.
By selecting “Generate a CSR for me (default),” Visa Developer will provide you with an automatically generated certificate based on default values. You may also choose to create and upload your own CSR by selecting “Submit my own CSR.”
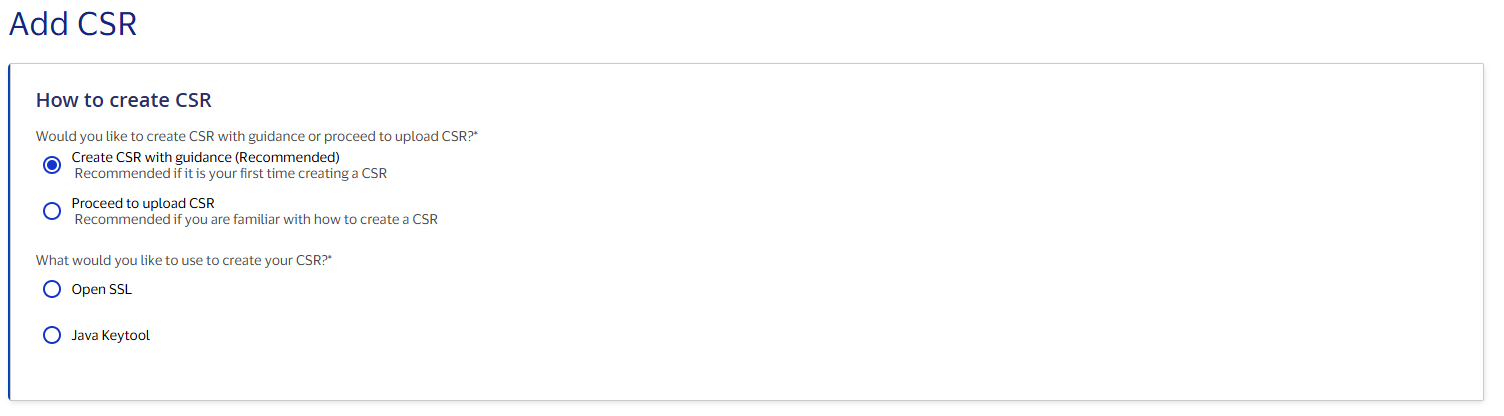
In Certification and Production environments, there are two methods for Adding a Certificate Signing Request to a project. By selecting “Create CSR with guidance (Recommended),” Visa Developer will guide you through the CSR generation process in steps. This option is recommended if it is your first time creating a CSR. You may also choose to create and upload your own CSR by selecting “Proceed to upload CSR.”
Create CSR with guidance
The CSR Wizard helps you create a Certificate Signing Request (CSR) by pre-filling most of the required fields with information from your project.
To create a CSR, select either "OpenSSL" or "Java Keytool."
Check that all the CSR Wizard fields are entered in accordance with the CSR Field Descriptions.
Then click "Generate Commands" to create the scripts you will use to generate either the JKS and CSR file (if you selected Keytool) or the key pair and CSR File (if you selected OpenSSL).
Run the generated commands to create the CSR file.
CSR Field Descriptions
| Field Name | Description |
Private key file name Or JKS file name |
Name of the Private key file when using Open SSL or JKS file when using Java Keytool |
| CSR file name | Name of the CSR file |
| Common Name (CN) | This field must be a fully qualified domain name and must identify the company. Format should be hostname.domainname.com. This cannot have wildcard characters for hostname and hostname should not be www. For example: services.company.com |
| Organization Name (O) | Name of your organization. For example: Bank of USA |
| Organizational Unit (OU) | Name of your division within your organization. For example: Debit Card Processing Unit. |
| Country (C) | Two-letter International Standards Organization (ISO) 3166-1 country code. For example: US |
| State (ST) | Name of the state or province where the server is located. Spell out the name completely (do not abbreviate). For example: California |
| Locality/City (L) | A valid city name. Spell out the name completely (do not abbreviate). For example: San Francisco |
| UID | This should be the CSR Unique Id appended with ”-CERT” or “-PROD” to indicate the environment:
To get the CSR Unique Id, go to the dashboard, select the Project Name for which you need to generate the CSR, and click on Settings. For Message Level Encryption (MLE) the CSR Unique Id will be the MLE KeyID.
|
Submit My Own CSR
Using Keytool
To create a credential request using Java Keytool:
1.
Create a new clientkeystore.jks, using the following keytool command (replace the < > characters and the enclosed values with your own values):
keytool -genkeypair -alias client -keyalg RSA -keysize 2048 -keystore clientkeystore.jks -storepass <password> -keypass <password> -dname "CN=<common name>, OU=<organizational unit>, O=<organization name>, L=<city/locality name>, ST=<state name>, C=<country name>, UID=<CSR unique Id>"
Note: Be sure to keep this key file and password secure. You will need these to make runtime API calls in the certification or production environment.
Note: Only the following ASCII characters are allowed for all fields.
- Space character
- Upper case A to Z
- Lower case a to z
- Digits 0 to 9
- Dash (-)
Note: Do not include any certificate extensions in the Certificate Signing Request.
CSR Field Descriptions
| Field Name | Description |
Private key file name Or JKS file name |
Name of the Private key file when using Open SSL or JKS file when using Java Keytool |
| CSR file name | Name of the CSR file |
| Common Name (CN) | This field must be a fully qualified domain name and must identify the company. Format should be hostname.domainname.com. This cannot have wildcard characters for hostname and hostname should not be www. For example: services.company.com |
| Organization Name (O) | Name of your organization. For example: Bank of USA |
| Organizational Unit (OU) | Name of your division within your organization. For example: Debit Card Processing Unit. |
| Country (C) | Two-letter International Standards Organization (ISO) 3166-1 country code. For example: US |
| State (ST) | Name of the state or province where the server is located. Spell out the name completely (do not abbreviate). For example: California |
| Locality/City (L) | A valid city name. Spell out the name completely (do not abbreviate). For example: San Francisco |
| UID | This should be the CSR Unique Id appended with ”-CERT” or “-PROD” to indicate the environment:
To get the CSR Unique Id, go to the dashboard, select the Project Name for which you need to generate the CSR, and click on Settings. For Message Level Encryption (MLE) the CSR Unique Id will be the MLE KeyID.
|
2.
Create a new CSR using the following keytool command:
keytool -certreq -alias client -keystore clientkeystore.jks -storepass <password> -keypass <password> -file certreq1.csr
Using OpenSSL
To create a credential request using OpenSSL:
1.
Generate Key Pair
openssl genrsa -out example-key.pem 2048
For information about supplying a password to protect the key file, see the OpenSSL documentation.
Note: Be sure to keep this key file and password secure. You will need these to make runtime API calls in the certification or production environment.
2.
Create a new CSR using the following OpenSSL command (replace the < > characters and the enclosed values with your own values):
openssl req -new -sha256 -key example-key.pem -out example.csr -subj "/CN=<common name>/OU=<organization unit>/O=<organization name>/L=<city/locality name>/ST=<state name>/C=<country name>/UID=<CSR unique Id>"
Note: For all fields, only the following ASCII characters are allowed.
- Space character
- Upper case A to Z
- Lower case a to z
- Digits 0 to 9
- Dash (-)
Note: Do not include any certificate extensions in the Certificate Signing Request.
CSR Field Descriptions
| Field Name | Description |
Private key file name Or JKS file name |
Name of the Private key file when using Open SSL or JKS file when using Java Keytool |
| CSR file name | Name of the CSR file |
| Common Name (CN) | This field must be a fully qualified domain name and must identify the company. Format should be hostname.domainname.com. This cannot have wildcard characters for hostname and hostname should not be www. For example: services.company.com |
| Organization Name (O) | Name of your organization. For example: Bank of USA |
| Organizational Unit (OU) | Name of your division within your organization. For example: Debit Card Processing Unit. |
| Country (C) | Two-letter International Standards Organization (ISO) 3166-1 country code. For example: US |
| State (ST) | Name of the state or province where the server is located. Spell out the name completely (do not abbreviate). For example: California |
| Locality/City (L) | A valid city name. Spell out the name completely (do not abbreviate). For example: San Francisco |
| UID | This should be the CSR Unique Id appended with ”-CERT” or “-PROD” to indicate the environment:
To get the CSR Unique Id, go to the dashboard, select the Project Name for which you need to generate the CSR, and click on Settings. For Message Level Encryption (MLE) the CSR Unique Id will be the MLE KeyID.
|
Request Product Pricing
Once you determine which product(s) you want to commercialize in your project, take a look at our Pricing Guide for general information or Contact Us for specific pricing details.
Request a Contract
Once you determine which product(s) you want to commercialize in your project, Contact Us for a contract.
Disclaimer: This contract has no binding effect for Visa until Visa provides Company with a countersigned version of the contract.
After Going Live
Once you submit all the required information, you will receive an email. If Visa needs any additional details, the email will outline the information required and will include a contract with terms and pricing for your signature if you haven’t already signed a contract with the relevant provisions provided to you by your Visa business contact.
If the submitted information is complete, Visa will process your request and if Visa approves and a signed relevant contract is in place, you will receive an email when your project credentials are available.
If you opted to use Two-Way Mutual SSL authentication, you will need to download and add your new project certificate to a keystore.
Create Keystores
A keystore is a repository where private keys and certificates can be stored.
If you used Java Keytool to create the CSR (as described above in Creating a CSR File for Visa Developer Project section), then follow the instructions for Java Keytool below. If you used OpenSSL, then follow the instructions for OpenSSL below.
Using Java Keytool
Once the Visa representative informs you that the certification or production environment certificate is ready, login to the Visa Developer Platform.
1.
Open the project for which certification or production credentials are required.
2.
On the left side, click Certification or Production and then Credentials.
3.
Request one time password (OTP) by clicking Request One Time Password. You will receive an email with the OTP.
4.
Enter the OTP value into the text box and click Submit. This displays certification or production environment credentials and certificates.
5.
Copy the User ID and Password, because you will need them to invoke an API using Two-Way SSL.
6.
Download the certificates ("Visa Development Platform Root Certificate", "Visa Development Platform Intermediate Certificate", and project-specific "Two Way SSL" certificate ).
7.
To chain the certificates for making the runtime calls:
keytool -import -alias root -keystore clientkeystore.jks -file ServicesCARoot.pem -storepass <password>
keytool -import -alias interm -keystore clientkeystore.jks -file ServicesCAInter.pem -storepass <password>
keytool -import -alias client -keystore clientkeystore.jks -file cert.pem -storepass <password>
Note: Aliases must be the same used when creating your keystore, and clientkeystore.jks is the file that you created earlier (as described above in Creating a CSR File for Visa Developer Project > Using Keytool section)
8.
Now use the clientkeystore.jks file to make the runtime calls for the respective API. Use the following endpoint:
- Certification environment: https://cert.api.visa.com/<URI>
- Production environment: https://api.visa.com/<URI>
where <URI> is the URI of the API endpoint.
9.
Include the User ID and password (from project details page) in the header using the Authorization field set to "Basic " + the base64 encoded concatenated string userid+":"+password (e.g. "Authorization: Basic R0ZUFBFTjVaTEUy)
Using OpenSSL
Once the Visa representative informs you that the certification or production environment certificate is ready, login to the Visa Developer Platform.
1.
Open the project for which certification or production credentials are required.
2.
On the left side, click Certification or Production and then Credentials.
3.
Request one time password (OTP) by clicking the Request One Time Password button. You will receive an email with the OTP. Once you get the OTP via email, enter the OTP value into the text box and click Submit.
4.
This will display certification or production environment credentials and certificates.
5.
Copy the User ID and Password, because you will need them to invoke an API using Two-Way SSL
6.
Download the project-specific certificate – cert.pem.
7.
Include the User ID and password (from project details page) in the header using the Authorization field set to "Basic " + the base64 encoded concatenated string userid+":"+password (e.g. "Authorization: Basic R0ZUFBFTjVaTEUy)
If your application reads the key and certificate from a PKCS #12 (PFX) file, then follow the steps below:
8.
Concatenate the certificate with the key file.
Unix and Mac command:
cat example-key.pem cert.pem > example.pem
Windows command:
type example-key.pem cert.pem > example.pem
Note: example-key.pem is the file that you created earlier (as described above in Creating a CSR File for Visa Developer Project > Using OpenSSL section).
9.
Create PKCS#12 file:
openssl pkcs12 -export -in example.pem -out example.pkcs12 -name "example"
Enter Export Password:
Now use the example.pkcs12 file to make the runtime calls for an API using Two-Way SSL. Use the following endpoint:
- Certification environment: https://cert.api.visa.com/<URI>
- Production environment: https://api.visa.com/<URI>
where <URI> is the URI of the API endpoint.
Import Root CA into Trust Store
Once you have setup your local trust store and imported your credentials you will need to import our Root certificate authority prior to interacting with our APIs. You may download our Root CA certificate in the ‘Credentials’ screen inside of your Visa Developer Project. Once downloaded you may import the certificate into your trust store by using the following command:
keytool -import -alias digicert -keystore myProject_keyAndCertBundle.jks -file DigiCertGlobalRootCA.crt -storepass <password>
Edit Project
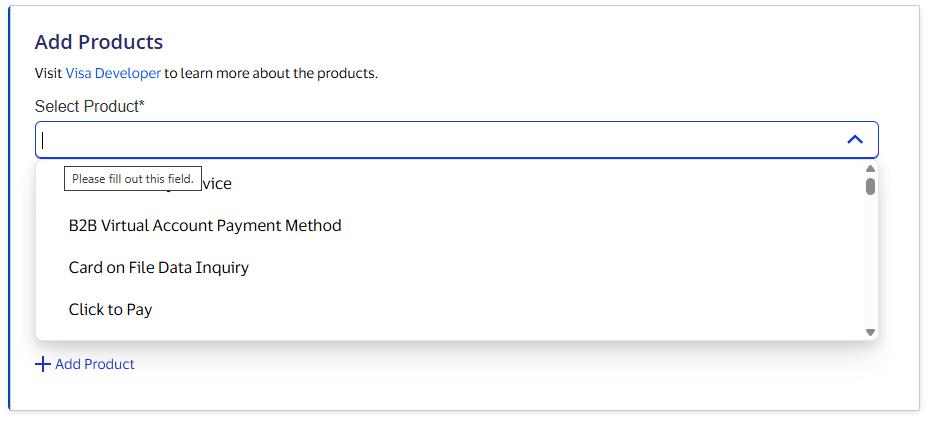
Add a product: To add a Visa Developer product to a project, visit the "Add Products" section in your project.
Add an API: To add an API within a product already in the project, click "Add API" for the product that is already in the project in the "Products in Project" section in your project.

After adding the product or API, follow the guidance on the "Onboarding Dashboard" in your project for processes to be completed before the new product or API can be used in the production environment.
Project Testing and Production Validation
Once you have integrated the credentials into your project, you are all set to begin the testing and/or the production validation processes!
Visit our Developer Quick Start Guide for more information on testing and validation
[1] Java is a registered trademark of Oracle and/or its affiliates