Quick Start Guide for Visa Developer
Introduction
Visa Developer offers a set of Application Programming Interfaces (APIs) that can give you the ability to incorporate Visa functionality into your projects. This guide describes how to create an account, get credentials to start building your test project and how to connect to the sandbox, certification or production environment for testing your project. There's a variety of APIs that you can use to build your project. Let’s get started!
Resources and Assets
The Visa Developer Platform offers a variety of resources and assets so you can quickly start working with our APIs.
Products and Use Cases
Check out Browse All Products to view a complete list of APIs and SDKs available on Visa Developer or visit Use Cases to see real-world examples of how our solutions can solve your needs.
We have a wide collection of product documentation, platform general documentation, standards and guidelines, etc. to help you learn about our products and platform.
Code Explorer
Our Code explorer will allow you to start testing code. You can view Code Explorer by navigating to the product API Reference page and see the Request and Sample Response.
Sandbox
Our Sandbox is a fully functional environment that allows you to test publicly available API endpoints. To help you develop and test your project, the Sandbox provides you with testing data. Note that the data returned in Sandbox is mock data only and limited. For real data, you would need to request production credentials (subject to an agreement or sponsorship and approvals).
Sample Code
Visa Developer provides a selection of product specific sample code for you to use to help accelerate your development. This sample code is in C#, Java, Node, PHP, Python and Ruby.
You can use the samples provided within the Project Dashboard > Sample Code to select, preview, and implement one or more samples into your development projects.
Assets
Additionally, there are SDKs, detailed implementation guides, integration guides, etc., that you can download from the Project Dashboard > Assets. You simply need to first sign in with your Visa Developer credentials.
Sample Code for Authentication Methods
The “Hello World” sample code aims to demonstrate the connectivity with the Visa Network using the Hello World API and using the two ways of authentication - Two-Way SSL (Mutual Authentication) And API Key – Shared Secret (X-Pay-Token).
Once you sign in with your Visa Developer credentials., you can download these sample codes from the Project Dashboard > Assets.
JWE/JWS Encryption and Decryption
The JSON Web Encryption and Object Signing (JWE/JWS) page describes the mechanism which Visa uses to encrypt and decrypt sensitive data.
Once you sign in with your Visa Developer credentials, Sample Code for the JWE/JWS implementation is available under the Sample Code section of the General Assets in the Project Dashboard.
Error Codes
To learn more about the common Visa Developer error codes and how to resolve them, refer to Error Codes documentation.
Learning Hub
Find the latest tutorials plus more at the Learning Hub.
Help and Support
For any additional help and support, you can visit our Support page or send your queries directly to [email protected].
Create Account
Create a Visa Developer account by clicking here. Whether you know what APIs you are interested in, or you need help picking, visiting our product overview pages, and use cases is a great way to get started. By creating an account, you will get access to a secure sandbox environment, test data and sample code to help you make your decision on what API is right for your use case, or to test to ensure the API is actually giving you the right test responses.
Request Access
To request access to a restricted product, start by going to your dashboard on developer.visa.com and selecting “Add New Project.”. If the product you’re interested in has a lock icon, it means special approval is required. Click “Request Access” to open the application form.
Once you’ve completed the form, submit your request. An admin will review the request and either approve or request resubmission. If approved, you will have access to the restricted product. If a resubmission is needed, please resubmit the information for an admin to review the request again.
Start Project
Create a project with the desired products. View Product Catalog for available products and Regional Availability for whether the product is available in your location. Once a project is created:
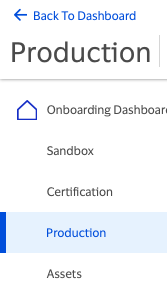
- Onboarding Dashboard: On the "Onboarding Dashboard" page on the left navigation in the project, you can:
- Add products and APIs to your project
- Complete the processes required before the products and APIs can be used in the production environment
- Sandbox: On the "Sandbox" page on the left navigation in the project, you can find:
- Products and APIs in your project
- Delete APIs
- Credentials
- Test data for your products and APIs
- Assets: On the "Assets" page on the left navigation in the project, you can find:
- Documentations and assets for your products and APIs
Authentication
All of our APIs require Two-Way SSL or X-Pay Token authentication. Learn what authentication code you need for your project based on the APIs you are using. We have both tips and tricks, as well as sample code to get you going with both Two-Way SSL or X-Pay Token methods. You can access the Credentials from the sidebar of your project dashboard.
Refer to Two-Way SSL or X-Pay Token dcumentation for more details.
Visa Developer also provides the “Hello World” sample code that aims to demonstrate the connectivity with the Visa Network using the Hello World API and using the authentication method - Two-Way SSL (Mutual Authentication) and API Key – Shared Secret (X-Pay-Token).
Once you sign in with your Visa Developer credentials., you can download these sample codes from the Project Dashboard > Assets.
Message Level Encryption
Message Level Encryption provides an enhanced end-to-end security for message payload by using asymmetric encryption technique (public-key cryptography). Some of our products also require message level encryption which is a process similar to getting other credentials.
Refer to Message Level Encryption documentation for more details.
Credential Expiration
Two-way SSL (Mutual Authentication) certificates, Message Level Encryption certificates and X-pay tokens all expire periodically
- For Two-way SSL or X-Pay token certificates, go to the "Credentials" track on your project's "Onboarding Dashboard" to renew.
- For Message Level Encryption certificates, go to the "Message Level Encryption" track on the same dashboard.
Once the new credentials are generated, you will see two set of credentials in you dashboard. Each set includes certificate, user ID, and password. Be sure to use the complete set to proceed with the next steps.
Visa Developer PKI
An X.509 Public Key Infrastructure (PKI) is implemented by Visa for issuing and managing digital certificates to be used in conjunction with Visa products and services. This PKI consists of a hierarchy of entities called CAs that issue certificates to “Subscribers” (that is, end-entities or other CAs) within the hierarchy. The term Visa PKI is used to refer to all of the Subscribers from the root CA all the way down to the lowest level end-entity.
Refer to Visa Developer PKI for a complete list of the Visa Developer Platform public certificates used to identify Visa API endpoints.
Outbound Callback Configuration
Outbound callback configurations are required if you would like receive payloads from Visa. In order to configure the same, please follow the steps below:
- Click page for the environment that requires the configuration from the left navigation within your project. For instance, if a configuration is needed in the sandbox environment, click "Sandbox" from the left navigation.
- Visit the "Outbound Callback Configuration" section on the page.
- Add a website path and domain for Visa to review.
- Ensure your endpoint is signed by one of our Trusted Certifying Authorities.
- Once approved, you can perform ping tests to test the payload of the configuration.
- You can also deactivate the configuration if needed at any time via the same area in your dashboard.
Refer to Outbound Callback Configurations documentation for more details.
Going Live
In order to use the products in the certification or production environment, complete the steps on the "Onboarding Dashboard" of your project. Visit Going Live for an overview of the processes to be completed before the APIs can be used in the production environment.
Project Testing and Production Validation
Once you have integrated the credentials into your project, you are all set to begin the testing and/or the production validation processes.
 Testing in Sandbox Environment
Visa Developer Sandbox is a fully functional environment that allows you to test publicly available API endpoints. To help you develop and test your project, the Sandbox provides you with all of the testing data. You can also refer to API Explorer to experience the API Endpoint and Request/Response parameters.
On your dashboard, click the project name to access the project details.
- Copy/paste your project keys, test data and documentation for the API project.
- To the left of each API name, there is a colored circle that indicates status:
- Green indicates you can start to invoke the API.
- Red indicates a failure and there will be no green after this. (There is no need to wait for the status anymore. You will need to create a new project.)
- Gray indicates that you will have to wait for the status to turn green.
If the status shows Activation in progress, click on the refresh icon next to the API to obtain the status.
Once you are ready to invoke your APIs in Sandbox, refer to the following URLs:
- For all Business-to-Business (B2B) calls — send test requests to this URL: https://sandbox.api.visa.com/
- For all Business-to-Consumer (B2C) calls — send test requests to this URL: https://sandbox.webapi.visa.com/
Note: Currently, Visa Developer only provides the Flex API/Token endpoint for B2C calls.
 Testing in Certification Environment
Certification environment end point: https://cert.api.visa.com/<URI>
Credentials
Two-Way SSL (Mutual Authentication)
- Private Key: This is the key you had generated at the time of submitting your CSR file in the Certification environment.
- Username and Public Key:
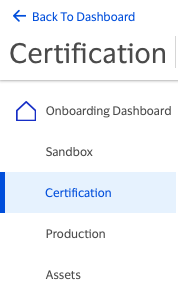
- Select Certification environment from left side navigation in project.
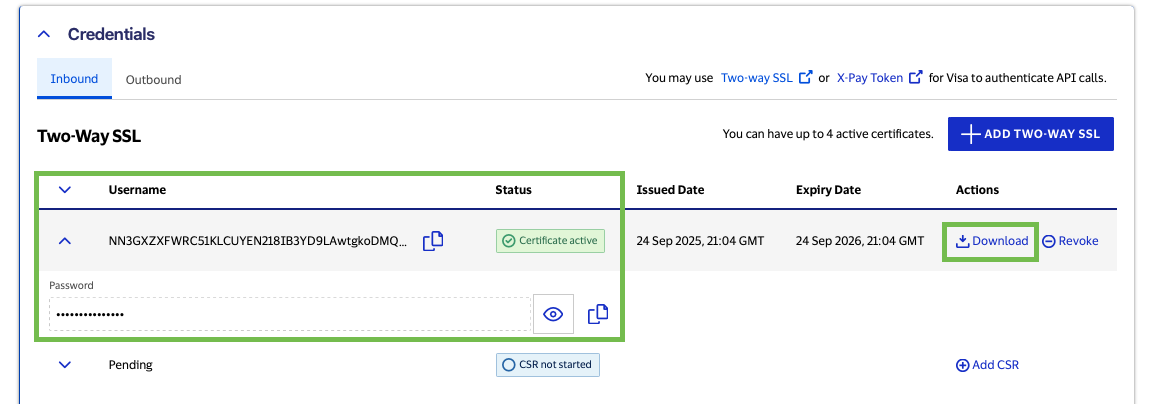
- Find Credentials tab and Two-Way SSL.
- You are now able to copy the username or download the public key.
- Password:
- Select Certification environment from left side navigation in project.
- Find Credentials tab and Two-Way SSL.
- Expand the Certificate to view and copy the password.
- Common Certificates
- These are available for download at the bottom of the Two-Way SSL section.

Testing Mutual Auth connection using Postman
Hello World End Point: https://cert.api.visa.com/vdp/helloworld
Refer to Testing Two-Way SSL Connectivity Using Postman for more details.
Shared Secret (X-Pay-Token)
- Set up Shared Secret Encryption
- Follow the instructions in our Shared Secret (X-Pay Token) Guide
- View API Key & Shared Secret
- Select Certification environment from left side navigation in project.
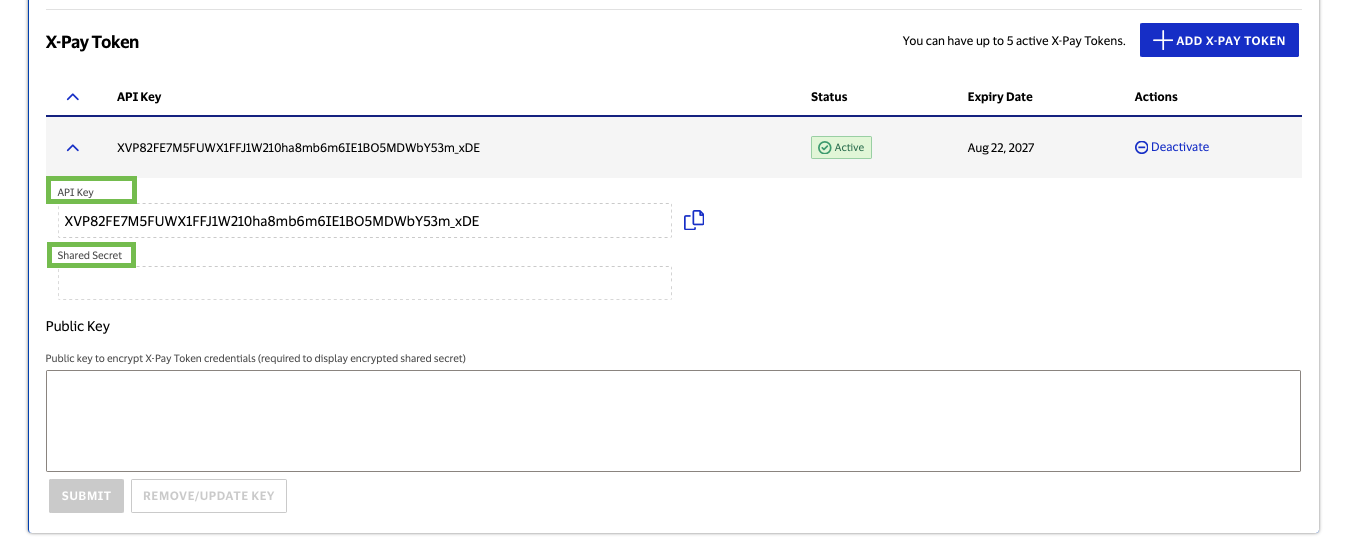
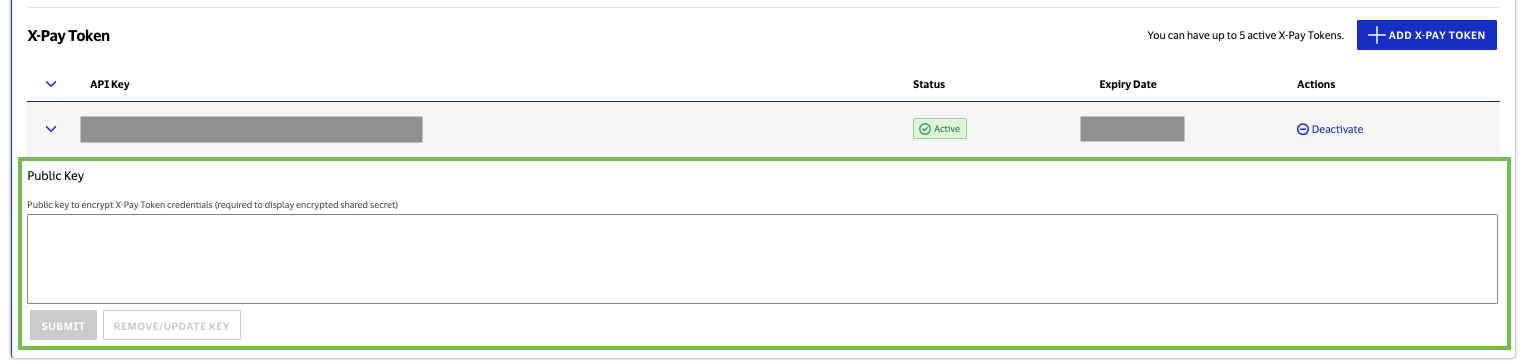
- Find Credentials tab and X-Pay Token
- Expand API Key.
- You can now view API Key and Shared Secret.
Refer to the X-Pay Token Guide for more details.
Testing X-Pay-Token Connection Using SOAP UI or VDC Playground
Hello World End Point: https://cert.api.visa.com/vdp/helloworld
SOAP UI
Refer to Testing X-Pay-Token Connectivity Using SOAPUI for more details.
Visa Developer Center Playground
Visa Developer Center Playground (VDC Playground) is a tool designed exclusively for testing and troubleshooting Visa APIs that are exposed through the Visa Developer Platform (VDP). It comes integrated with all required authentication methods to connect and get going with VDP APIs.
Refer to Visa Developer Center Playground documentation for more details.
 Testing in Production Environment
Production environment end point: https://api.visa.com/<URI>
Credentials
Two-Way SSL (Mutual Authentication)
- Private Key: This is the key you had generated at the time of submitting your CSR file in the Production environment.
- Username and Public Key:
- Select Production environment from left side navigation in project.
- Find Credentials tab and Two-Way SSL.
- You are now able to copy the username or download the public key.
- Password:
- Select Production environment from left side navigation in project.
- Find Credentials tab and Two-Way SSL.
- Expand the Certificate to view and copy the password.
- Common Certificates
- These are available for download at the bottom of the Two-Way SSL section.
Testing Mutual Auth connection using Postman
Hello World End Point: https://api.visa.com/vdp/helloworld
Refer to Testing Two-Way SSL Connectivity Using Postman for more details.
Shared Secret (X-Pay-Token)
- Set up Shared Secret Encryption
- Follow the instructions in our Shared Secret (X-Pay Token) Guide
- View API Key & Shared Secret
- Select Production environment from left side navigation in project.
- Find Credentials tab and X-Pay Token
- Expand API Key.
- You can now view API Key and Shared Secret.
Refer to the X-Pay Token Guide for more details.
Testing X-Pay-Token Connection Using SOAP UI or VDC Playground
Hello World End Point: https://api.visa.com/vdp/helloworld
SOAP UI
Refer to Testing X-Pay-Token Connectivity Using SOAPUI for more details.
Visa Developer Center Playground
Visa Developer Center Playground (VDC Playground) is a tool designed exclusively for testing and troubleshooting Visa APIs that are exposed through the Visa Developer Platform (VDP). It comes integrated with all required authentication methods to connect and get going with VDP APIs.
Refer to Visa Developer Center Playground documentation for more details.