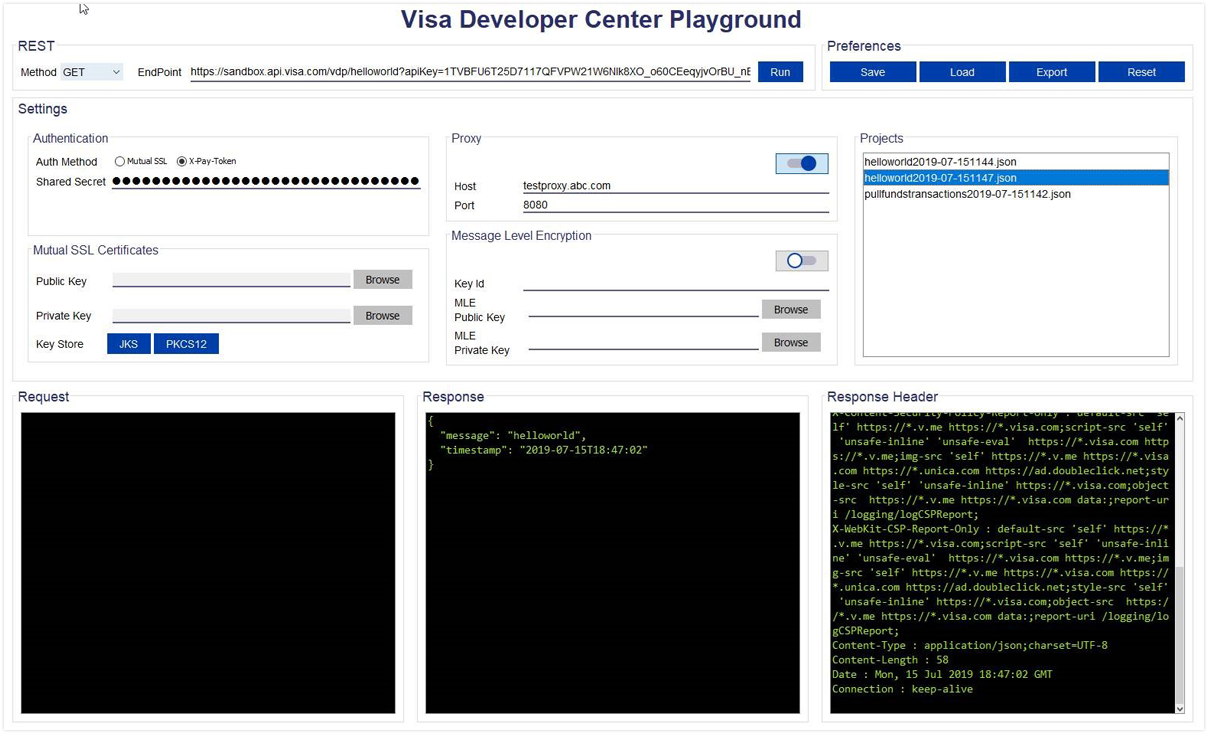
Getting started with VDC Playground
Visa Developer Center Playground (VDC Playground) is a tool designed exclusively for testing and troubleshooting Visa APIs that are exposed through the Visa Developer Platform (VDP). It comes integrated with all required authentication methods to connect and get going with VDP APIs.
To access and download this tool, log in to Visa Developer > Project dashboard > Asset Management.
Key features include
- Support for all authentication methods, including Message Level Encryption and Two-Way SSL
- Generate key stores (jks/p12).
- Save preferences and export details for reporting bug directly from the tool.
Note: VDC Playground is currently compatible with Windows only.
Launch VDC Playground
Once you have downloaded the asset, launch the VDC Playground by double clicking on the executable jar file. If it doesn't open, perform the steps below in Windows and try again.
- Start Control Panel.
- Click Default Programs.
- Click Associate a file type or protocol with a specific program.
- Double click .jar.
- Browse C:\Program Files\Java\jre\bin\javaw.exe.
- Click the button Open and click the button OK.
To open in Command Line, type java -jar vdpplayground.jar
Open a Project
Go to Visa Developer project dashboard and open the existing project. If you are creating a new project, begin on the Create Project page.
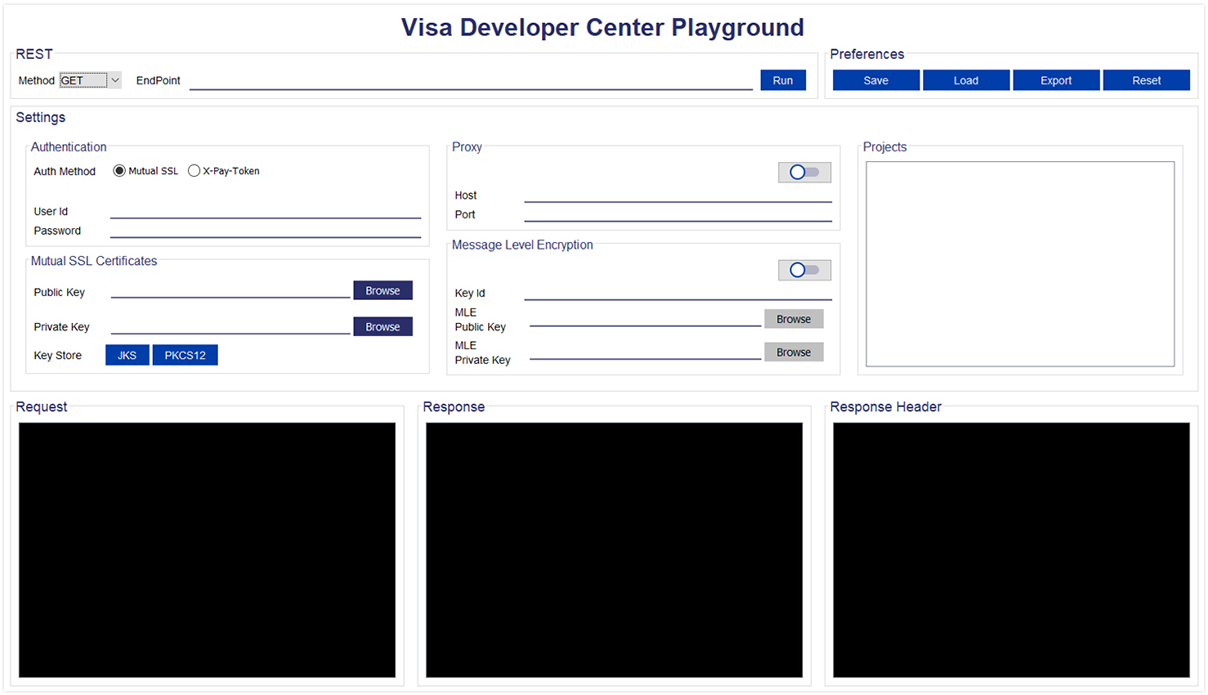
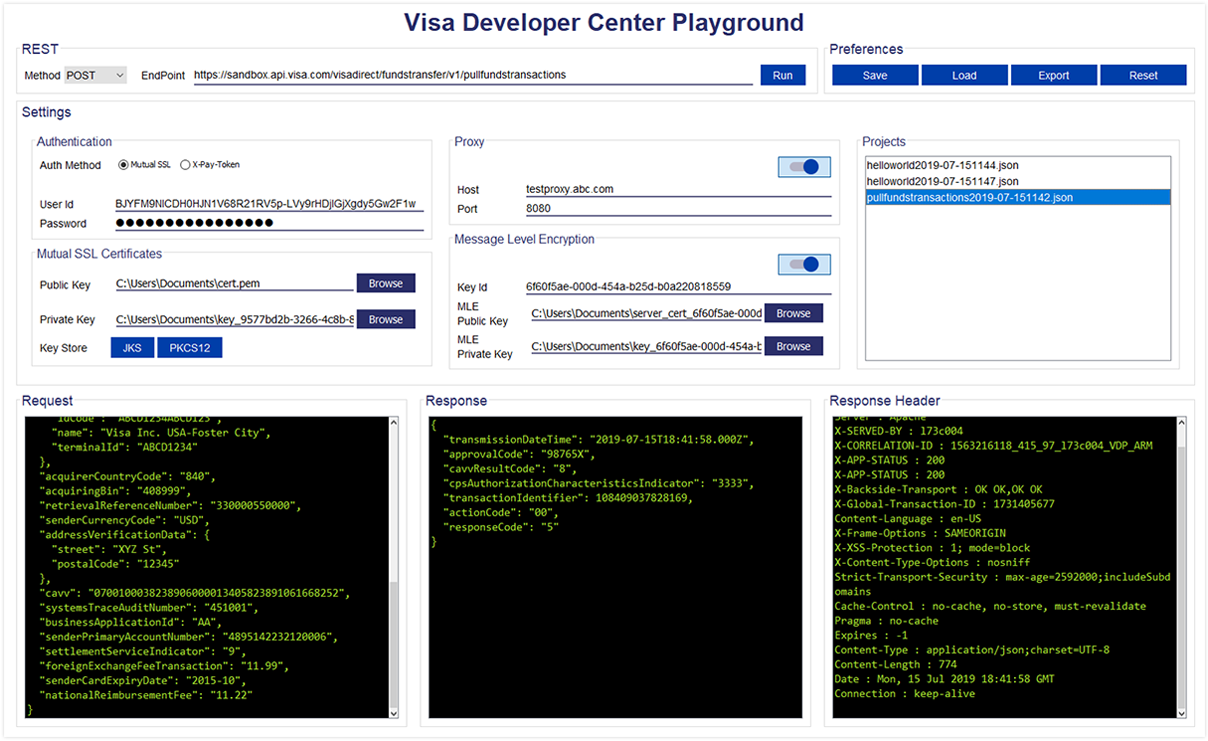
Select REST Method and Endpoint
- In VDC Playground, select Rest Method (see Figure 1).
- Populate the Visa API endpoint. You can get it from Code Explorer in API Reference Page for the particular API.
- Provide appropriate proxy host and port if you are behind firewall.
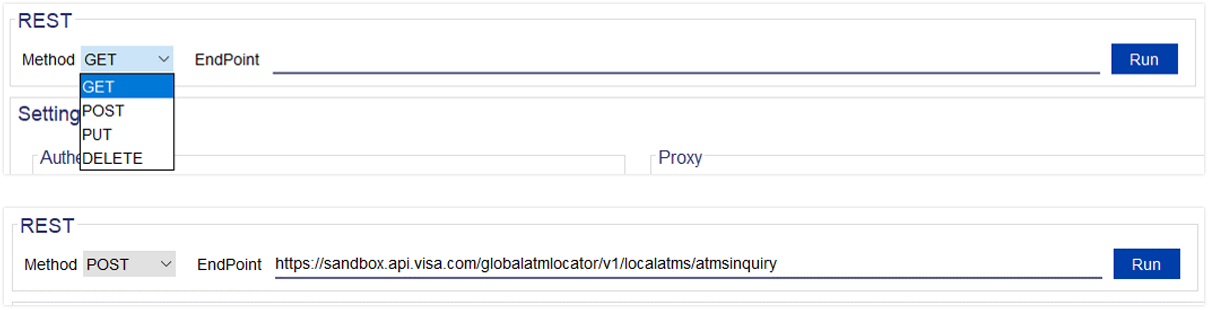
Figure 1
Authentication Settings
- Select Auth Method (see Figure 2).
- Provide appropriate proxy host and port if you are behind firewall.
- Get the User Id and Password from VDP Project dashboard under Credentials Tab.
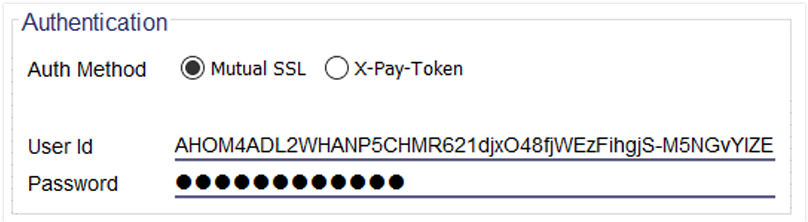
Figure 2
Settings for Two-Way SSL
- Browse and select appropriate Public Key and Private Key (see Figure 3).
- You can obtain the Private Key (PKCS12) at the time of creating a project in Sandbox and at the time of submitting CSR for higher environments (Figure 4). Refer to Configuring a Two-Way SSL Keystore Using an Auto-generated CSR for details.
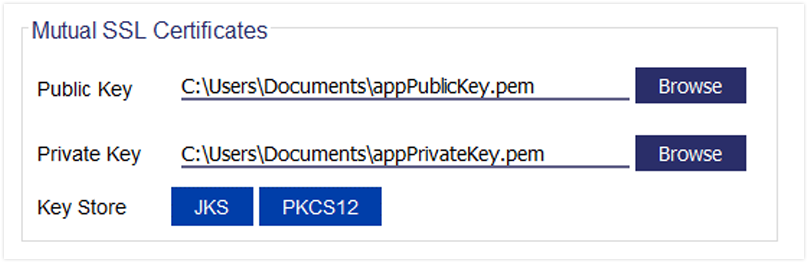
Figure 3
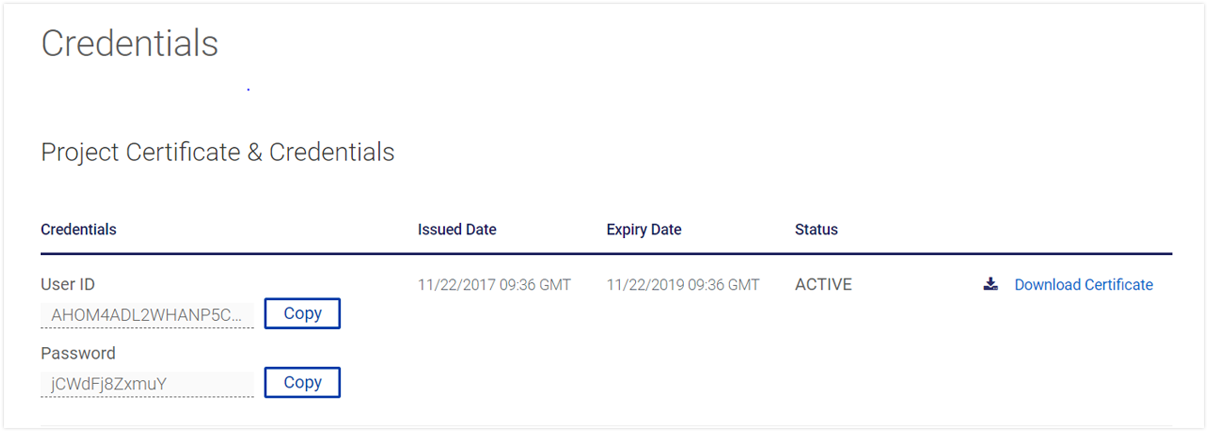
Figure 4
Settings for X-Pay Token
- Select Auth Method as X-Pay Token (see Figure 5).
- Get the API Key and Shared Secret from VDP Dashboard > Credentials section.
- Provide the API key as part of query parameter on the API End Point as shown to in Figure 6.
- Provide the Shared Secret in the settings input field as seen in Figure 5.
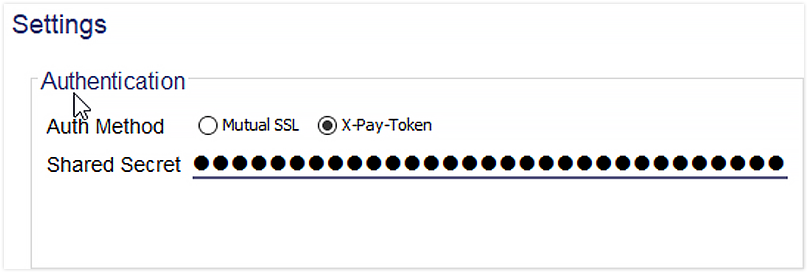
Figure 5

Figure 6
Settings for Message Level Encryption
For APIs which require Message Level Encryption, please populate keyId, MLE Public and Private keys (PKCS12) as shown in Figure 7.
Additionally, upload the “Server Encryption Certificate” for “MLE Public” key. You can locate it under the “Encryption/Decryption” section on Credentials tab in your project home page.
 Note
Note
Refer to Message Level Encryption documentation to get details on how to obtain MLE credentials.
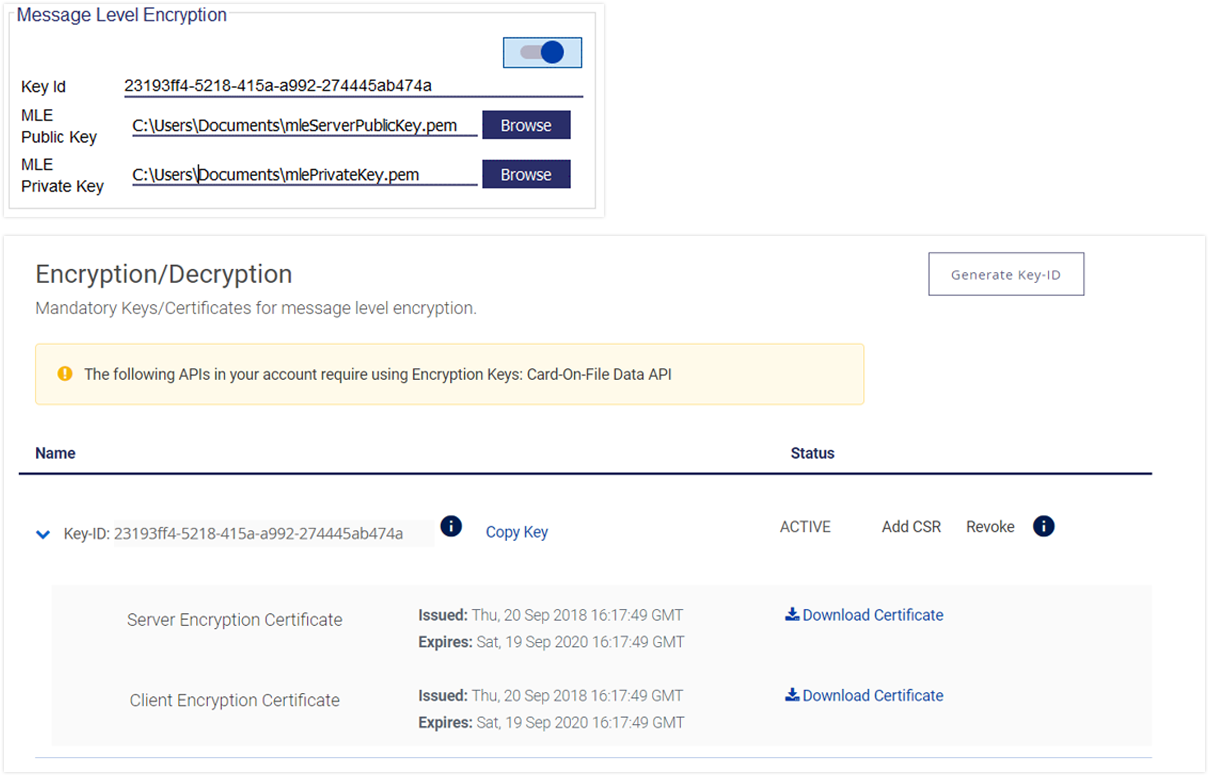
Figure 7
Settings for Proxy
Provide appropriate Proxy Host and Port if you are behind firewall (see Figure 8).
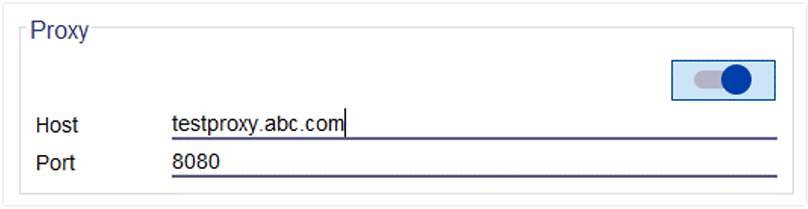
Figure 8
Provide Request Payload
- Paste the Request Payload in the Request text box (Figure 9) and click Run button.
- Make sure you have the request payload populated using the test data provided to you in Sandbox.
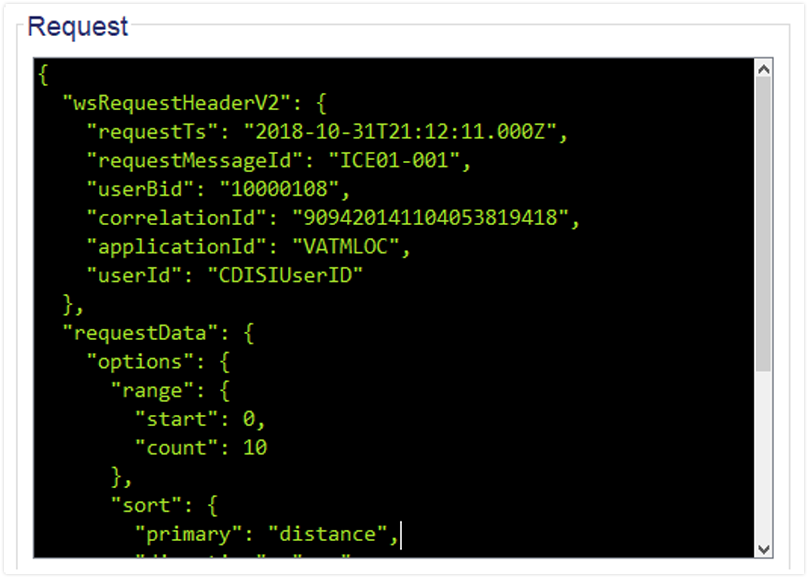
Figure 9
Response Body and Header
You will get the Visa Response and corresponding Header in the respective sections as shown in Figure 10.
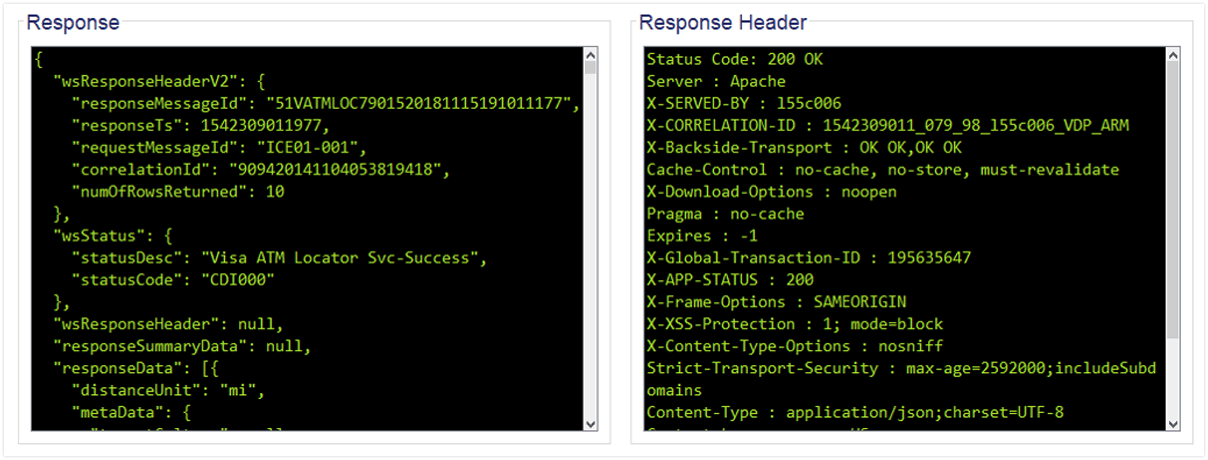
Figure 10
Examples
Two Way SSL

X-Pay Token
Visa Direct: Funds Transfer API with MLE
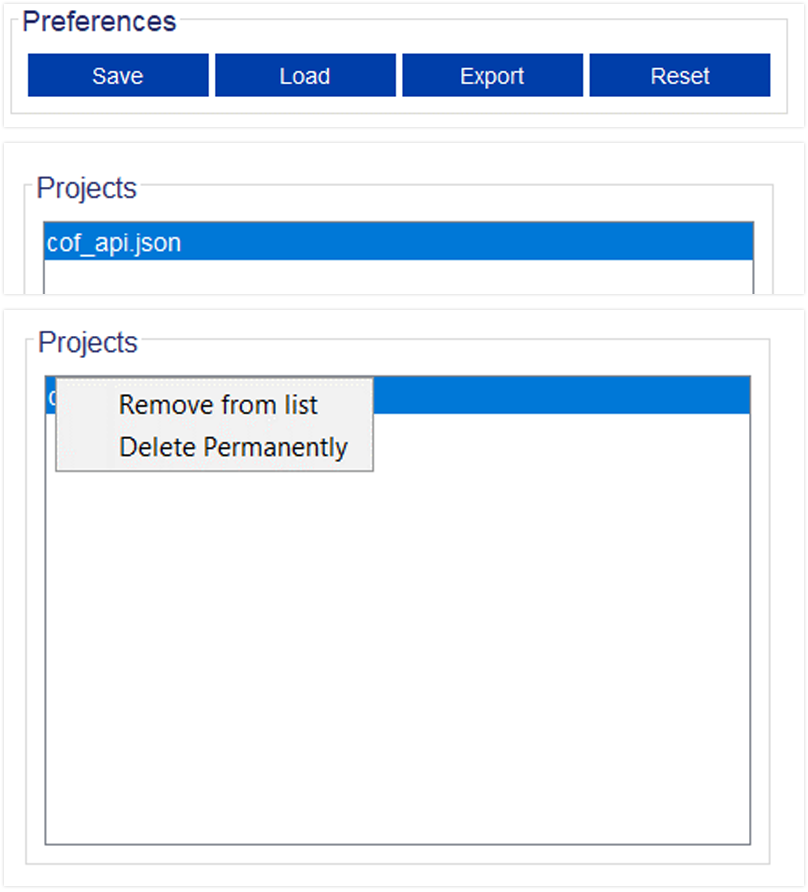
Preferences & Projects
- Save Functionality helps you to save complete configuration details on your local machine.
- Load functionality helps you load the previously saved configuration back on to the tool.
- Export Functionality copies Method, Endpoint, Request , Response and Response Header to Clipboard.
- Reset will help clear all values on the tool.
- Projects Section helps you to select a project previously saved or loaded on to the tool and just execute it.
- You can also right click on the project to either remove it from the Project Panel temporarily or delete the saved configuration permanently based on the options shown.
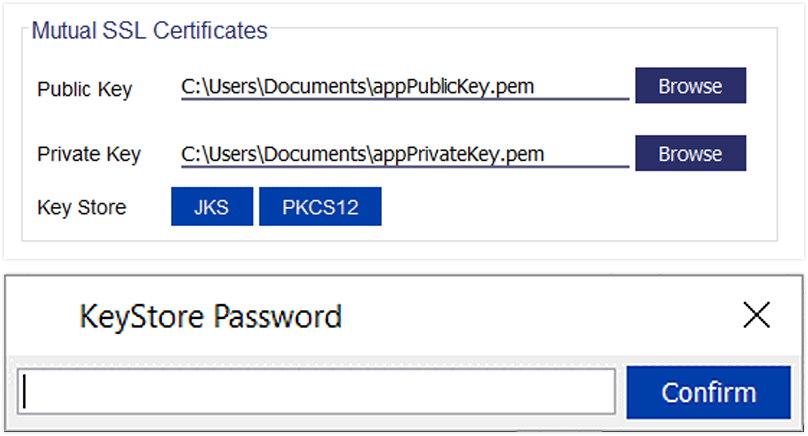
Generate Keystore
- You can generate keystore in .jks or .p12 format from this tool.
- Populate the Public and Private Keys and click either JKS or PKCS12 button to generate Key Store for the respective format.
- Enter password to project the keystore and confirm to save it to your local disk.