Outbound callbacks
Learn how to configure an outbound callback so Visa can send event notifications to your server.

Overview
An outbound callback is an asynchronous HTTP POST that Visa sends to your server when a configured event occurs. Visa acts as the client, and your application receives and processes the payload. When you create a project with APIs that support callbacks, you register the URLs that listen for events you want to track. When one of those events occurs, Visa delivers the event payload to your endpoint so your system can act on it immediately.
This guide explains how to:
- Add an outbound callback in Sandbox, Certification, and Production
- Set up authentication methods using Two‑Way SSL or X-Pay Token
- Verify server readiness
- Test connectivity
Before you begin
Before configuring an outbound callback, confirm that:
- You have a Visa Developer account and a project, as described in the quick start
- Your project contains a product that supports callback events
- Your outbound callback endpoint is publicly reachable over HTTPS
Server certificate requirements
In order to receive outbound callbacks, your server requires a server certificate that you install and manage. This certificate must be issued by a third‑party Certificate Authority (CA) and is not managed by Visa.
- Self‑signed certificates are not supported. Your server certificate must be issued by a CA on the Visa trusted list.
- Your server certificate must be valid (not expired).
- You manage this certificate yourself, including renewing it before it expires, to avoid callback failures.
Add an outbound callback in Sandbox
Follow these steps to add an outbound callback in the Sandbox environment.
Step 1: Add outbound configuration (Sandbox)
- Open your project and select Sandbox.
- Go to Outbound Callback Configuration > Add Outbound Configuration.
- Select the Product, API, and Product Endpoint Name and enter your callback details:
- HTTPS Domain (for example: https://testproject.herokuapp.com)
- Path (endpoint)
- Authentication Type (if selectable)
- Select Add Configuration.
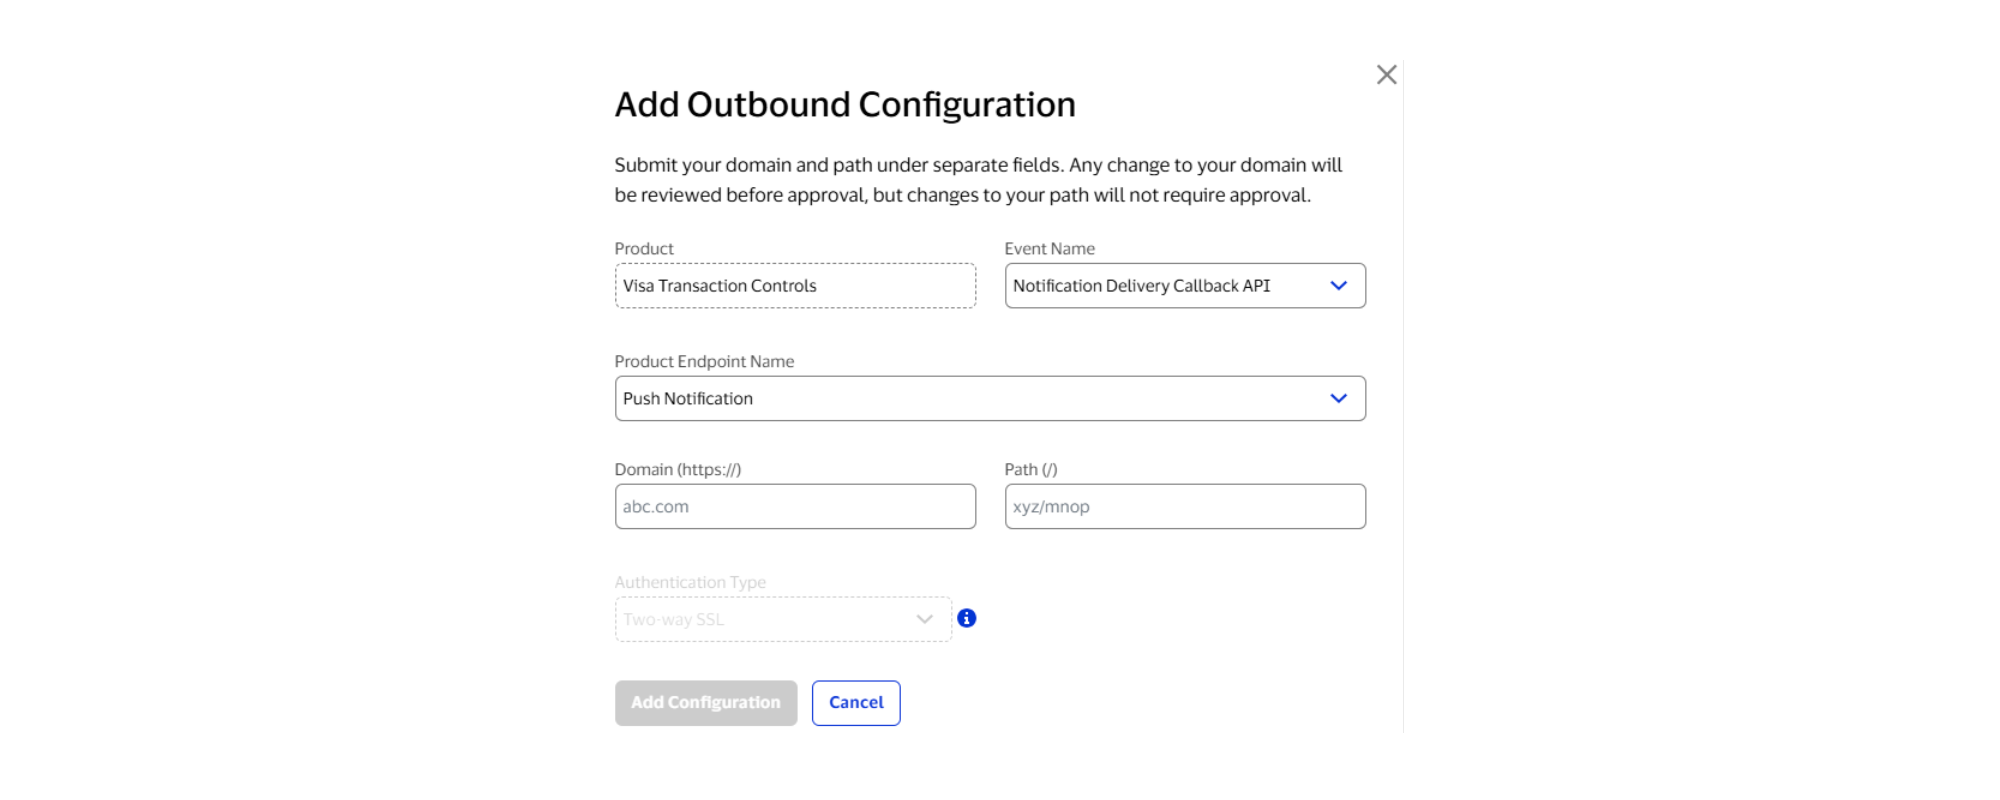
The configuration state appears as Pending until Visa completes review. When approved, the status changes to Activated and Visa Developer begins sending events.
If Visa rejects the submission, the configuration state changes to Rejected. Review the comments, correct the URL, and resubmit.
Step 2: Set up authentication method (Sandbox)
Set up an authentication method for your endpoint.
Two-Way SSL
- Open your project and select Sandbox.
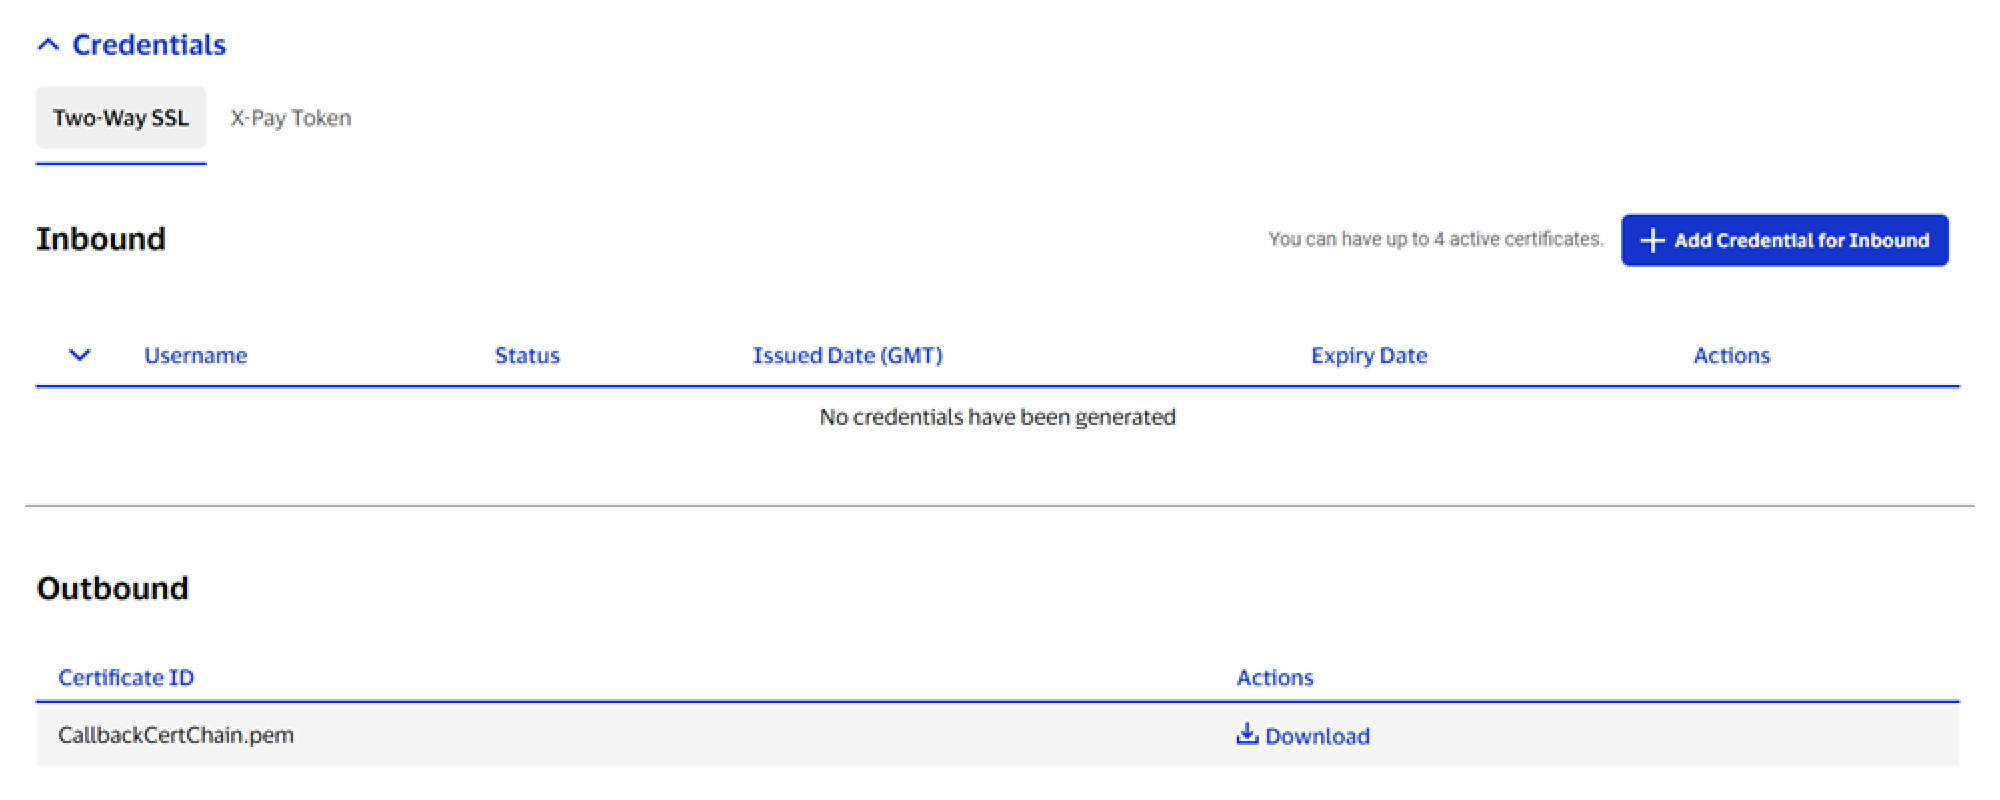
- Go to Credentials > Two-Way SSL.
- Under Outbound, download the CallbackCertChain.pem certificate chain file, which contains the outbound client certificate (leaf certificate), intermediate CA certificate, and root CA certificate.
- Install the root CA certificate in your server’s truststore.
Important: Visa recommends trusting the root CA certificate rather than explicitly trusting the leaf certificate so that there is no action required by you when Visa renews the leaf certificate.
X-Pay Token
- Open your project and select Sandbox.
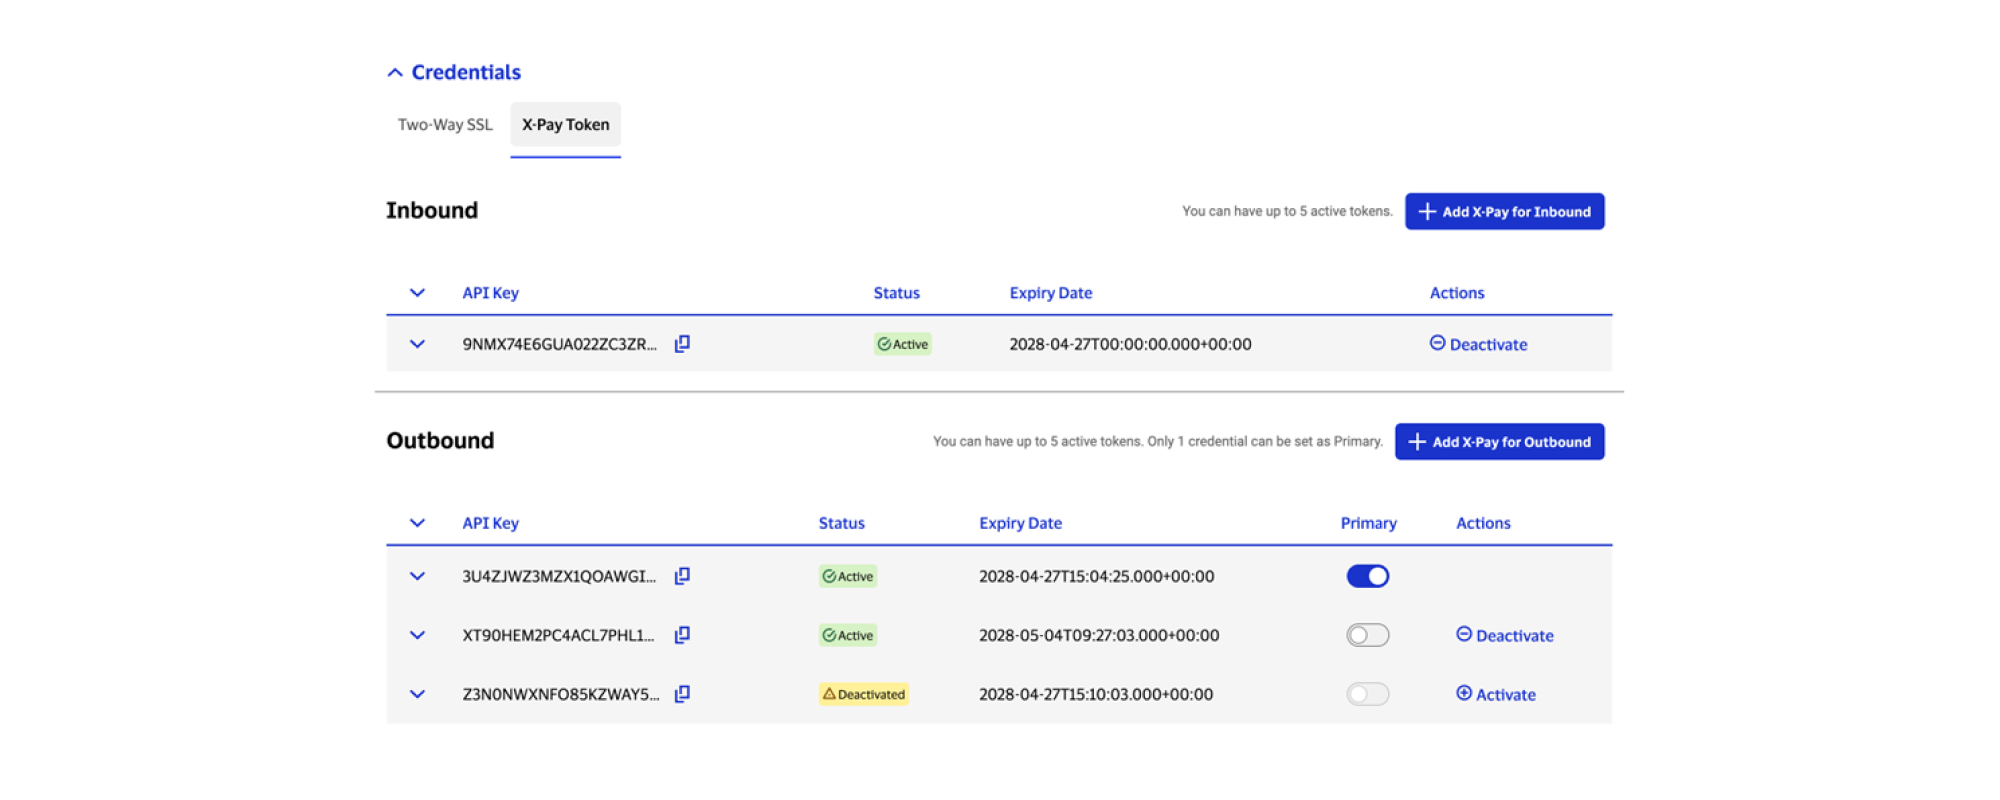
- Go to Credentials > X-Pay Token.
- Under Outbound, select Add X-Pay for Outbound.
- Review the X-Pay Token.
Note: The first outbound X-Pay Token created is automatically set as the primary X-Pay Token.
Step 3: Verify server readiness (Sandbox)
Confirm that your server is publicly reachable and that the server certificate meets the server certificate requirements described above.
Network allowlisting (Sandbox)
Allowlist the following Visa outbound public IP addresses to ensure that callback notification requests are not blocked by your network.
- 198.217.139.45
- 198.217.139.47
- 198.217.139.42
- 198.217.139.40
- 198.241.168.15
- 198.241.162.104
Step 4: Test connectivity (Sandbox)
- Open your project and select Sandbox.
- Go to Outbound Callback Configuration.
- Select Ping Test.
- Review the sample payload.
- Select Send.
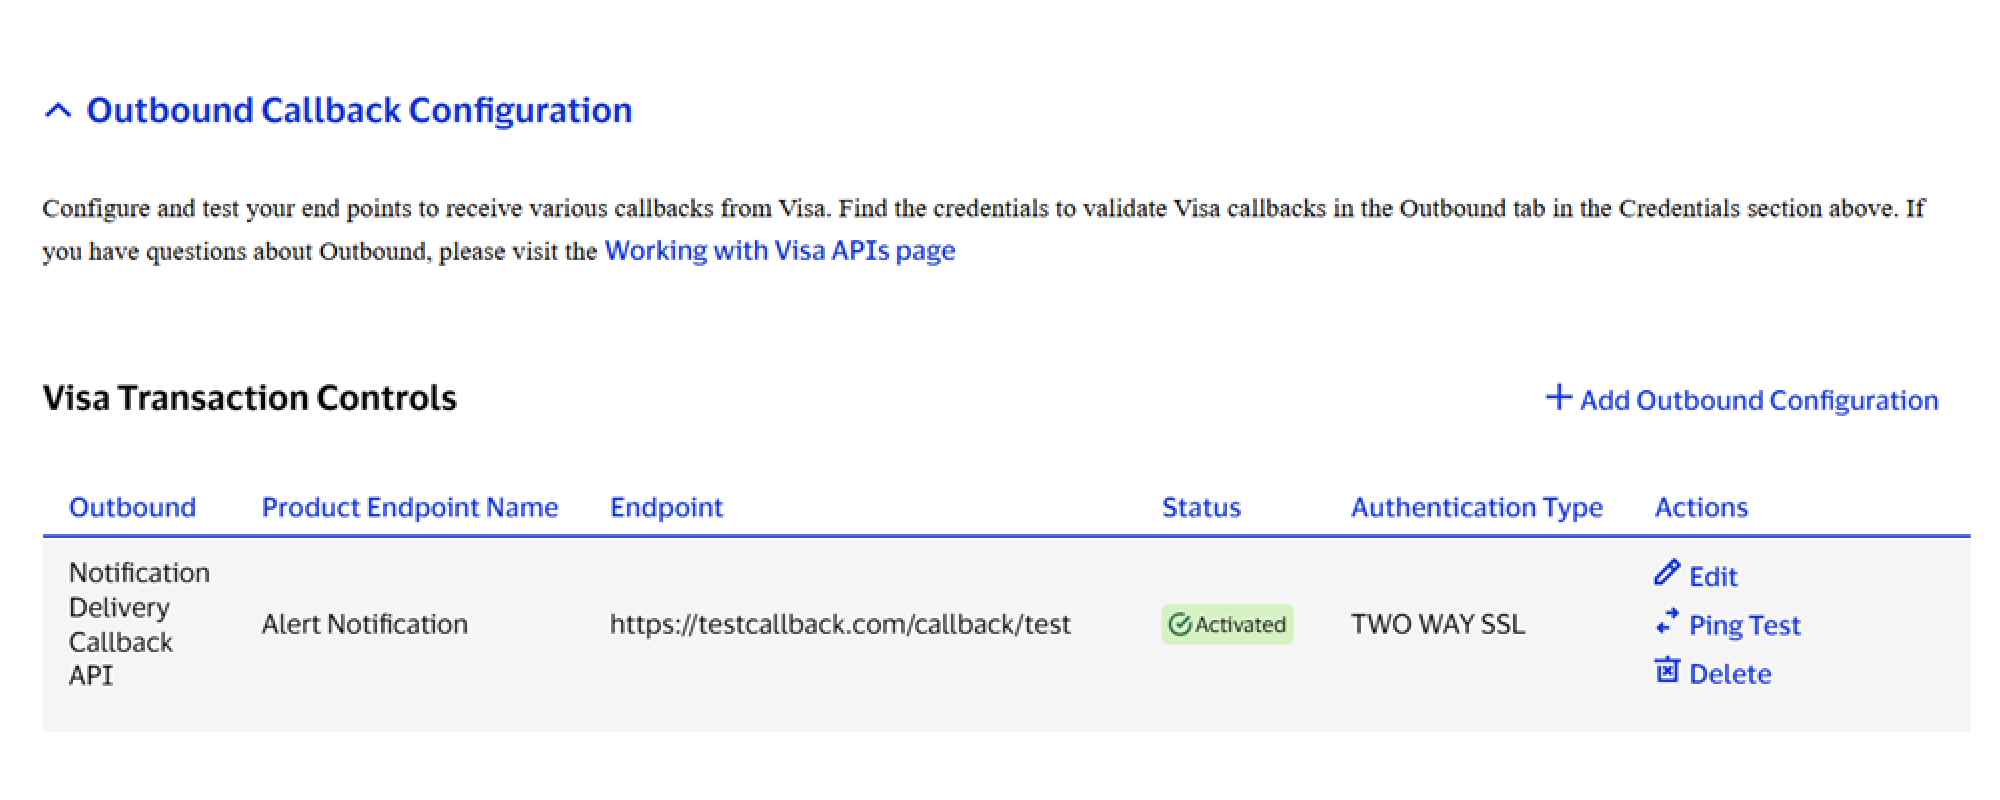
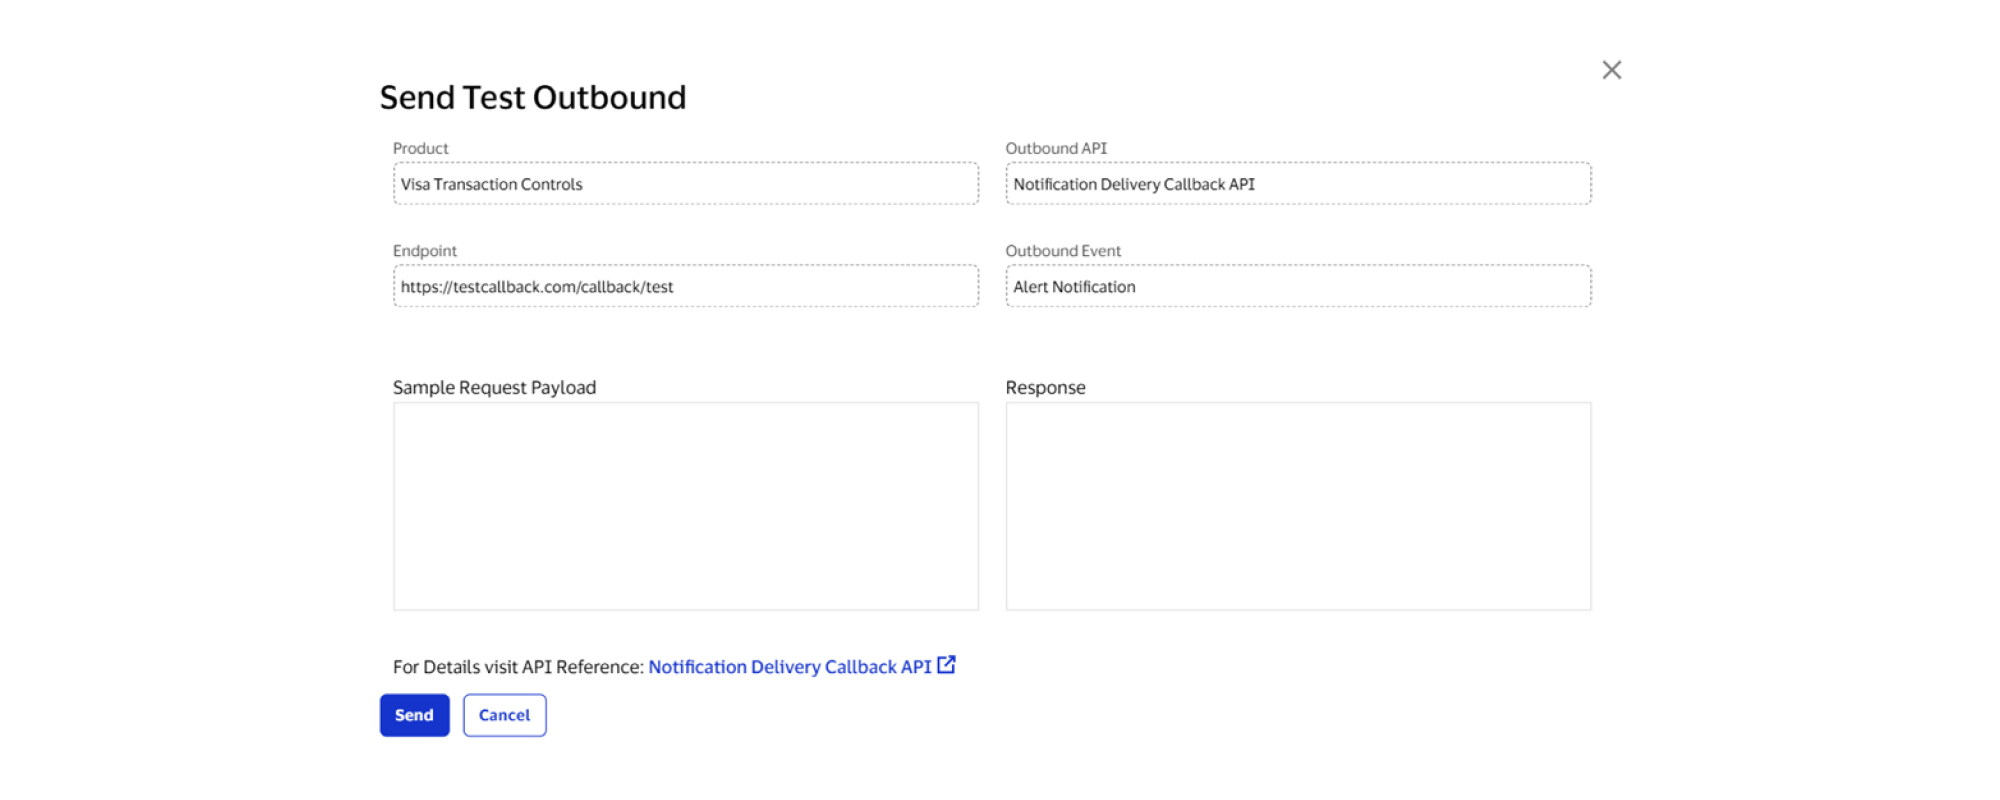
Visa sends the test payload to your callback URL and displays your server’s response:
- An HTTP 200 OK response indicates that the callback endpoint is configured correctly
- An HTTP 4xx/5xx error indicates an error
Add an outbound callback in Certification or Production
After submitting the Request to Start Next Environment and an admin has approved it, you can configure outbound callbacks in Certification or Production.
Step 1: Add outbound configuration (Certification/Production)
- Open your project and select Certification or Production.
- Go to Outbound Callback Configuration > Add Outbound Configuration.
- Select the Product, API, and Product Endpoint Name and enter your callback details:
- Domain (for example: https://testproject.herokuapp.com)
- Path (endpoint)
- Authentication Type (if selectable)
- Select Add Configuration.
The configuration state appears as Submitted until Visa completes review. When approved, the status changes to Approved, and eventually Inactive. When your server is ready to receive outbound callback events, activate the callback (see Step 5 below).
If Visa rejects the submission, the configuration state changes to Rejected. Review the comments, correct the URL, and resubmit. The status returns to Pending and the review cycle continues.
Step 2: Set up authentication method (Certification/Production)
Set up an authentication method for your endpoint.
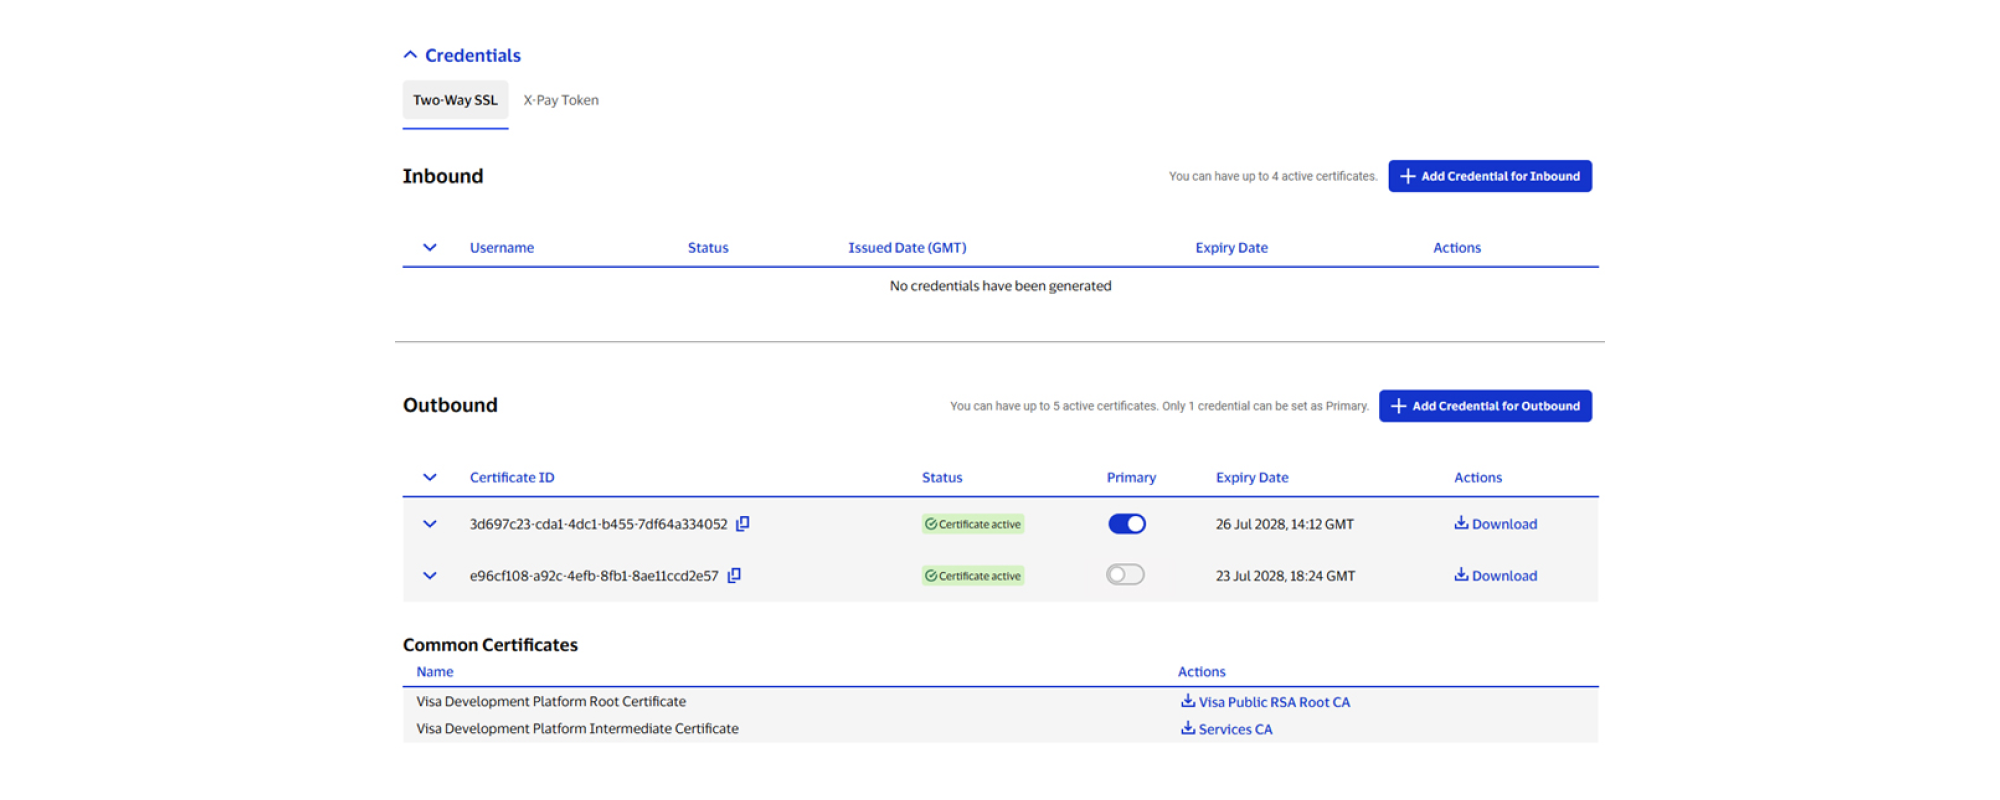
Two-Way SSL
- Open your project and select either Certification or Production.
- Go to Credentials > Two-Way SSL.
- Under Outbound, download the Visa Development Platform Root Certificate (Visa Public RSA Root CA).
- Install this in your server’s truststore.
Important: Visa recommends trusting the root CA certificate rather than explicitly trusting the leaf certificate so that there is no action required by you when Visa renews the leaf certificate.
The Visa Development Platform Intermediate Certificate and the outbound callback certificate (leaf certificate) are also shown.
Note: The first outbound Two-Way SSL certificate created is automatically set as primary.
X-Pay Token
- Open your project and select either Certification or Production.
- Go to Credentials > X-Pay Token.
- Under Outbound, select Add X-Pay for Outbound.
- Review the X-Pay Token.
Note: The first outbound X-Pay Token created is automatically set as the primary X-Pay Token.
Step 3: Verify server readiness (Certification/Production)
Confirm that your server is publicly reachable and that the server certificate meets the server certificate requirements described above.
Network allowlisting (Certification or Production)
Allowlist the following Visa outbound public IP addresses to ensure that callback notification requests are not blocked by your network.
| USA (Certification) | USA (Production) | India (Visa Token Service (VTS) clients only) |
|---|---|---|
| 198.217.139.46 | 198.217.139.41 | Bangalore: 103.144.116.26 |
| 198.217.139.47 | 198.217.139.49 | Mumbai: 198.217.248.24 |
| 198.217.139.40 | 198.217.139.48 | |
| 198.217.139.43 | 198.217.139.44 | |
| 198.241.168.15 | 198.241.168.15 | |
| 198.241.162.104 | 198.241.162.104 |
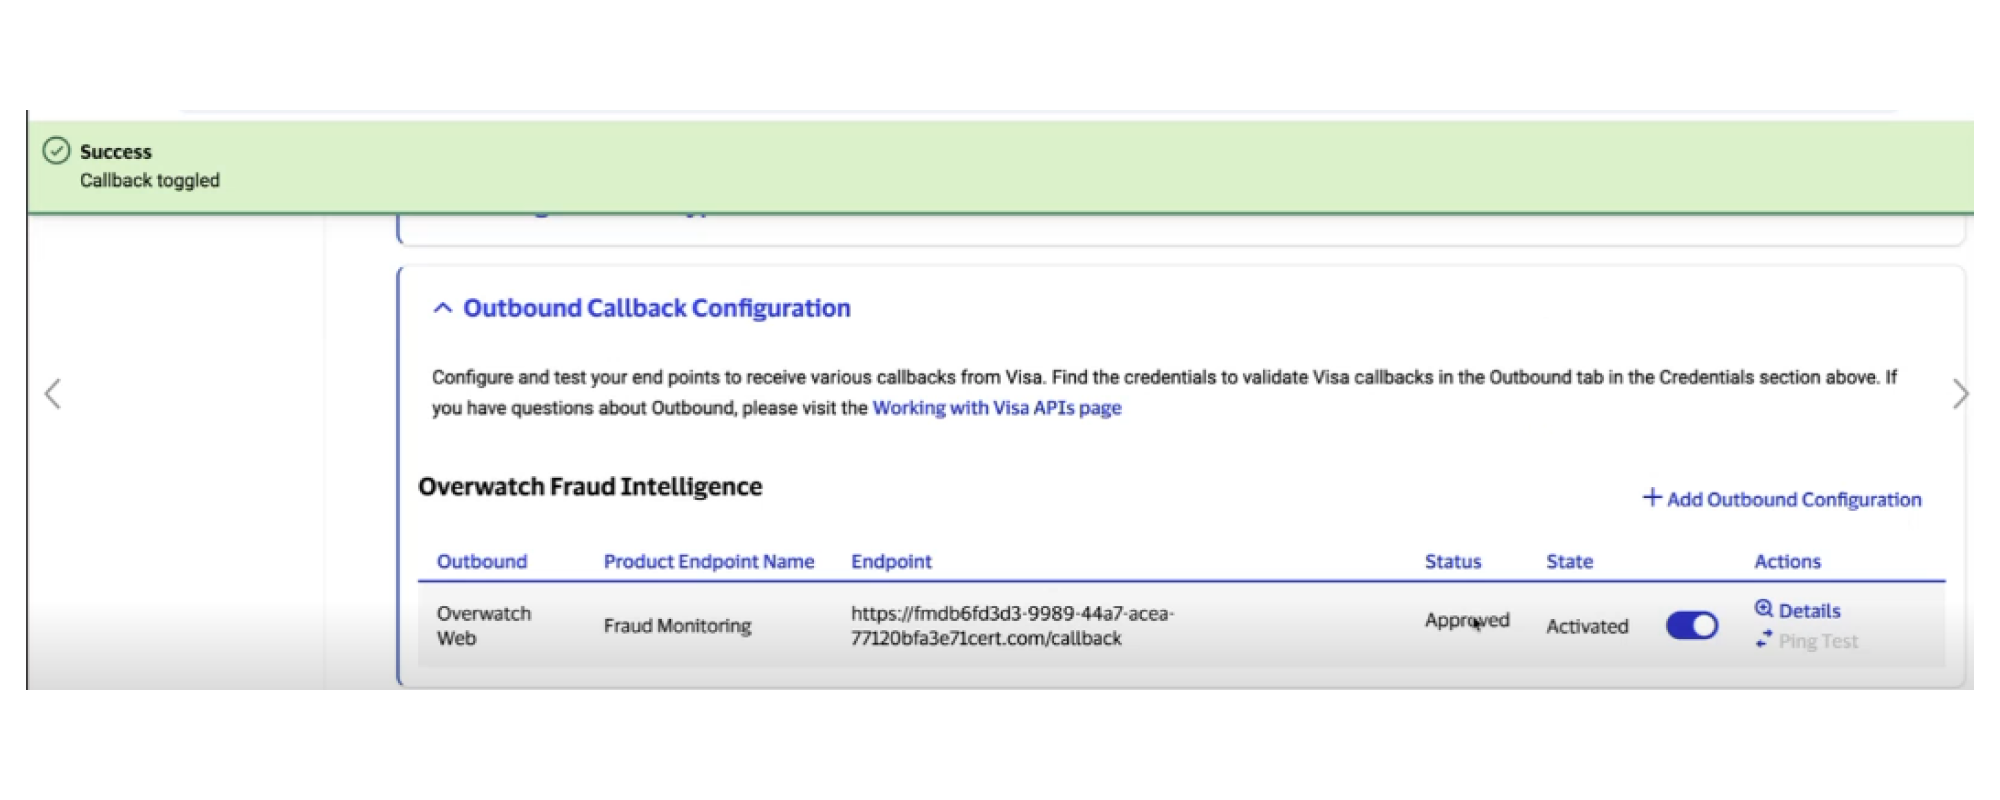
Step 4: Activate the callback (Certification/Production)
When you are ready to receive callbacks on your endpoint, toggle the callback ON.
Step 5: Test connectivity
- Open your project and select either Certification or Production.
- Go to Outbound Callback Configuration.
- Select Ping Test.
- Review the sample payload.
- Select Test outbound.
Visa sends the test payload to your callback URL and displays your server’s response:
- An HTTP 200 OK response indicates that the callback endpoint is configured correctly
- An HTTP 4xx/5xx error indicates an error
Manage outbound callbacks (all environments)
Edit an outbound callback
You can edit an approved configuration.
- Open the Outbound Callback Configuration.
- Select Details > Edit.
- Update the Domain, Path, and/or Authentication Type.
- Select Save.
Important: In Certification and Production, changing the domain requires Visa re‑approval. Changing only the path does not.
Key details:
- You cannot edit a configuration while it is Pending.
- Editing creates a new Pending configuration.
- The existing callback remains Active.
- Host both URLs until approval completes.
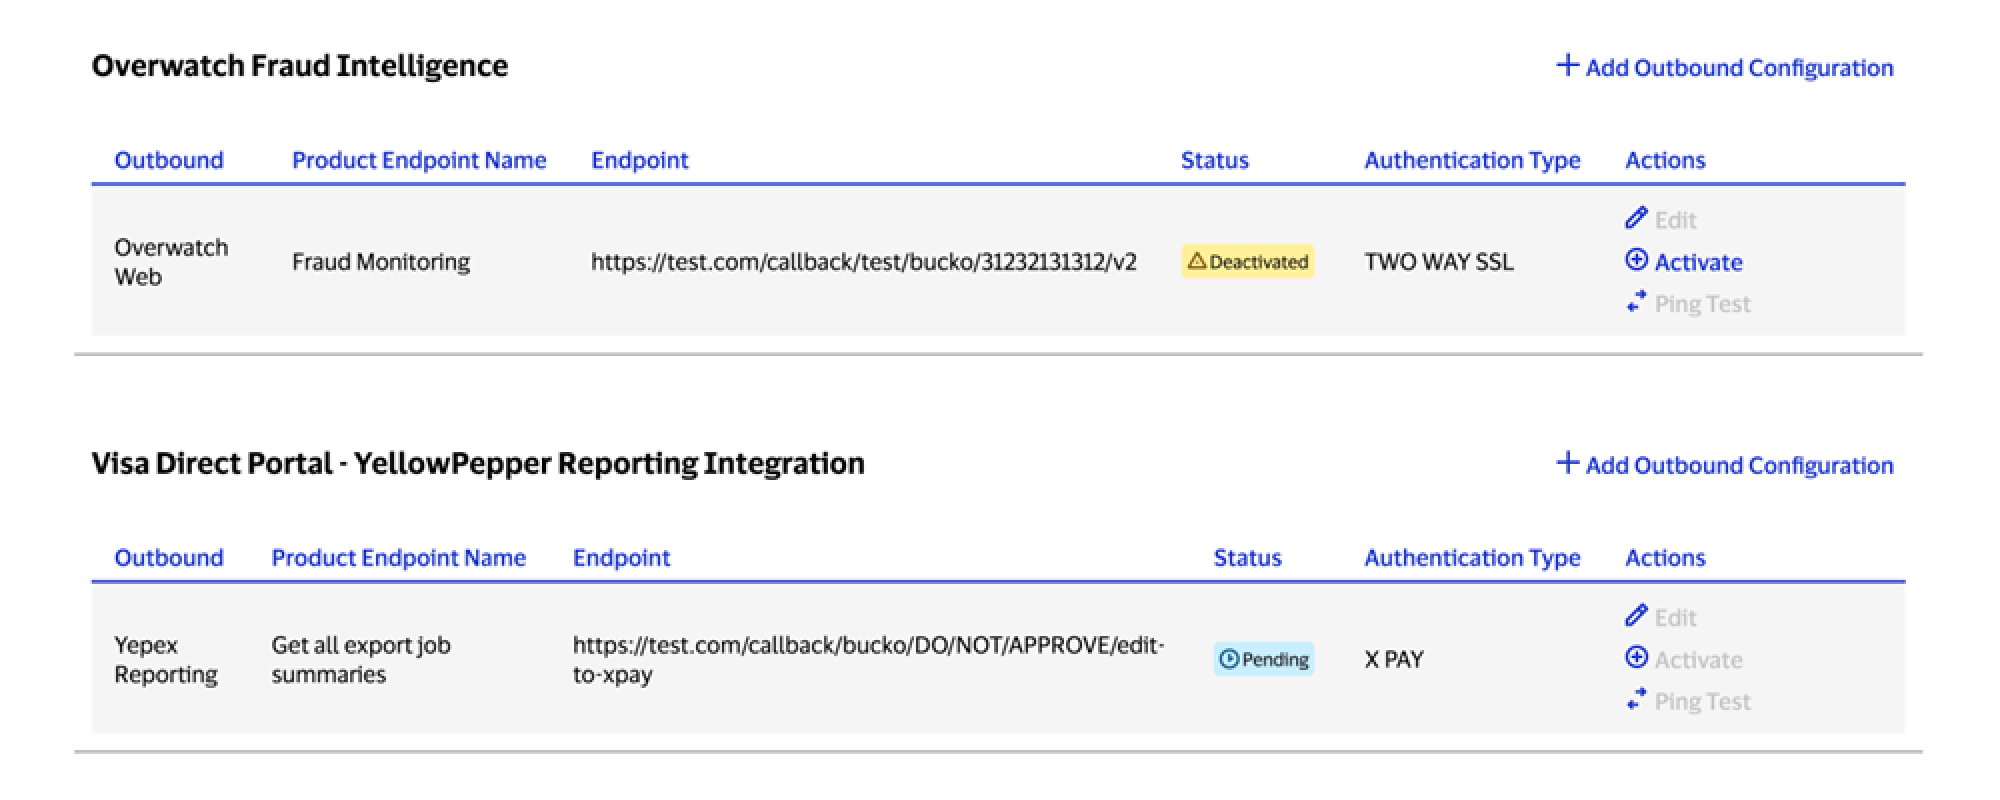
Deactivate an outbound callback
You can deactivate an approved callback without deleting it.
- Open the Outbound Callback Configuration.
- Select Deactivate.
To reactivate the endpoint, select Activate.
Delete an outbound callback
In Sandbox, select Delete to remove an outbound callback configuration.
In Certification or Production, contact your Visa representative. Only a Visa Admin can delete an outbound callback configuration in higher environments.
Note: You cannot create a new configuration for the same event while another submission is Pending.
Need help?
Find answers in our FAQs or get support from a Visa Developer expert.