Going live
Move your project from Sandbox to Certification or Production using the Visa Developer Onboarding Dashboard.

Overview
Going live moves a project from Sandbox into Certification or Production so live traffic can be processed with Visa APIs. Visa Developer uses a guided Onboarding Dashboard that shows the tasks required for the APIs selected in a project.
In this guide, you will:
- Understand how the Onboarding Dashboard supports the onboarding process
- Provide required business and project information
- Request access to Certification or Production
- Obtain certificates and credentials needed to make live API calls
Before you begin
Before you request to start the next environment, confirm that:
- You have a Visa Developer account and a project, as described in the quick start
- You have added at least one API to the project
Note: Some APIs require Certification or additional security steps before Production access. Environment promotion and requirements vary by API.
How the Onboarding Dashboard works
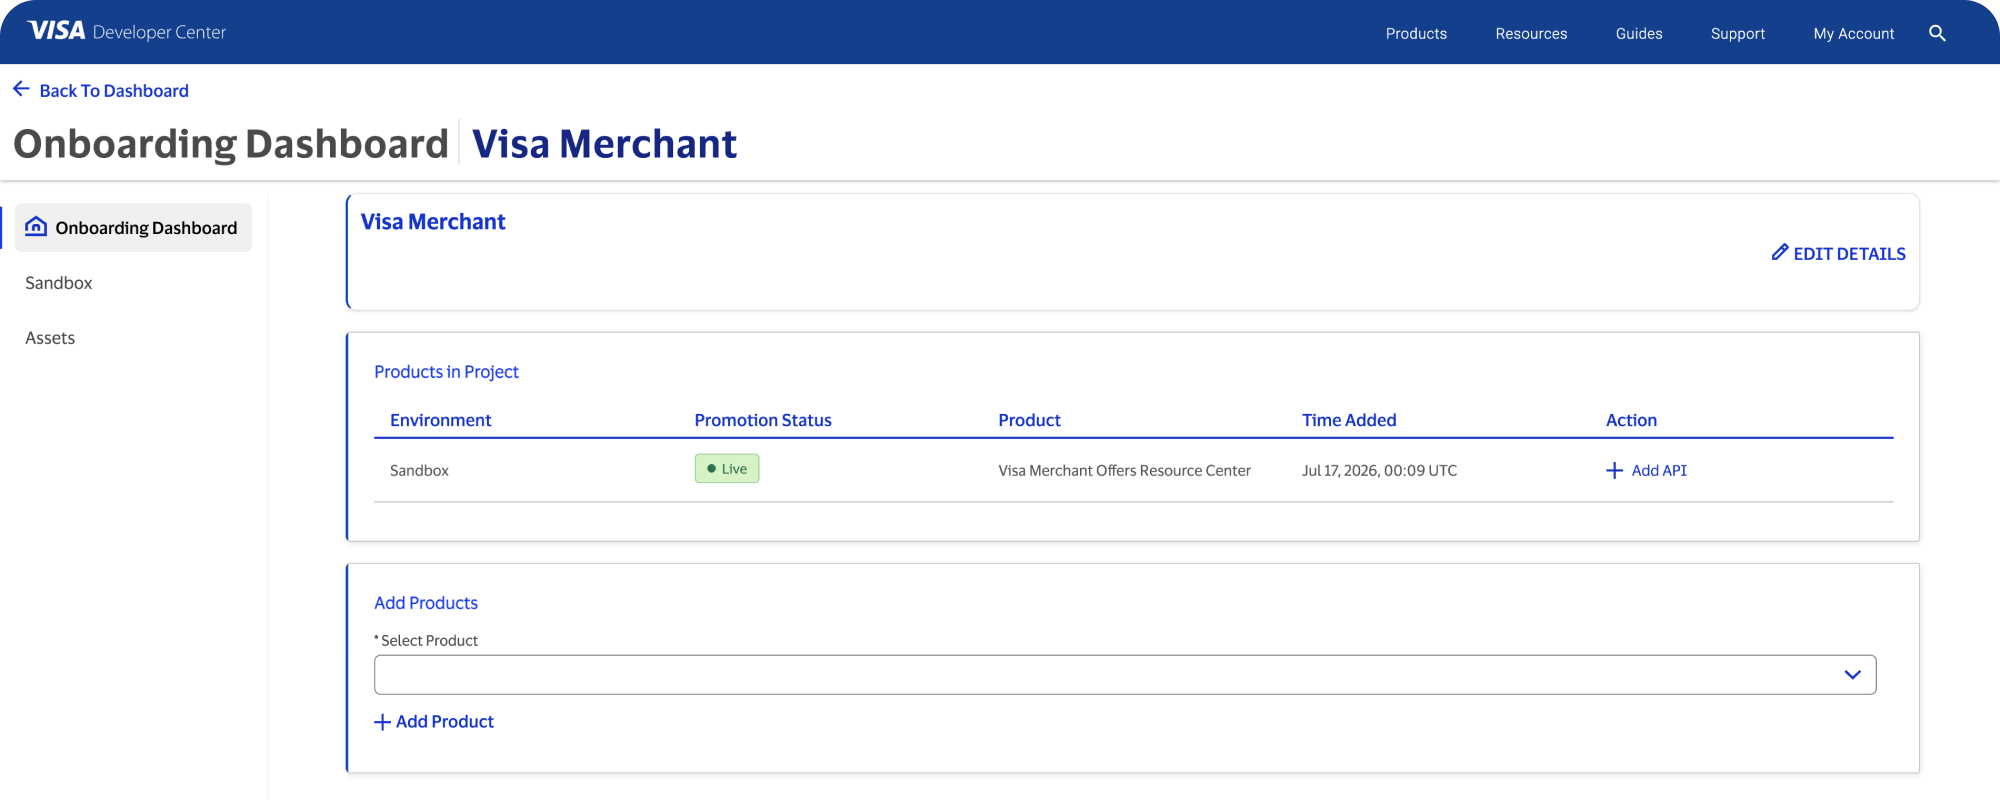
The Onboarding Dashboard walks you through the tasks required to promote a project to the next environment. Tasks appear dynamically based on the APIs selected for the project. You provide business information and progress through each section of the Onboarding Dashboard, as described below.
Provide business information
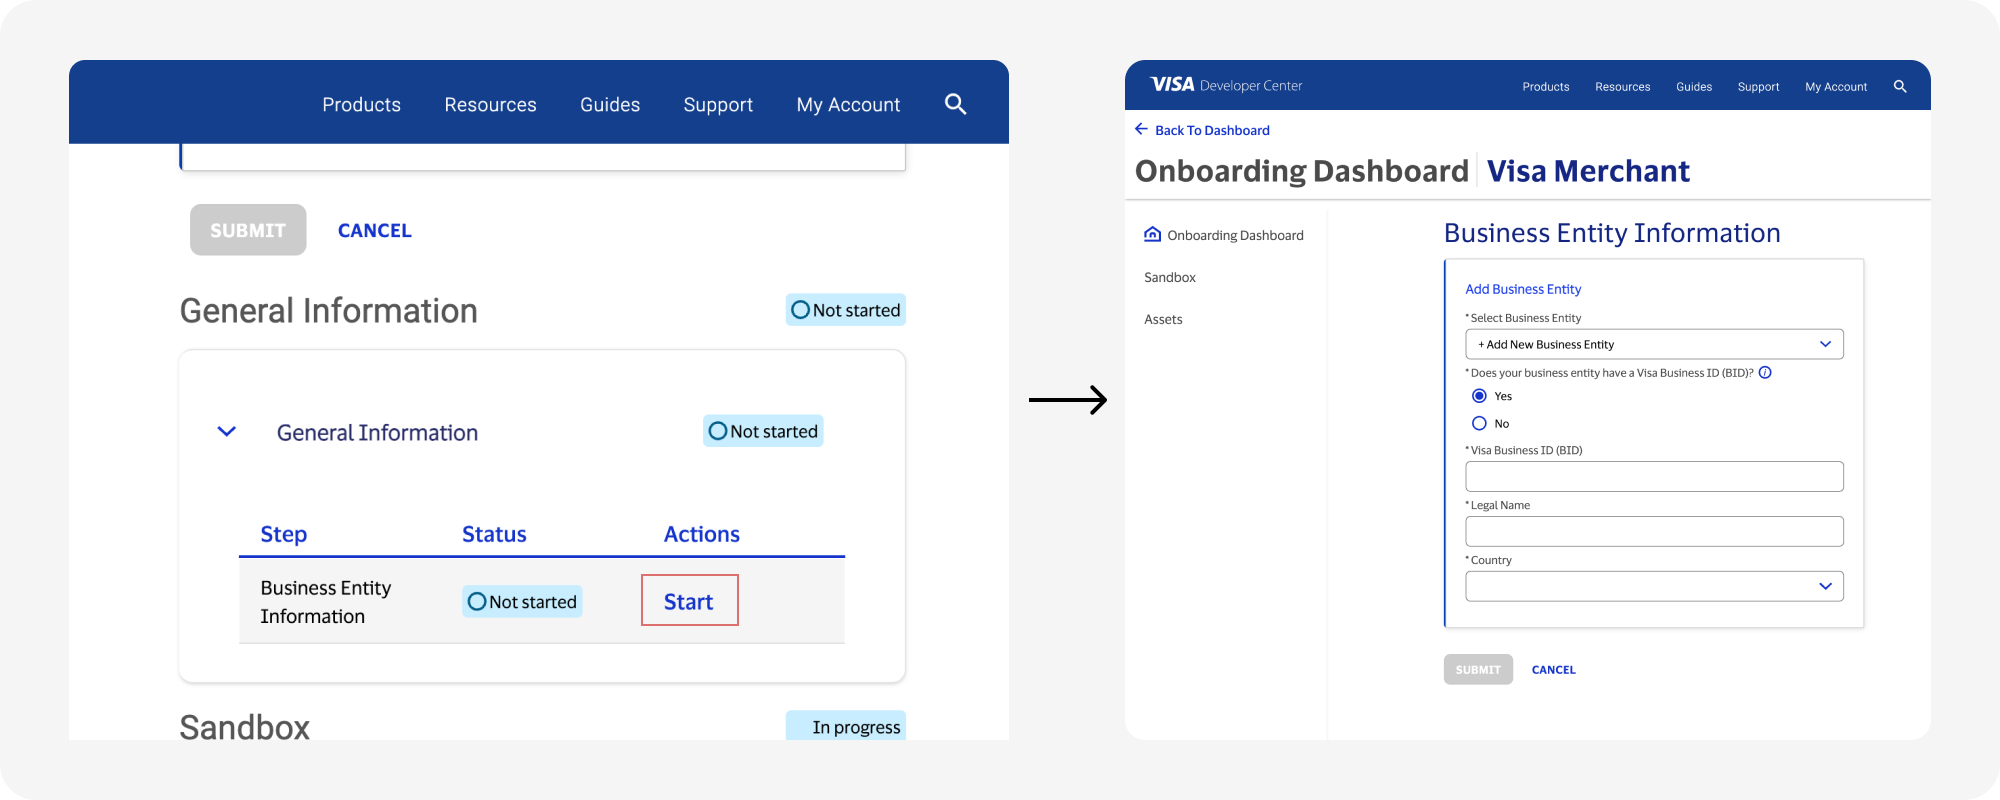
If you provided business information when you first set up your project, select View to review the information.
Otherwise, select Start to provide these required details so Visa can evaluate eligibility and compliance:
- Business entity: Provide information about the business entity that the project is built for.
- Business contact: Provide the primary contact details for the business entity who will receive notifications when any action is required.
Request pricing and contract
Pricing for Visa products is based on how you use each capability (for example, per transaction, API call, or subscription) and is finalized through your contract with Visa. Because pricing varies by product, use case, and region, most clients work directly with their Visa account representative to determine details.
Sandbox access is free for building and testing. Moving to Certification or Production requires accepting terms of use and, for some products, a contract, which defines pricing and may include setup fees, fee schedules that must be reviewed and signed, or additional agreements for certain products.
In Production, pricing typically follows one of three models: free to use, subscription-based (through Visa Access), or usage-based. Final pricing may also be influenced by factors such as regional requirements and eligibility for program discounts.
For pricing specific to your integration, contact your Visa account representative or email [email protected].
Request to start the next environment
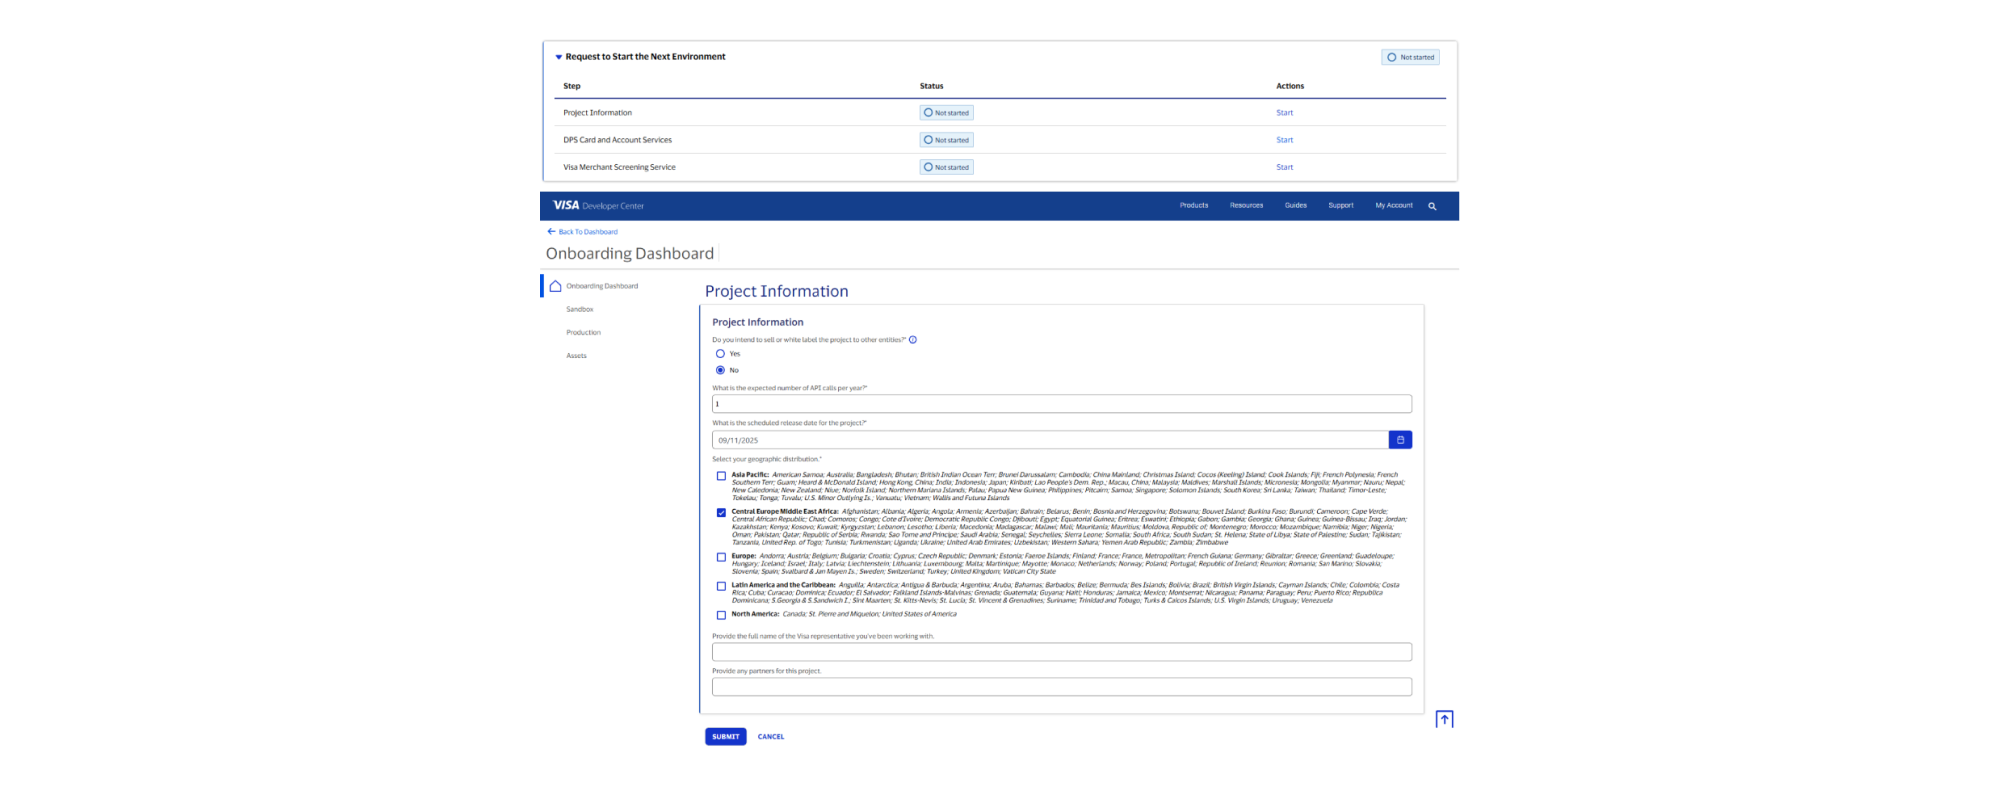
- Select Start in the Project Information row to begin the process.
- Complete the required information.
- Select Submit.
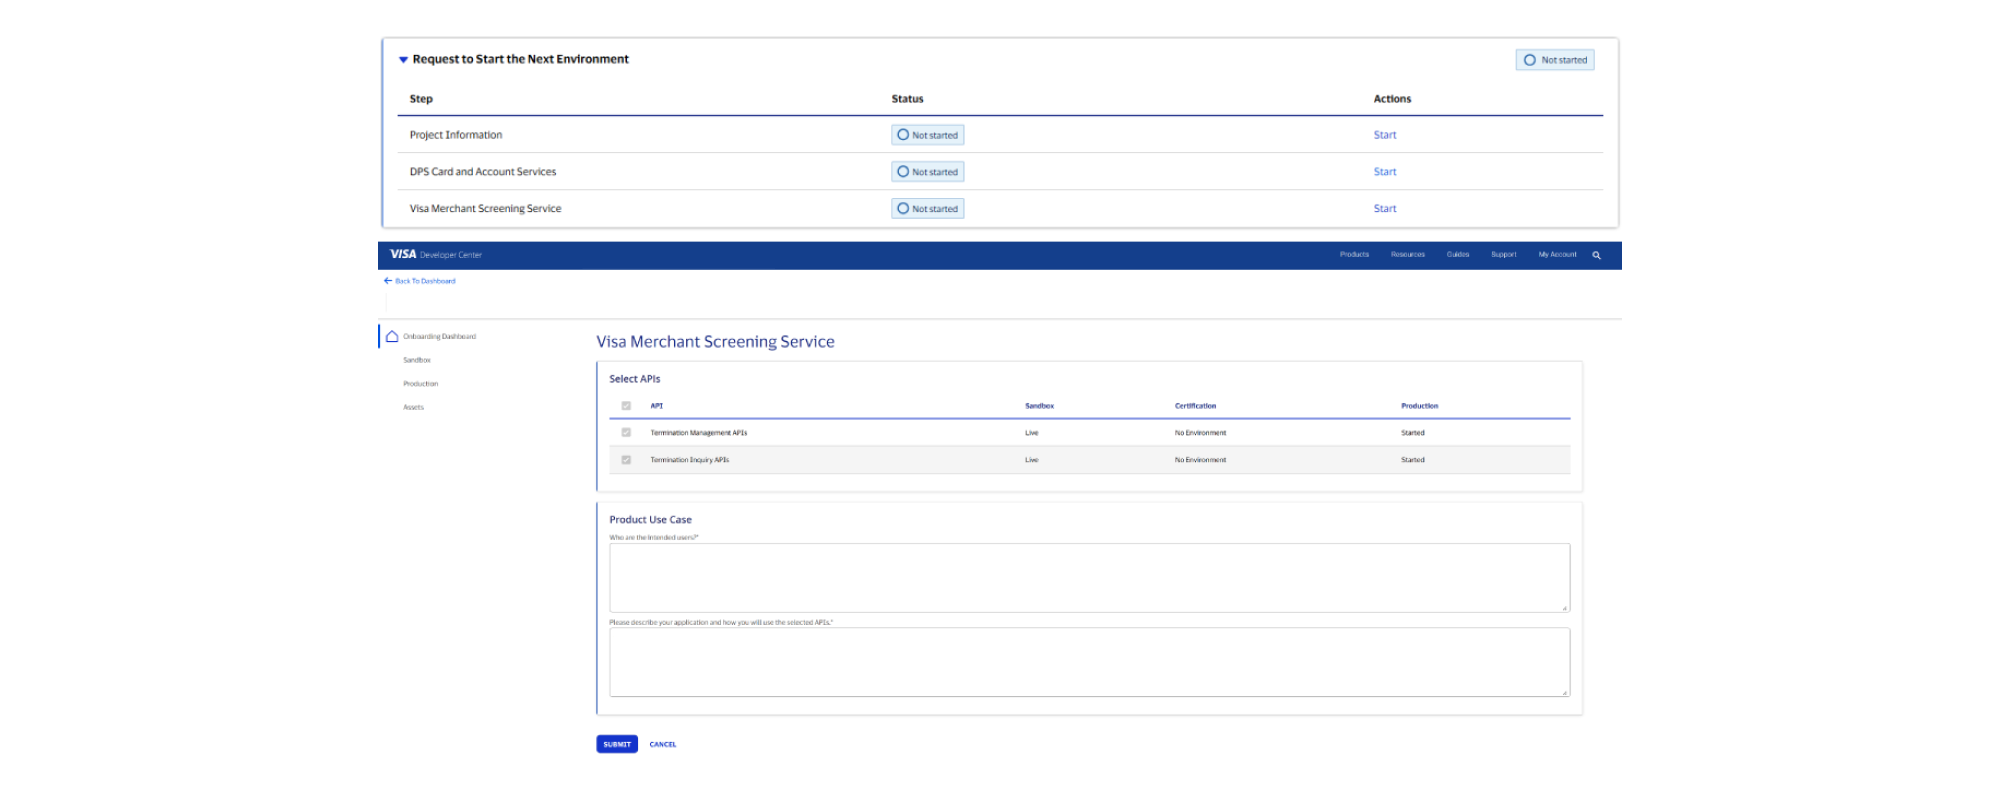
- Select Start for the first product you want to promote to Certification or Production.
- Select the APIs to include.
- Provide use case details and select Submit. The product status changes to In Review.
Repeat these steps for each product you want to promote.
Visa reviews each submission and may request additional information. You'll receive an email when your request is approved or if more details are needed.
Once approved, the Certification or Production environment becomes available in your Onboarding Dashboard.
In some cases, a Visa representative may be assigned to help guide the process.
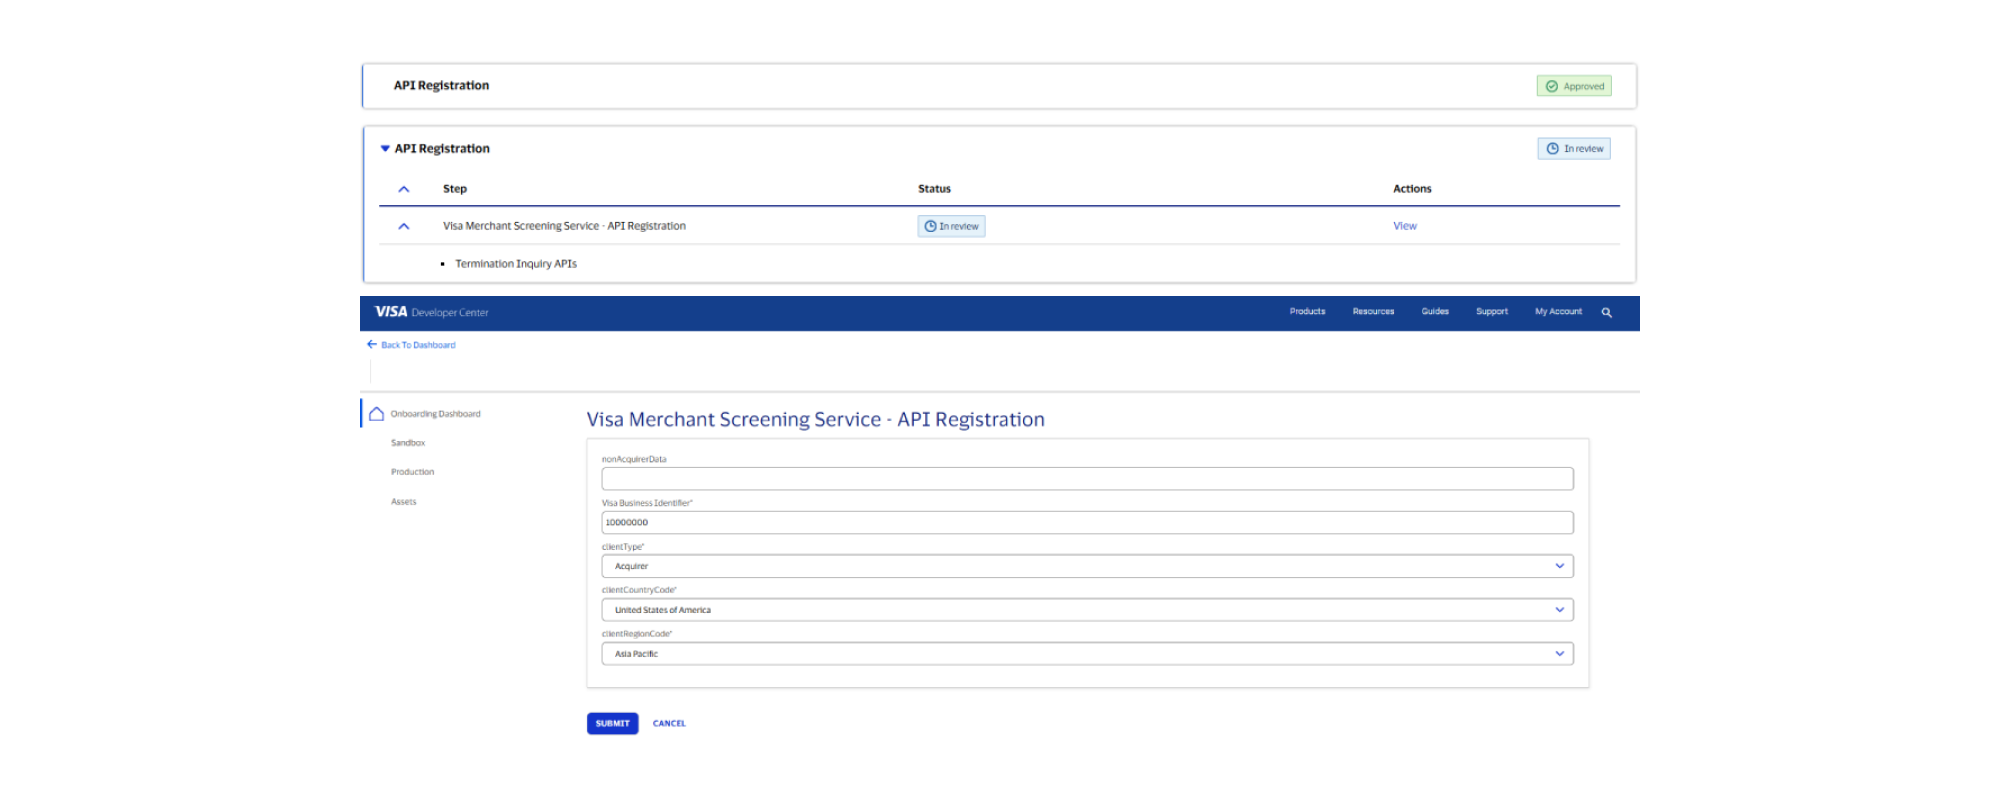
Register APIs
Provide required configuration settings for the selected APIs. Some APIs do not require configuration.
Add project users
Check that your project has active users assigned to each environment as detailed in the quick start. Users are required to manage keys, update configurations, and renew or replace certificates.
Ensure you assign access only to users who require it for this environment, and include a shared mailbox or distribution list to maintain shared access and avoid dependency on a single user.
Set up authentication and encryption
- Select one or more authentication methods. Then use the corresponding guide to set up credentials for Certification and Production:
- Two-Way SSL
- X-Pay Token
- If your integration requires encryption, follow the Message-Level Encryption (MLE) guide to obtain and configure the required credentials.
- Verify your setup by confirming that your project can successfully authenticate and send requests to the target environment.
Update a project after promotion
After promotion, you can add new products or APIs to your project at any time.
To use newly added products or APIs in Certification or Production, you must submit them for promotion by completing the Request to start next environment step. Each product or API is reviewed and approved individually.
Adding a new product or API may also trigger additional onboarding steps, such as API registration or outbound callback configuration.
You can continue to use your existing authentication and encryption credentials to make calls to newly added products or APIs.
Need help?
Find answers in our FAQs or get support from a Visa Developer expert.