Visa Developer Playground
Test Visa APIs using Visa Developer Playground.

Overview
Visa Developer Playground is a tool for testing and troubleshooting Visa APIs exposed through Visa Developer. The tool includes integrated support for available authentication methods.
In this guide, you will learn how to:
- Launch Visa Developer Playground and open a project
- Select a REST method and endpoint
- Configure authentication, encryption, and proxy settings
- Run a request and review response body and headers

Visa Developer Playground is compatible with Windows only.
Before you begin
Before using Visa Developer Playground, confirm that:
- You have a Visa Developer account and project, as described in the quick start.
- You have downloaded Visa Developer Playground from Onboarding Dashboard > Assets > General Assets > Tools
- Endpoint information for the selected API is available from the Code explorer on the API reference page
- Credentials are available from Onboarding Dashboard > Credentials
Step 1: Launch Visa Developer Playground and open a project
- Launch Visa Developer Playground:
- Open the executable Java archive (JAR) file or
- Run from the command line:
java -jar vdpplayground.jar- From Visa Developer, open your project.
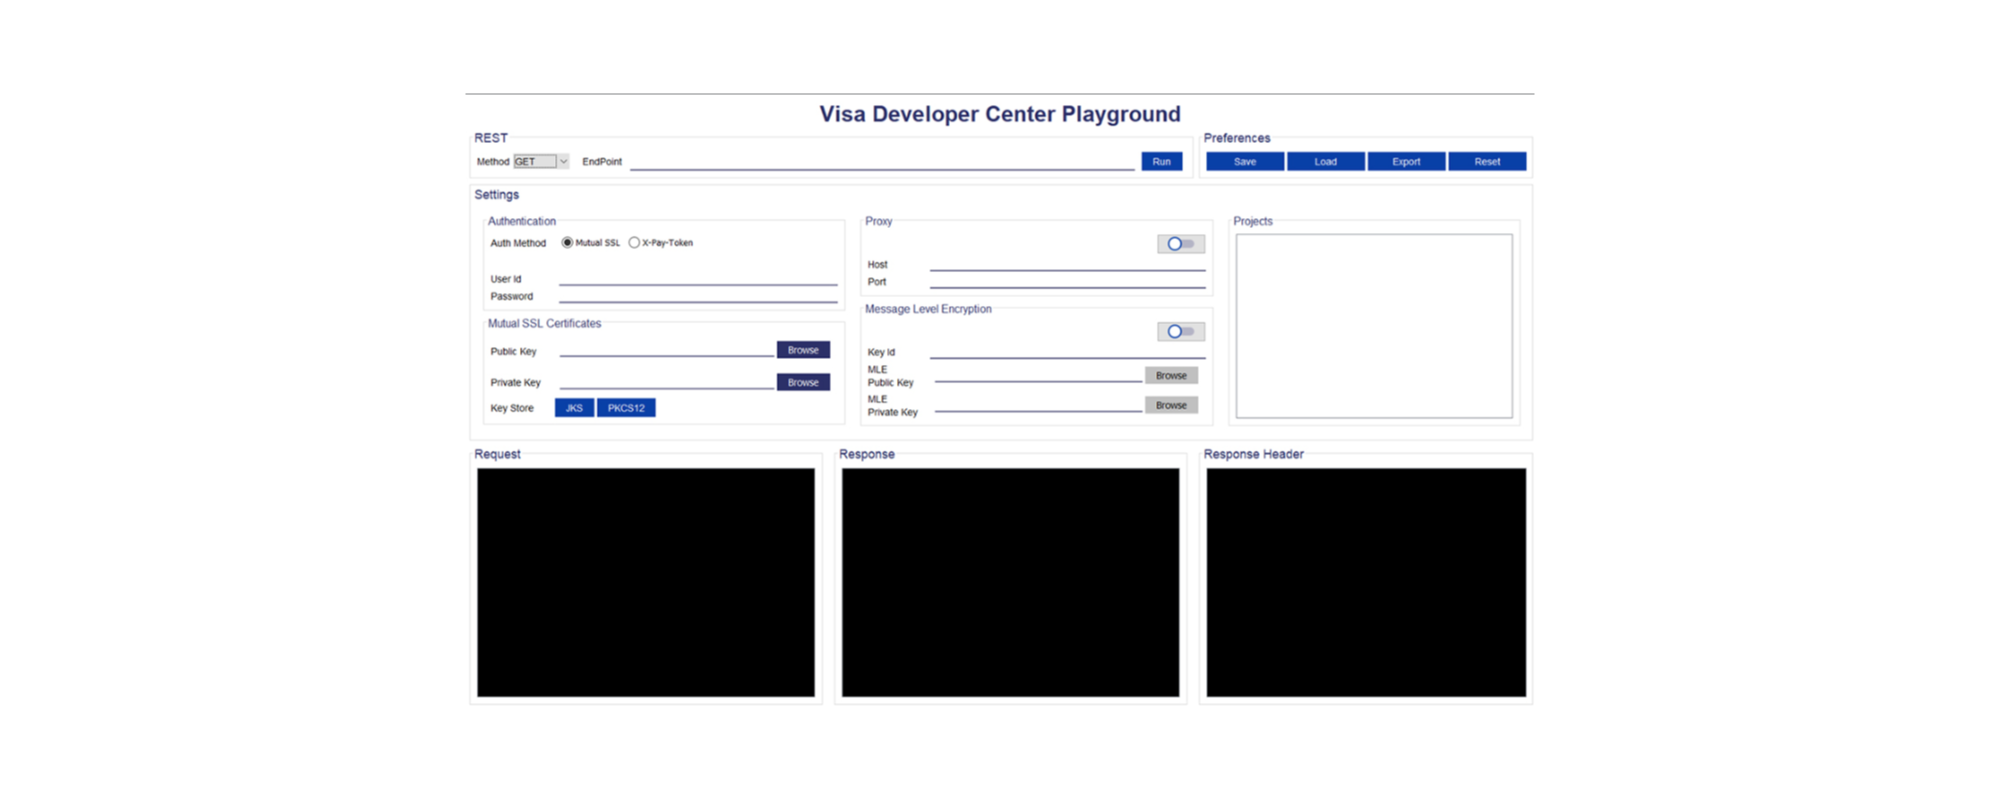
Step 2: Select a REST method and endpoint
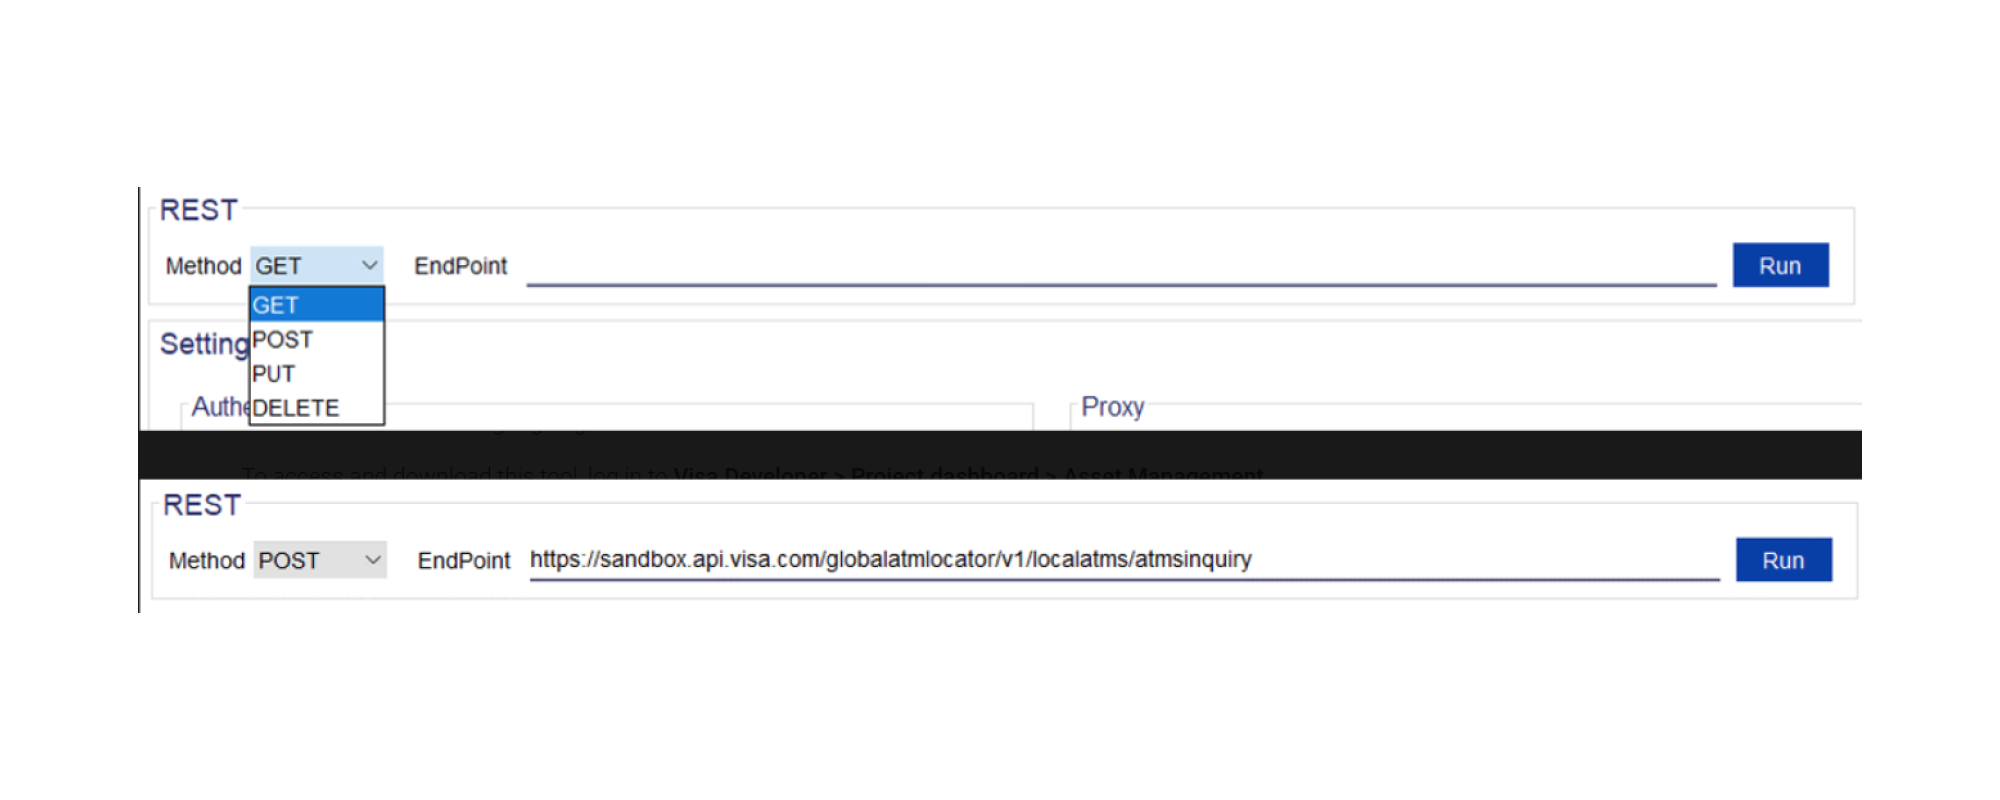
- From Visa Developer, obtain the Visa API endpoint in the Code explorer on the API Reference page for your selected API.
- In Visa Developer Playground, select a REST method and enter the Visa API endpoint.
Step 3: Configure authentication, encryption, and proxy settings
Select your authentication method and encryption method, then enter the required values. If you are behind a firewall, you also need to configure proxy settings.
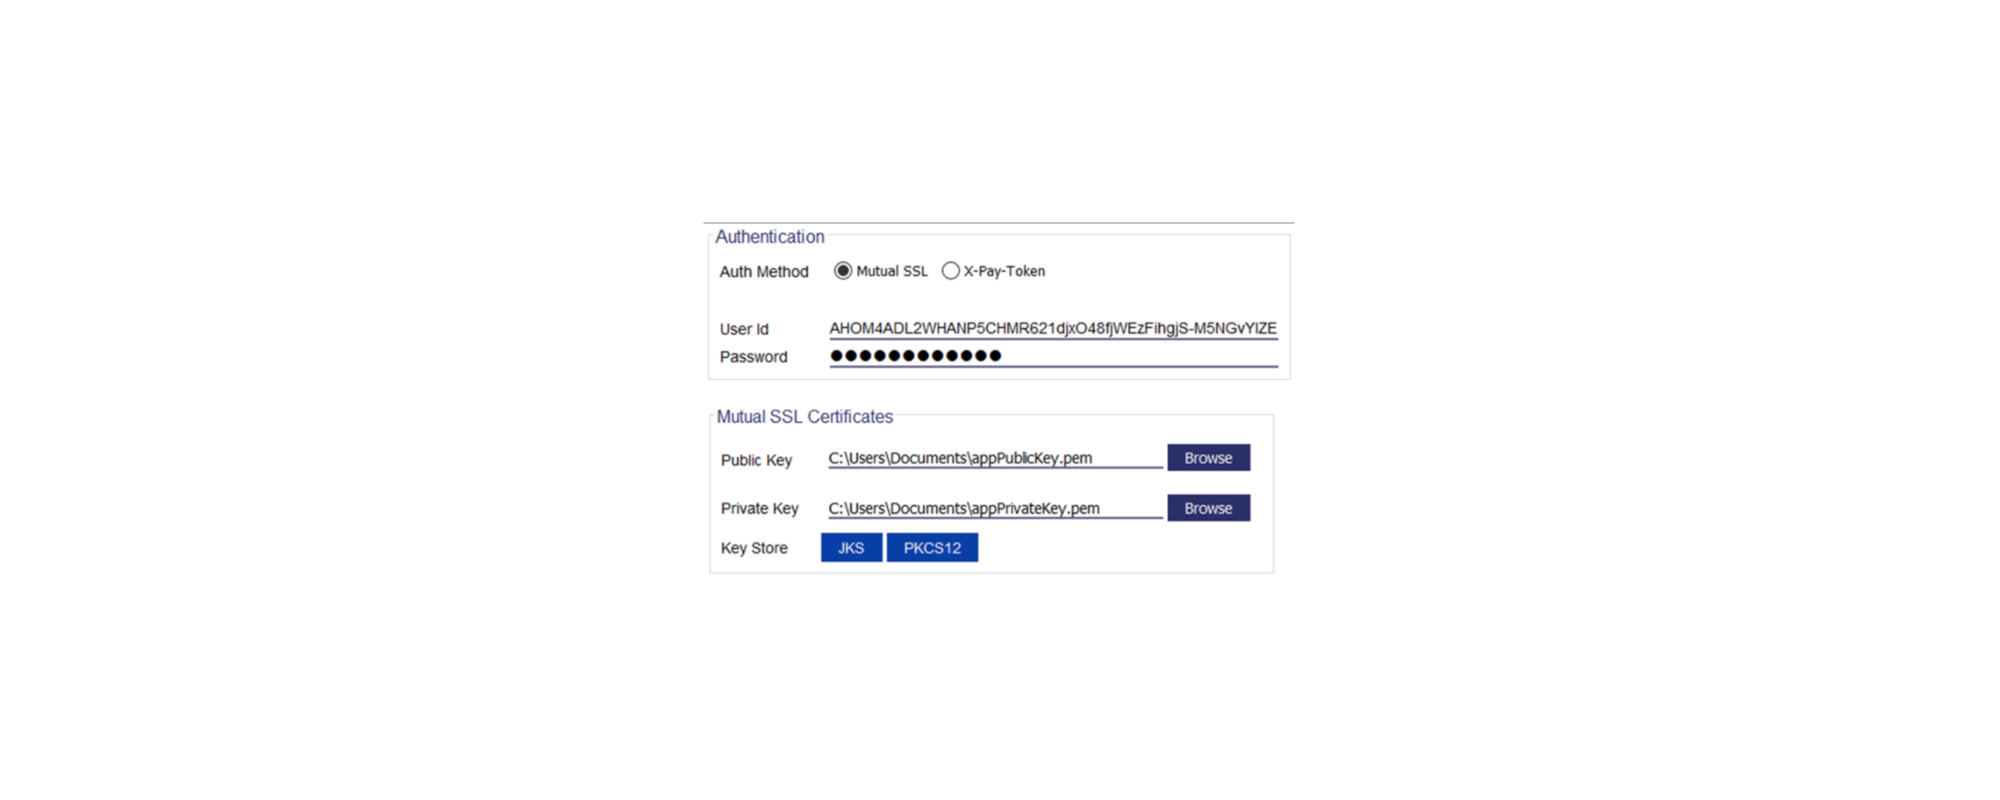
Configure Two-Way SSL authentication settings
If you are using Two-Way SSL:
- Select Two-Way SSL (Mutual SSL) as the authentication method.
- Obtain your user ID and password from Onboarding Dashboard > Credentials and provide them in the required fields.
- In the Public Key field, browse and select your Two-Way SSL client certificate.
- In the Private Key field, browse and select your Two-Way SSL private key.
You can generate a keystore file by selecting JKS or PKCS12 and saving the keystore to a file.
Learn more about Two-Way SSL credentials, keys, and JKS/PKCS12 keystores.
Configure X-Pay Token authentication settings
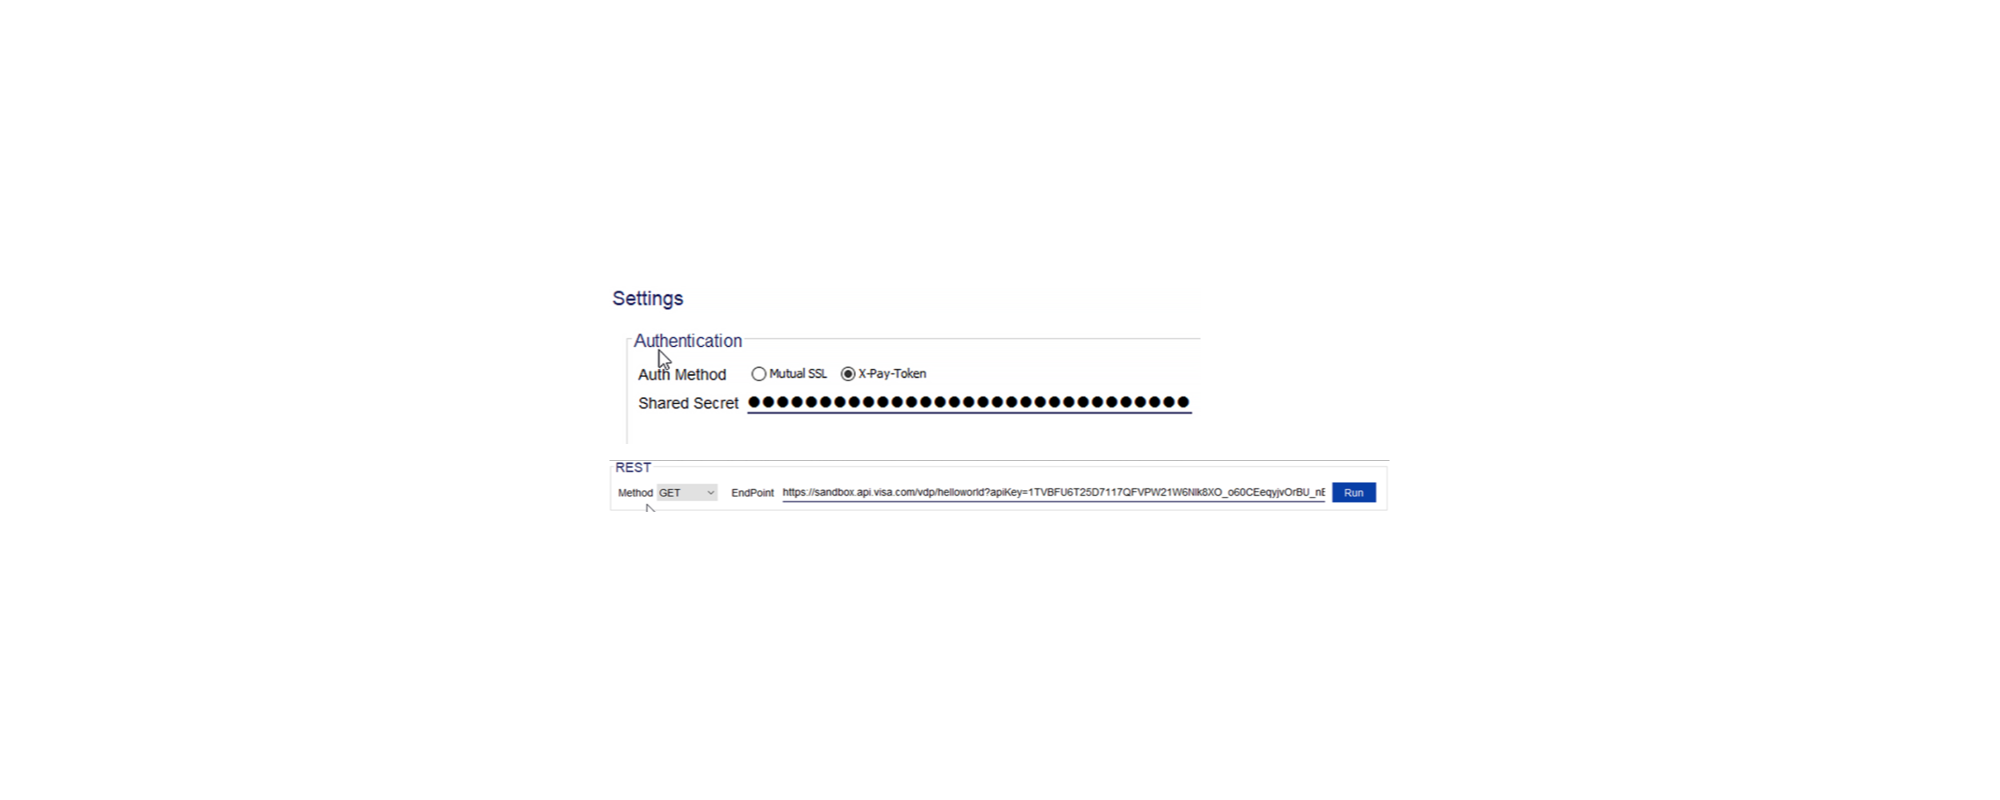
If you are using X-Pay Token:
- Select X-Pay Token as the authentication method.
- Obtain the API key and shared secret from Onboarding Dashboard > Credentials.
- Provide the Shared Secret in the required field.
- Provide the API key as a query parameter on the API endpoint.
Learn more about X-Pay Token shared secret and keys.
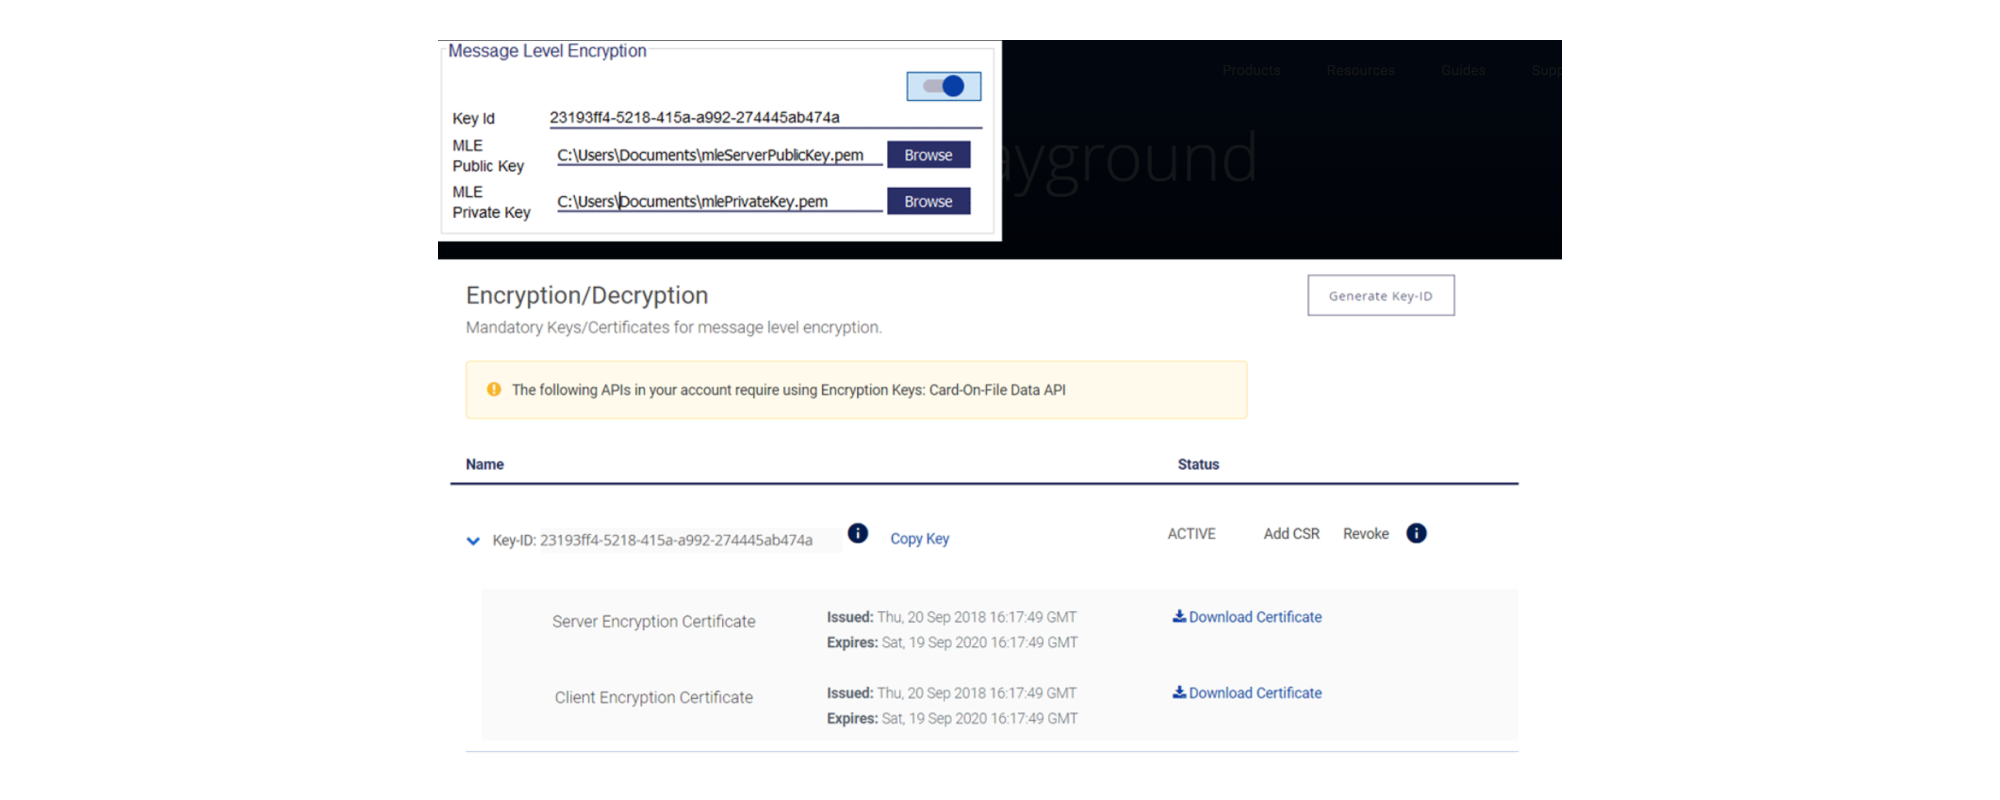
Configure Message-Level Encryption (MLE) settings
- Obtain the Key ID and MLE server certificate from Onboarding Dashboard > Message Level Encryption
- Provide the MLE Key ID in the Key Id field.
- In the MLE Public Key field, browse and select the MLE server certificate.
- In the MLE Private Key field, browse and select your MLE client private key.
- Toggle the slider to use MLE for the request/response.
Learn more about Message-Level Encryption (MLE) certificates and keys.
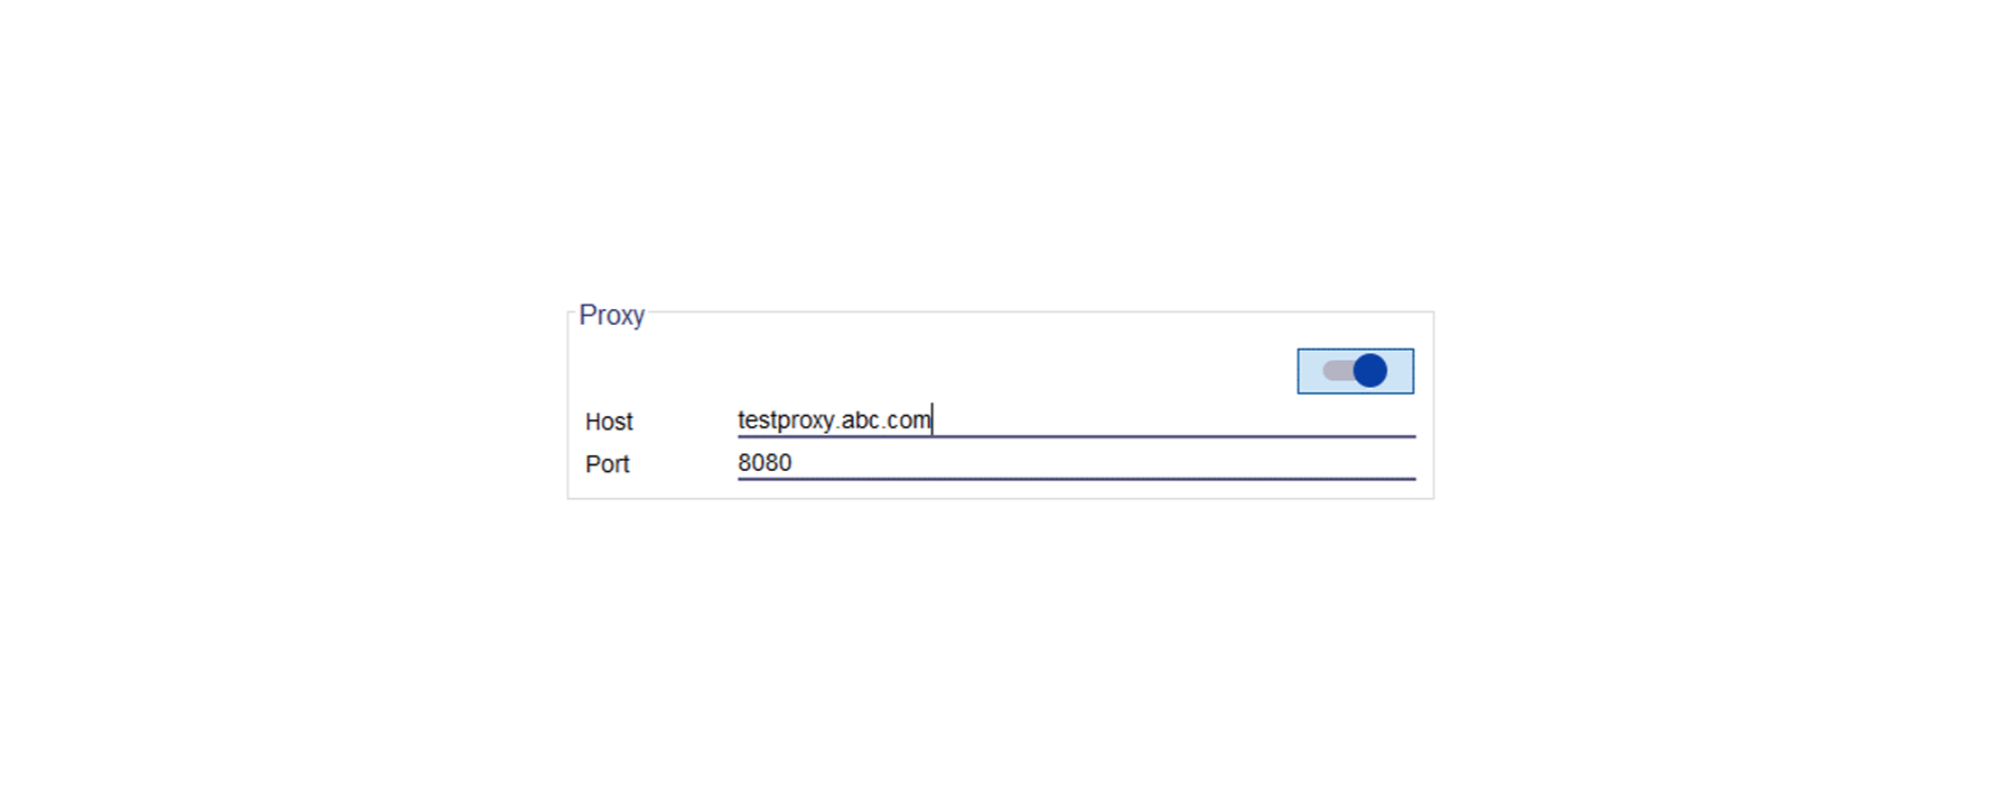
Configure proxy settings
If you are behind a firewall, provide appropriate proxy host and port details.
Step 4: Provide request payload
Paste the request payload into the request text box and select Run.
Note: Sandbox test data is available on the API reference page for some APIs.

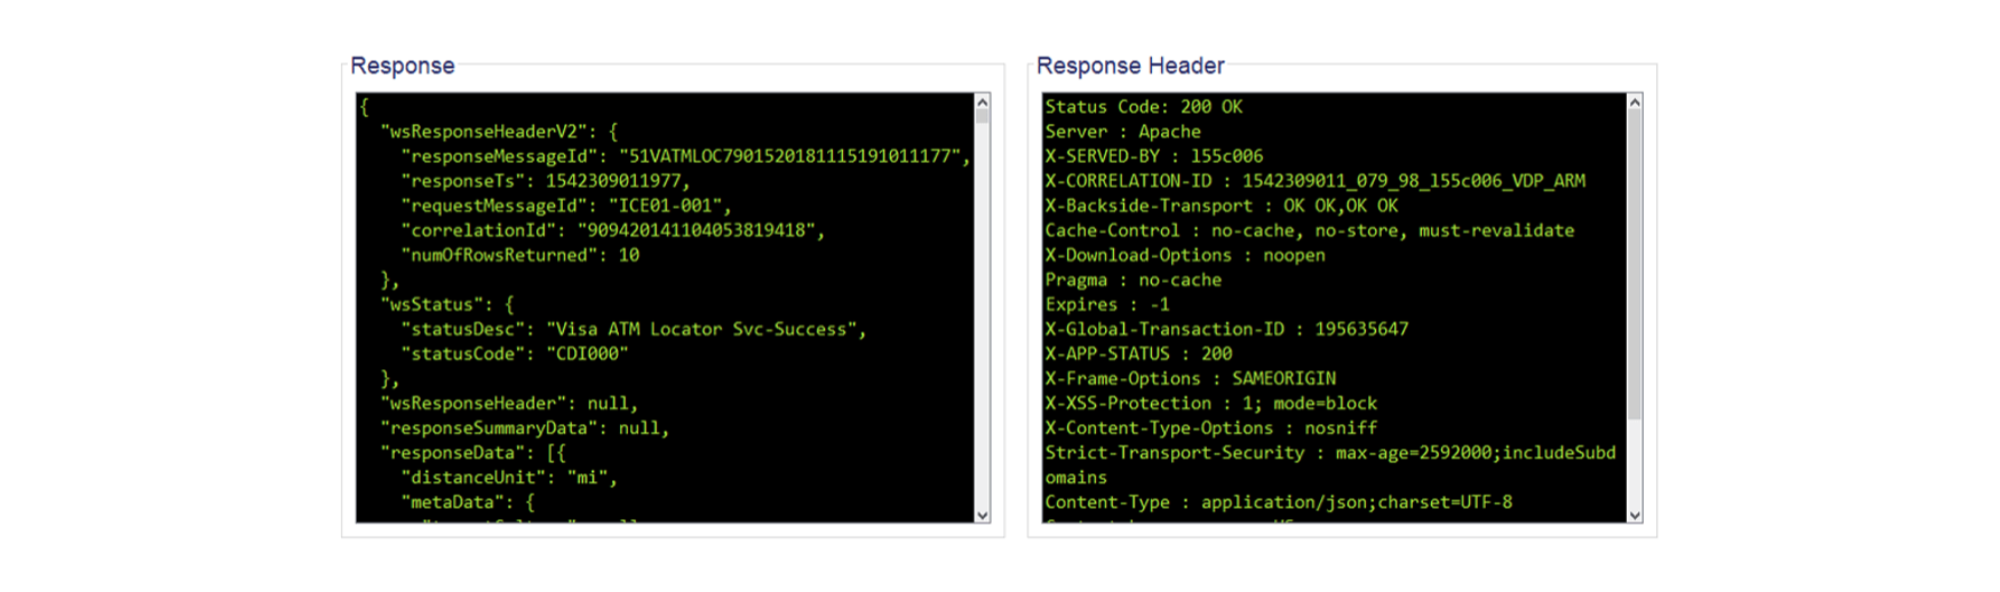
Step 5: Review response body and header
Review the Visa response body and response header in the response sections.
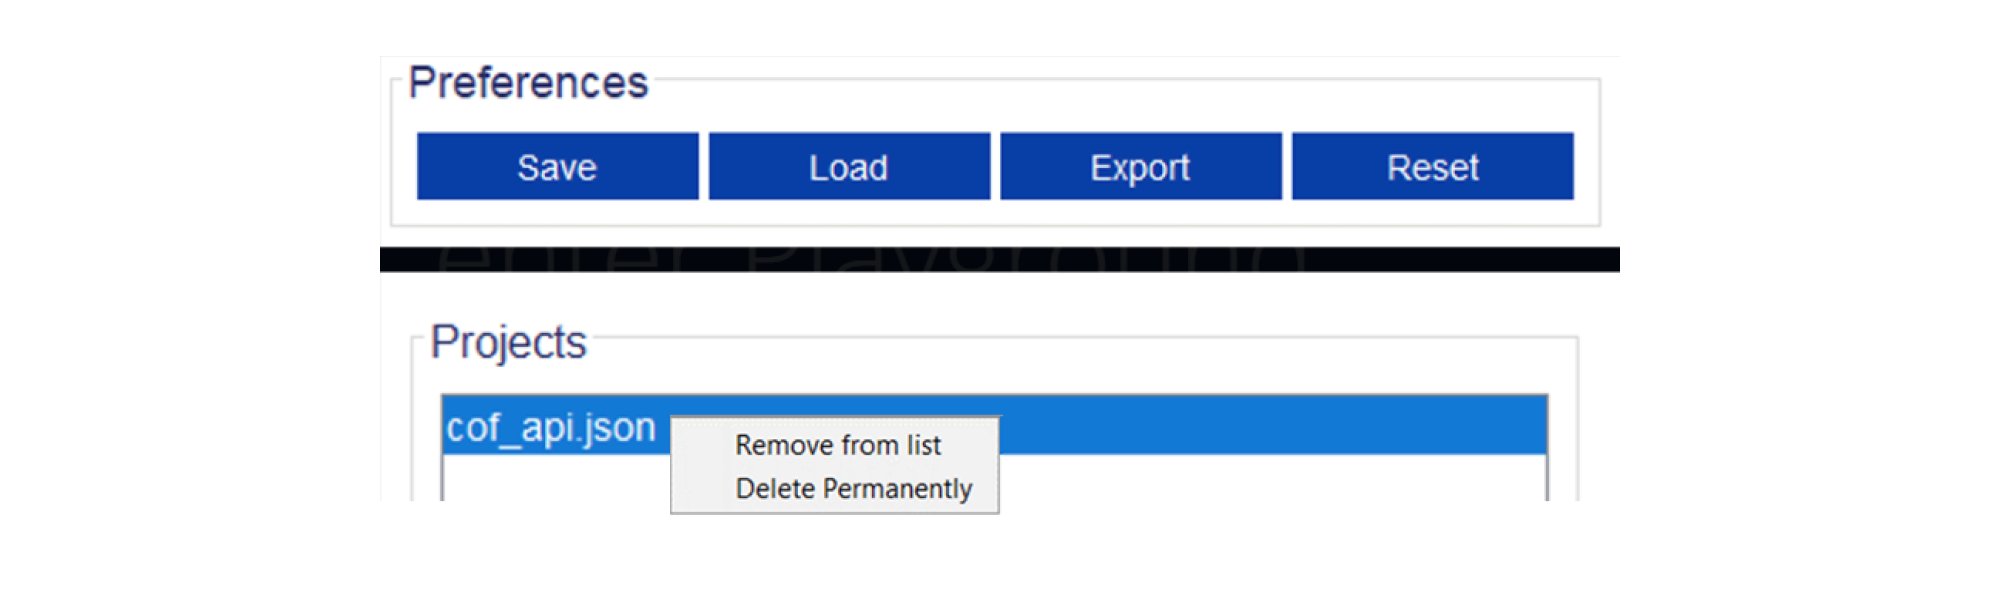
Set preferences and projects
You can set preferences for the tool, including:
- Save complete configuration details on your local machine.
- Load a previously-saved configuration back into the tool.
- Export details like Method, Endpoint, Request, Response, and Response Header to the clipboard for bug reporting.
- Reset and clear all values.
You can also remove items listed in the Projects panel. Select the project and from the right-click menu:
- Select Remove from list to remove a configuration from view
- Select Delete Permanently to delete it
Need help?
Find answers in our FAQs or get support from a Visa Developer expert.